


How to Install a Front Basket on Your Bike – A Step-by-Step Guide
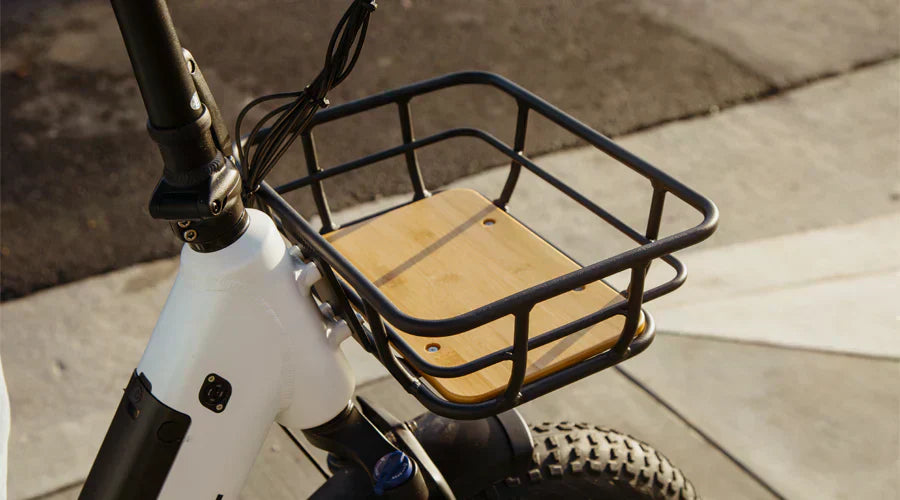
Adding a front basket to your bike is a great way to increase its practicality, whether you’re commuting, running errands, or just enjoying a leisurely ride. A well-installed basket provides convenient storage without compromising the bike’s stability. In this guide, we’ll walk you through the step-by-step process of installing a front basket, including repositioning the front light for a seamless fit.
Step 1: Remove the Front Light
Remove the original front light to make room for the front basket installation.

Step 2: Attach the Front Basket
Align the holes of the front basket with the reserved mounting holes on the bike frame, then secure it using washers and screws.

Step 3: Install the Bracket
Install the new bracket in the designated slot at the front of the basket. Pay attention to the bracket's installation direction.

Step 4: Reinstall the Front Light
Remove the original front light bracket and install the front light onto the new bracket. After installation, reconnect the wiring to complete the setup.
Final Thoughts
With your front basket properly installed, your bike is now more functional and stylish! Whether you're carrying groceries, a backpack, or other essentials, this upgrade will make your rides more convenient. Happy cycling!


the photo shows the front light attached to the fender, not the bottom of the basket. Will the basket fit over the light so you don’t have to move it.?
After receiving my extra light brackets I tried mounting to basket per instructions and realized screws sent with bracket are to small.I needed to find new screws at hardware store.I am happy with customer service as they sent a link on how to install as well as shipping correct brackets in a timely manner.A installation link would have been great. In the basket shipment package
Leave a comment