


Explore News

Maintenance
Lost or Broken Kingbull Battery Key? Here’s How to Fix It Fast
Hey, Kingbull bike riders! We know the feeling—you’re ready for a scenic ride, but you realize your ebike battery key is lost or has snapped off in the lock. It’s a common headache, but it doesn't have to end your journey.
At Kingbull, we’re committed to your riding experience. Whether you need an ebike battery key replacement or a complete lock swap, we’ve got you covered with this step-by-step guide.
Proactive Prevention: Secure Your Spare Key
The best way to handle a lost electric bike key is to never have a "last" key.
The Golden Rule: As soon as you unbox your new Kingbull e-bike, separate the two keys provided.
Store Safely: Keep your spare in a secure, memorable location at home—never on your keychain while riding!
Photo Record: Take a clear photo of your key code (if applicable) for future reference.
Option 1: Purchase a Brand New Battery Lock and Key (Official Solution)
If you’ve lost both keys or your lock mechanism is damaged, the most secure and reliable method is a full ebike battery lock replacement.
Why choose the official Kingbull lock set?
Guaranteed Compatibility: No guesswork on fitment for your specific model.
Enhanced Security: A fresh set ensures your battery remains theft-resistant.
Everything Included: Comes with a new lock cylinder and two matching keys.
[Shop Official Kingbull Battery Lock Sets Here] (Internal Link to Store)
Step-by-Step: How to Replace Your E-bike Battery Lock
Replacing the lock is easier than you think. Follow these four steps to get back on the road:
Step 1: Remove the Battery
Safely remove the battery from the bike frame. (Note: If your lock is jammed, please contact our [Technical Support] for specialized unlocking tips).
Step 2: Remove Screws on the Battery Upper Base
Locate the upper base where the battery connects. Use a precision screwdriver to unscrew the fasteners (refer to the red circled areas in the diagrams below).
Step 3: Detach and Swap the Lock Base
Unscrew the side bolts that secure the battery lock to the bike frame. Once loose, pull the entire battery base out.
Detach the old lock mechanism.
Snap the new Kingbull lock into the base, ensuring it aligns perfectly.
Slide the assembled unit back into the frame.
Step 4: Secure Everything
Tighten the screws on both the upper base and the side of the bike. Double-check that the lock moves smoothly with your new key before inserting the battery.
Option 2: Get a Spare Key Made Locally (The Quick Fix)
If you still have one working key, don't wait for it to break!
Where to go: Visit a local hardware store or a professional locksmith.
Cost-Effective: This is the fastest way to get a backup without replacing any hardware.
Tip: Ask the locksmith to use a high-quality "blank" to ensure the new key doesn't snap under pressure.
Frequently Asked Questions (FAQ)
Q: Can I order a new key using my bike’s serial number?
A: To ensure maximum security, Kingbull locks are unique. If both keys are lost, we recommend a full lock replacement (Option 1) to ensure your battery remains secure.
Q: What tools do I need for the replacement?
A: Most Kingbull models require a standard Phillips head screwdriver and potentially an Allen (hex) wrench.
Q: My key is stuck in the lock, what should I do?
A: Use a small amount of lubricant (like WD-40 Specialist Silicone) to wiggle it free. Do not apply excessive force, as this may damage the internal pins.
Ride Worry-Free with Kingbull
Losing a key is a bump in the road, not the end of the trip. By keeping a spare safe or knowing how to perform a quick battery lock replacement, you’ll stay prepared for any adventure.
Need further help? Contact the Kingbull Support Team or browse our [Maintenance Video Library].
Stay Prepared. Ride with Confidence. Enjoy the Journey!
Read more

Maintenance
The Ultimate Electric Bike Troubleshooting Guide
Discover the secrets to maintaining your electric bicycle with our expert electric bike troubleshooting guide. From diagnosing e-bike power and battery issues to tackling complex electrical and mechanical problems, we'll walk you through step-by-step solutions. Save time and money while gaining a deeper understanding of your e-bike's inner workings for uninterrupted, high-performance rides.
The ability to troubleshoot an electric bike is a valuable skill for any rider. Mastering DIY e-bike repair saves time, money, and the hassle of visiting a bike shop for minor fixes. By gaining a deeper understanding of your bike's mechanics, you can make informed decisions during regular maintenance and ensure your Kingbull e-bike stays in peak condition.
Keep reading to learn how to fix electric bicycle problems step by step. With our professional ebike maintenance tips, you can keep your daily commute or trail journey smooth and uninterrupted.
1. Understanding Common Electric Bike Issues & How to Fix Them
Despite their efficiency and durability, electric bikes can occasionally encounter technical glitches. Below are the most frequent ebike problems, including their symptoms, root causes, and potential DIY solutions.
A. Ebike Power and Battery Problems
Ebike Battery Not Charging or Holding a Charge: If your electric bike battery is failing to charge, first check the battery connections to ensure they’re secure, clean, and free from corrosion. If the physical connections are fine, try charging with a different compatible charger or power source to rule out a faulty adapter. If the battery still won't hold a charge, you may need to inspect the lithium-ion battery cells for signs of damage, swelling, or natural wear.
Sudden Power Loss During Rides: Experiencing a sudden ebike power cut-off can be alarming. First, verify the battery charge level to ensure it hasn't hit the Low Voltage Cut-off (LVC). If the charge is low, switch to a lower pedal assist mode (PAS) or pedal manually to conserve power. If the battery is full but power still cuts out, it may indicate a loose terminal or a thermal protection shutdown in the ebike controller.
Inconsistent or Weak Motor Assistance: If your ebike hub motor feels sluggish, check the battery voltage. Low voltage directly leads to weak performance. You should also examine the motor cables and waterproof connectors for any physical damage. Lastly, review your e-bike display settings to ensure the pedal assist level is set correctly for your terrain.
B. Electrical System and Wiring Fixes
Malfunctioning LCD Display Controls: If your ebike display won't turn on, check the main wiring harness connection. If the connection is tight, try a "system reset" by turning off the bike and disconnecting the battery for several minutes. Look for specific e-bike error codes on the screen, as these provide the fastest way to diagnose an underlying sensor or controller fault.
Loose or Damaged Wiring Connections: Over time, riding vibrations can loosen plugs. Periodically inspect the wiring for frayed insulation or disconnected ports. Damaged wires should be replaced with the correct gauge wire or professionally repaired to prevent a short circuit. If you are uncomfortable with ebike electrical repairs, always seek help from a certified technician.
Lighting and Accessory Issues: For issues with integrated LED lights, check the plugs connecting the light to the main wiring harness. Inspect bulbs for cracks or loose filaments. If the lights still don't work, use a digital multimeter to check if the proper voltage is reaching the component from the controller.
C. Mechanical and Performance Issues
Ebike Braking Problems or Unusual Noise: Squeaking or grinding noises usually indicate worn ebike brake pads or misaligned calipers. Check the pads for thickness and ensure they are aligned with the brake discs. Inspect the brake cables for stretching; a simple adjustment to the barrel adjuster often restores crisp stopping power.
Shifting Difficulties or Chain Slipping: If your gears are skipping, check the derailleur cable tension. Cleaning and lubricating the bike chain and jockey wheels can work wonders for shifting performance. A build-up of grit is the #1 cause of poor mechanical performance in electric bikes.
Unbalanced or Wobbly Wheels: If your ride feels unstable, check the spoke tension. A loose spoke can cause the rim to warp. Also, inspect the tires for punctures or uneven wear and ensure they are inflated to the recommended PSI for maximum grip and safety.
2. Professional E-Bike Troubleshooting Steps: A 3-Phase Plan
To approach electric bicycle repair safely and efficiently, professionals follow a structured diagnostic process.
Phase 1: Preparing for Troubleshooting
Safety Precautions and Equipment: Before you begin, prioritize safety. Wear safety glasses and protective gloves. Arm yourself with an essential e-bike toolkit containing Allen keys, wrenches, pliers, and a digital multimeter for accurate electrical testing.
Familiarize Yourself with the Manual: Your Kingbull owner's manual is your best friend. It contains specific torque specs, wiring diagrams, and unique error code definitions tailored to your specific model.
Phase 2: Basic Inspections
Power Source Integrity: Verify the battery is seated correctly and locked into its cradle. Check terminals for "sparking" marks, dirt, or corrosion.
Battery Health Assessment: Use a multimeter to measure the actual voltage output. Compare these readings to the manufacturer's specifications to determine if your lithium-ion ebike battery is reaching its end-of-life.
Comprehensive Component Check: Inspect tires for cuts, test brake levers for responsiveness, and look for rust on the drivetrain. Regular lubrication of the chain and derailleurs prevents 80% of mechanical failures.
Phase 3: Sourcing and Replacing Components
Electrical Repairs: To fix loose connections, ensure all plugs "click" into place. For damaged connectors, use heat-shrink tubing or premium electrical tape to seal out moisture.
Authentic Component Replacement: If an ebike controller or thumb throttle is confirmed dead through multimeter testing, always source an authentic Kingbull replacement part to ensure compatibility and protect your warranty.
3. Kingbull E-Bike Specific Error Codes & Maintenance
For owners of Kingbull electric bikes, we provide specialized support for common error codes and accessory replacements:
Common Kingbull Error Codes
If your LCD display shows an error code, map it below to troubleshoot instantly:
Error Code
Fault Description
Quick DIY Solution
E034
Motor Communication / Phase Fault
Check the main quick-disconnect motor cable near the rear chainstay. Ensure arrows align and it's fully plugged in.
E037
Throttle Fault / Signal Error
Inspect the throttle wire at the handlebars. Ensure it isn't pinched or disconnected.
🎥 Video Diagnostic Guides
[Watch Now] Kingbull E034 Error Code Fix & Demo Video
[Watch Now] Kingbull E037 Error Code Fix & Demo Video
Kingbull Accessories Installation & Replacement
When upgrading or repairing your Kingbull fat tire ebike, follow these exact video tutorials to complete the job like a pro:
🔧 How to Replace Ebike Brake Pads (Eliminate squeaking and restore stopping power)
🔧 Ebike Speed Sensor Replacement Guide (Fix inconsistent pedal assist issues)
🔧 Adjusting Lever Travel & Brake Sensors (Ensure your motor cut-off switch triggers correctly)
Conclusion: Extending Your E-Bike’s Lifespan
Developing strong electric bike troubleshooting skills is essential for every modern rider. By understanding common issues and staying prepared with the right tools, you can keep your bike performing at its peak for miles to come.
Always consult your Kingbull product manual or visit a local bike store for complex electrical overhauls. By following these preventative ebike maintenance recommendations, you will enjoy a seamless riding experience and significantly extend the life of your electric bike.
Read more
Maintenance
Riding Through the Storm: Ensuring Your E - Bike's Resilience in Inclement Weather
Hey there, fellow e-bike enthusiasts! There's no denying the sheer exhilaration and freedom that our electric bikes bring to our daily lives. However, we all know that Mother Nature can be quite the unpredictable force. Whether it's an unforeseen torrential downpour, a snow-covered landscape, or those bone-chilling winter days, adverse weather conditions can pose significant challenges to our beloved rides. But fear not! With a few well-thought-out strategies and a bit of proactive care, you can safeguard your e-bike and ensure it remains in prime condition, regardless of what the elements throw at you.
1. Shielding the Sensitive Electronics
E-bikes house a variety of delicate electronic components, with the battery and display being particularly vulnerable. These components are the lifeblood of your e-bike, and protecting them is of utmost importance. Investing in high-quality waterproof covers is a fantastic first step. These covers are specifically designed to provide a snug and secure fit, effectively repelling rain and snow. In a pinch, heavy-duty plastic bags can also serve as a makeshift solution. Just make sure to wrap them tightly around the battery and display, sealing off any potential entry points for moisture.
When it comes to storage, always prioritize keeping your e-bike indoors. If that's not possible, look for a well-sheltered area that offers protection from the elements. A covered porch, a garage, or a shed can all be great alternatives. By doing so, you're not only shielding your e-bike from direct exposure to rain and snow but also reducing the risk of damage from wind-blown debris.
2. Maintaining Chain Integrity
The chain of your e-bike is a crucial component that often bears the brunt of bad weather. Rain, snow, and slush can quickly wash away the essential lubricant that keeps the chain running smoothly. Without proper lubrication, the chain becomes prone to rust and accelerated wear, which can ultimately lead to costly repairs or even replacement.
To combat this, it's essential to use a high-quality, water-resistant bike lube on a regular basis. Make it a habit to apply the lube before and after rides, especially if you've been out in wet conditions. After riding in the rain or snow, take a few minutes to thoroughly wipe down the chain with a clean cloth. This helps to remove any dirt, grime, or moisture that may have accumulated. Once the chain is dry, reapply the lube, ensuring that every link is evenly coated. This simple routine will go a long way in extending the lifespan of your chain and maintaining optimal performance.
3. Prioritizing Tire Traction for Safety
In wet, icy, or slippery conditions, the traction of your tires can mean the difference between a safe ride and a dangerous accident. As such, it's vital to pay close attention to the condition of your tires. Start by regularly checking the tread depth. Tires with sufficient tread provide better grip on the road surface, allowing you to maintain control of your e - bike. If you notice that the tread is worn down, it's time to consider replacing the tires.
For an added boost in traction, you can experiment with adjusting the tire pressure. And here's a detailed guide on tire pressure for Kingbull electric bike tires:
Soft Terrain (such as sand or snow): Keep the pressure between 18 and 20 PSI. This lower pressure allows the tires to have a larger contact area with the soft surface, ensuring better traction and comfort. You'll feel more stable when riding on sand dunes or through a snowy path.
Daily City Riding or Paved Roads: Maintain the pressure between 20 and 25 PSI. At this level, the rolling resistance is reduced, which in turn improves the efficiency of your ride. You'll find that your e-bike glides more smoothly on the flat, hard surfaces of city streets.
Heavy Loads or Long-Distance Riding: Keep the pressure between 25 and 30 PSI. Higher pressure in these situations ensures tire stability and durability. Whether you're carrying a heavy cargo or embarking on a long journey, the tires can better withstand the continuous stress.
Special Consideration for Rainy Conditions
When it's raining, proper tire pressure adjustment becomes even more critical.
Lower the tire pressure to increase traction: On slippery wet roads, reducing the tire pressure can increase the contact area between the tires and the ground, enhancing traction and reducing the risk of skidding. However, it's important not to overdo it, as excessive reduction will increase rolling resistance, hampering riding efficiency and potentially damaging the tires.
Refer to the suggestions on the tire sidewall: Each tire's sidewall indicates the recommended tire pressure range, which serves as the fundamental reference.
Adjust according to the actual situation: The intensity of the rain, road slipperiness, and personal riding habits all factor into the optimal tire pressure choice.
Slight pressure reduction: In light rain or when the road surface is slightly slippery, decrease the tire pressure by about 5 - 10%.
Greater pressure reduction: In heavy rain or on extremely slippery roads, you can increase the reduction, but ensure the tires don't deform excessively.
Maintain balance: Keep the front and rear tire pressures balanced to prevent uneven traction.
Precautions:
Avoid excessive pressure reduction: This can lead to increased rolling resistance, reducing your e-bike's battery range and raising the risk of a tire blowout.
Check the tire pressure regularly: After riding in the rain, promptly check the tire pressure to ensure it's within the normal range.
Pay attention to the tire tread pattern: Alongside tire pressure, the tread pattern impacts traction. Opt for tires with good water-drainage capabilities to enhance safety during rainy rides.
4. Secure Storage and Theft Prevention
When your e-bike isn't in use, proper storage is key. Storing it indoors in a dry, climate- controlled area is the best way to protect it from the elements and potential damage. But even when stored indoors, it's important not to let your guard down when it comes to security. Always lock your e-bike, whether it's in your garage, basement, or apartment. A high-quality bike lock can deter would-be thieves and give you peace of mind.
Click here for more tips on how to prevent e-bike theft.
If you have no choice but to store your e-bike outdoors, invest in a durable, weather- resistant bike cover. These covers are designed to withstand harsh weather conditions, protecting your e-bike from rain, snow, sun, and wind. Make sure to choose a cover that fits your e-bike snugly and has additional features like UV protection and reinforced seams for added durability.
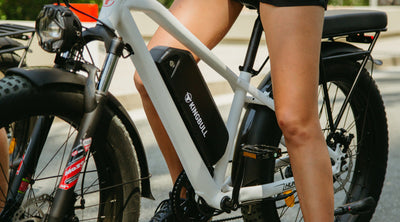
5. Cold-Weather Battery Care
Cold weather can have a significant impact on the performance of your e-bike's battery. As the temperature drops, the chemical reactions within the battery slow down, resulting in reduced power output and shorter battery life. To mitigate this, it's crucial to take extra care of your battery during the colder months.
For more tips on protecting your battery in cold weather, click here.
Whenever possible, store your battery indoors in a warm environment. If you're planning to go for a ride in cold weather, bring the battery inside a few hours before you leave. This allows the battery to warm up to a more optimal temperature, which can significantly improve its performance.
6. Regular Cleaning and Thorough Inspections
After braving the elements on your e-bike, it's essential to give it a thorough cleaning. Bad weather often brings with it a host of dirt, salt, and debris that can accumulate on your bike and cause damage over time. Salt, in particular, is highly corrosive and can quickly eat away at metal parts.
When it comes to cleaning, we strongly caution against using a pressure washer on e-bikes. The powerful water jet from a pressure washer not only poses a risk of damaging the electrical connections but can also force water into sensitive areas, such as the motor housing, battery compartment, or other vulnerable parts, potentially causing malfunctions.
Instead, opt for a gentle bike cleaner and a soft brush. Use them to meticulously remove all the grime from your e-bike, with special attention given to hard to-reach areas like the chain, gears, and brakes.
Once your e-bike is clean, conduct a detailed inspection. Check the brakes to ensure they're functioning properly. Test the cables for any signs of fraying or corrosion. Examine the tires for any cuts, punctures, or uneven wear. By catching these issues early on, you can prevent them from turning into more serious problems down the line. Make regular maintenance checks a part of your routine, and your e-bike will continue to serve you well for years to come.
Pro Tips
Consider using a waterproof spray on connectors and exposed metal parts. This provides an extra layer of protection against moisture and corrosion, helping to keep your e-bike's electrical system and metal components in top shape.
When storing your e-bike for an extended period, such as during the off-season, it's a good idea to remove the battery and store it separately in a temperature-controlled area. This helps to prevent the battery from discharging and extends its overall lifespan.
Stay Safe Out There!
Riding in bad weather requires extra caution. Slow down and give yourself plenty of time to react to any unexpected situations. Wear appropriate gear to keep yourself safe and comfortable. A well-fitting helmet is a must, along with a waterproof rain jacket and gloves to keep you dry and warm.
Before you head out, take a few minutes to check the weather forecast. If the conditions are too extreme, it may be best to postpone your ride. Remember, your safety should always be your top priority.
By following these comprehensive tips, you can not only protect your e-bike from the ravages of bad weather but also continue to enjoy the thrill of riding, no matter what Mother Nature has in store. So gear up, take care of your e-bike, and hit the road with confidence, rain or shine!
Read more
Maintenance
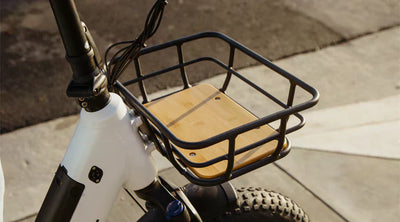
How to Install a Front Basket on Your Bike – A Step-by-Step Guide
Adding a front basket to your bike is a great way to increase its practicality, whether you’re commuting, running errands, or just enjoying a leisurely ride. A well-installed basket provides convenient storage without compromising the bike’s stability. In this guide, we’ll walk you through the step-by-step process of installing a front basket, including repositioning the front light for a seamless fit.
Step 1: Remove the Front Light
Remove the original front light to make room for the front basket installation.
Step 2: Attach the Front Basket
Align the holes of the front basket with the reserved mounting holes on the bike frame, then secure it using washers and screws.
Step 3: Install the Bracket
Install the new bracket in the designated slot at the front of the basket. Pay attention to the bracket's installation direction.
Step 4: Reinstall the Front Light
Remove the original front light bracket and install the front light onto the new bracket. After installation, reconnect the wiring to complete the setup.
Final Thoughts
With your front basket properly installed, your bike is now more functional and stylish! Whether you're carrying groceries, a backpack, or other essentials, this upgrade will make your rides more convenient. Happy cycling!
Read more
Maintenance
Kingbull Electric Bike Tire Assembly Guide: Ride Safer and More Comfortably!
Hey Kingbull Electric Bike Riders! We're so stoked you're part of the Kingbull family! Your wheels are your connection to the road, so keeping them in top shape is key for a safe and awesome ride. That's why we've put together this guide to walk you through tire assembly and maintenance. Let's keep those wheels turning!
Why Choose Kingbull Electric Bikes?
Kingbull is committed to providing users with high-quality, high-performance electric bikes. Our e-bikes are not only stylish and performant, but also meticulously crafted in every detail. For example, our wheels:
Use Schrader Valves: Schrader valves are sturdy, durable, and provide a good seal, making inflation easier and preventing air leakage.
Offer a Variety of Specifications: We offer a wide range of sizes and specifications including 20-inch and 26-inch CST fat tires to meet different models and riding needs, ensuring you can find the best tire for you.
Recommended Tire Pressure: Based on the characteristics of Kingbull electric bikes, we recommend a tire pressure range of 25-30 psi. This ensures both riding comfort and tire wear resistance.
Preparation
Before starting the assembly, make sure you have the following tools and materials ready:
New tires (make sure they match your Kingbull electric bike model)
Wheel rims
Hand pump or air compressor
Wrench (choose the size according to your e-bike's wheel hub nuts)
Jack (if you need to lift the e-bike)
Tire levers (may be needed to remove old tires)
Gloves (optional, to keep your hands clean)
Assembly Steps
1. Removing Old Tire (if replacing)
If you are replacing tire, you first need to remove the wheel.
Use a wrench to loosen the wheel hub nuts.
If you need to lift the e-bike, you can use a jack.
Carefully remove the old tire from the wheel.
2. Inspecting the Rims
Check the Wheel for damage or deformation.
Clean the Wheel to ensure there is no debris.
3. Installing New Tire
Insert the valve stem of the new tire into the valve hole of the Wheel. Most Kingbull electric bikes use Schrader valves, so please pay attention to the distinction.
Attach the tire bead to the wheel hub.
Make sure the tire is fully seated on the Wheel.
4. Inflating
Use a hand pump or air compressor to inflate the tire to the appropriate pressure. For Kingbull electric bikes, we recommend inflating the tires to 25-30 psi. You can press the tire with your hand to feel the inflation, the tire should not be easily deformed by pressing.
Be careful not to overinflate, as this may cause the tire to burst.
The tire pressure value can usually be found on the tire sidewall.
5. Installing the Wheel
Install the wheel on the e-bike.
Use a wrench to tighten the wheel hub nuts.
Make sure the wheel is securely installed.
Tire Maintenance and Care for Your Kingbull E-Bike
Proper assembly is key, but regular maintenance and care are also essential to maximize the lifespan of your tires and ensure your safety while riding. Here are some helpful tips:
1.Regular Tire Pressure Checks
Maintaining the correct tire pressure is crucial for optimal tire performance and safety. We recommend checking your tire pressure regularly and adjusting it as needed within the recommended range for Kingbull e-bikes (25-30 psi).
2.Inspect for Wear and Tear
Periodically examine your tires for any signs of cracking, cuts, or uneven wear. If you notice significant wear, it's time for a tire replacement.
3.Avoid Impacts and Squeezes
While riding, try your best to avoid hitting or squeezing your tires against hard objects, as this can cause damage.
4.Keep Your Tires Clean
Regularly clean your tires to remove dirt, debris, and other foreign objects from the tire surface. This helps maintain tire cleanliness and prolong their lifespan.
Troubleshooting wheel Wobbles
Even with regular maintenance, you might sometimes experience a wobbly wheel. wheel wobbles are a common issue with e-bikes, and here are some of the usual suspects:
Low Tire Pressure: Underinflated tires can cause them to deform, leading to a wobble. The fix is simple – pump up your tires to the correct pressure using a bike pump or air compressor.
Improper Assembly (Inner Tube and Rim Mismatch): If the inner tube and tire aren't seated correctly on the rim, it can throw off the balance and cause a wobble. You'll need to take the tire off and reinstall everything, making sure it's all lined up properly.
Loose Hub Axle: A loose hub axle can cause the whole wheel to wobble. Grab your wrench and tighten that axle!
Uneven Tire Wear: If your tire is worn down unevenly, it can cause the center of gravity to shift, resulting in a wobble. Time for a new tire!
Damaged Rim: A bent or damaged rim is a common cause of tire wobbles. If this is the case, you'll need to replace the rim.
If your Kingbull e-bike has a wobbly wheel, it's super important to figure out why and get it fixed before you hit the road. Your safety is what matters most!
Kingbull Support
If you have any questions about installing your tires or run into any issues, don't hesitate to reach out to Kingbull customer support. We're here to help!
Video Tutorial
Want to see it in action? Check out our video tutorial for a step-by-step walkthrough:
We hope this guide helps you keep your Kingbull e-bike rolling smoothly and safely. Happy riding!
Read more
Maintenance
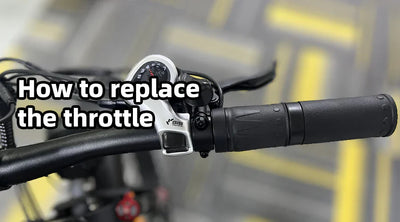
How to Replace the Throttle
Replacing the throttle might sound like a complicated task, but with the right steps, it’s a manageable DIY project that can save you time and money. Whether your throttle is unresponsive, sticking, or completely malfunctioning, replacing it can restore your vehicle’s performance and ensure a smoother driving experience. In this guide, we’ll walk you through the process step by step so you can get back on the road with confidence.
Specific Steps
Step 1:Loosen the Handlebar Grip
Use the provided tool to turn the handlebar grip screw counterclockwise until it loosens.
Step 2: Remove the Old Throttle and Install the New One
Once the grip is loose, carefully disconnect the throttle cable and remove the grip. Next, install the new throttle, reconnect the cable securely, and tighten the screw by turning it clockwise.
Conclusion
Replacing your throttle isn’t as difficult as it may seem. By following the correct steps, you can successfully complete the job and improve your vehicle’s performance. Always double-check your work, ensure all components are securely in place, and test the throttle before driving. If you’re unsure about any step or run into issues, don’t hesitate to consult a professional mechanic. We hope this guide helps—happy driving!
Read more


