


Explore News
MaintenanceTips & Cycling Knowledge
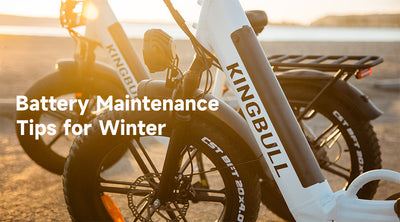
Keep Your Electric Bike Powered Up This Winter: Battery Care Tips You Need
Winter can be tough on electric bike batteries, but with the right care, you can keep your bike running smoothly and extend the battery’s lifespan. Here’s a handy guide to help you navigate cold-weather battery maintenance so you can enjoy riding even in the chillier months.
1. How Cold Weather Affects Your Battery
Lithium-ion batteries are sensitive to temperature changes. In cold conditions, you may notice:
Reduced Range: Low temperatures temporarily lower battery capacity, which can shorten your ride distance.
Slower Charging: Charging efficiency drops in the cold, making the process take longer.
Risk of Over-Discharge: Repeated low-battery usage in cold weather can lead to faster battery degradation.
Understanding these effects is the first step to keeping your battery healthy during winter.
2. Tips for Battery Storage and Usage in Winter
Keep It Warm:
Store your battery indoors at room temperature (60°F - 77°F) when not in use.
Use an insulated battery cover to protect it if you’re riding in freezing conditions.
Charge After Each Ride:
Charge your battery promptly after riding, but let it warm up to room temperature before plugging it in if it’s been out in the cold.
Avoid Deep Discharge:
Keep the battery level above 30% during winter to prevent damage caused by over-discharge in cold weather.
3. Charging Your Battery in Cold Weather
Charge Indoors:
Always charge your battery in a warmer environment (above 50°F) to ensure proper charging performance.
Use the Right Charger:
Stick to the manufacturer’s recommended charger to avoid compatibility issues and maintain battery health.
Don’t Overcharge:
While modern batteries usually stop charging when full, unplug it after charging to prevent unnecessary stress on the battery.
4. Regular Cleaning and Inspections
Clean the Battery Contacts:Cold, wet conditions can lead to corrosion. Use a dry cloth or appropriate cleaner to wipe down the battery’s metal contacts regularly.
Inspect the Battery Casing:Check for cracks or damage to ensure moisture doesn’t seep in, which could harm the battery.
5. Maximizing Battery Range in Winter
Use Eco Mode:Riding in a lower power mode helps conserve battery life and extend your range.
Lighten the Load:Reducing the weight on your bike can help the battery work more efficiently.
Warm the Battery Before Riding:If the battery has been in a cold place, bring it indoors to warm up to room temperature before attaching it to the bike.
6. Storing Your Battery During the Off-Season
Charge It Just Right:For long-term storage, keep the battery at 40%-60% charge. Don’t store it fully charged or completely drained.
Store in the Right Place:Choose a dry, temperature-controlled spot (between 32°F and 95°F) to keep your battery safe.
7. Consider a Backup Battery
If you frequently ride in freezing temperatures or take long trips, having a fully charged spare battery can give you peace of mind.
Wrap-Up
Winter weather doesn’t have to slow you down. With proper battery care and maintenance, you can enjoy smooth, worry-free rides even in the coldest months. Taking a little extra time to protect your battery will help extend its life and ensure your bike performs its best all year round.
Ride smart, stay warm, and keep the adventures going this winter!
Read more

MaintenanceTips & Cycling Knowledge
E-Bike Display Error Codes: Solutions for Error Code E36
The display screen of Kingbull electric bicycle (e-bike) is not only an essential source of information during a ride but also shows key data such as speed, battery level, mileage, and riding mode. This information helps riders better understand the status of their bike, ensuring a smooth and safe riding experience. However, beyond these functions, the display screen has another crucial role: when a fault occurs, it can display specific error codes that inform the rider about potential issues with the e-bike.
Different error codes correspond to various types of faults, which may involve the motor, controller, braking system, or sensors, among other components. These error codes function as the e-bike’s “diagnostic tool,” helping riders quickly identify the root cause of the problem. Therefore, when an error code appears on the e-bike’s display, the rider must use the code’s meaning to conduct a thorough inspection of the bike and take appropriate measures to resolve the issue.
Kingbull Electric Bikes have received a comprehensive upgrade for 2025!
This upgrade includes a new display system, offering you more accurate riding data. To assist users with operation and troubleshooting potential screen error codes, we have prepared a detailed video guide. For instructions on the new display error code operations, please refer to the YouTube video below:
Understanding Error Code E36
Error code E36 typically indicates an issue with the electric bike's motor or that the controller has detected a voltage beyond the safe operating range. This can be caused by several factors, including:
Loose or Damaged Cables: The motor cables under the frame may be loose, broken or have poor contact, affecting power output.
Display Malfunction: The bike's display could be faulty, misinterpreting or incorrectly communicating voltage levels to the controller.
Controller Fault: The voltage detection circuit within the controller may be malfunctioning, preventing accurate transmission of voltage data, or leading to an incorrect detection of over/under-voltage conditions.
Motor Malfunction: The motor may be damaged, resulting in improper function, and might need replacement.
How to Respond to Error Code Alerts
When an error code appears on your e-bike’s display, there’s no need to panic. Most issues can be addressed through basic checks and troubleshooting. Here are some general steps to follow:
1. Check Connections and Plugs
Many fault codes stem from loose connections or damaged wires. Carefully inspect the connections of various components on your electric bike, paying special attention to the motor cables, particularly when an E36 code appears, as this is often caused by issues with the motor or motor control circuit. Check for any looseness, wear, or breakage in the motor wires, especially at the connection point under the frame.
Corrosion on Plugs: Due to moisture or dirt, plugs may corrode over time. Regularly clean the plugs and ensure they are dry.
2. Reset the Display
Sometimes, the bike’s display may need to be reset to clear temporary faults. Follow these steps to reset the display:
Enter Settings Mode: Press and hold the “+” and “-” buttons simultaneously to access the display settings menu.
Select P16 Parameter: Press the power button to navigate to the P16 parameter setting.
Reset the Display: In the P16 parameter screen, press and hold the “-” button for about five seconds to reset the display.
Save Settings: Once reset, press and hold the “+” and “-” buttons again to exit settings, then restart the display to check if the fault has been cleared.
3. Check the Controller
If the problem persists after resetting the display and inspecting the cables, it may be related to a fault in the controller. Verify that the connections between the controller and other components (like the motor and sensors) are secure and that the controller itself is functioning correctly.
For Literider models, the controller is located inside the fold of the frame. In Voyager, Rover, Hunter, and Discover models, the controller is situated near the pedals and crank. You’ll need to remove the black cover to check the controller. You can refer to these videos for guidance on how to perform this check.
4. Contact Professional Support
If you are unsure how to proceed or if the issue remains unresolved after the above steps, please contact our customer service at customers@kingbullbike.com.
To expedite the resolution of your issue, please include your order number along with any relevant images or videos of the problem. Our customer service team will respond within 48 hours with more specialized technical support.
If you encounter other fault codes E34 or E37, please click here to view the solution steps.
Conclusion
Troubleshooting E-bike error code E36 faults often involves checking connections, resetting the display, and inspecting the controller. By following these steps, common issues can be resolved. However, if problems persist, reaching out to professional support with detailed information will ensure timely assistance. Remember, regular maintenance is key to keeping your e-bike running smoothly and preventing future faults.
Read more
Maintenance
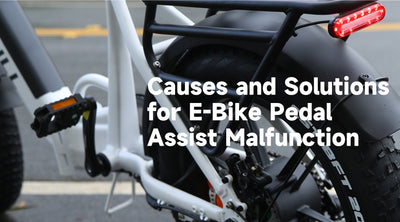
Causes and Solutions for E-Bike Pedal Assist Malfunction
Electric bicycles have seen a surge in popularity, thanks to their eco-friendly nature and the convenience they offer for urban commuting and recreational riding. Central to their appeal is the pedal assist system, which provides riders with an extra boost of power, making cycling easier and more enjoyable. However, like any complex system, the pedal assist can sometimes malfunction, leading to a frustrating disruption in the riding experience. In this blog, we’ll delve into the common causes of pedal assist malfunctions and offer practical solutions to help you get back on the road smoothly.
How the Electric Bicycle Pedal Assist System Works
The pedal assist system on an electric bicycle is a sophisticated technology designed to provide riders with additional power, making cycling easier and more efficient. When a rider begins pedaling, built-in sensors immediately detect changes in pedal force. These sensors are typically located around the pedals or the bike's bottom bracket, and they accurately capture the rider’s effort and cadence. Once the sensor detects the pedal force, it transmits this data to the motor controller.
The motor controller serves as the brain of the system, processing the information received from the sensors and adjusting the motor’s power output accordingly. If the rider increases their effort, such as when climbing a hill or facing strong resistance, the controller automatically boosts the motor’s output, providing more assistance to help the rider conserve energy. Conversely, if the rider reduces their pedaling effort or stops altogether, the controller correspondingly decreases the motor’s output, or even shuts it off when assistance is no longer needed. This intelligent coordination ensures that the electric bicycle delivers a smooth and energy-efficient riding experience by dynamically adjusting power based on the rider's needs.
Common Causes of Pedal Assist Malfunction
Wiring and Connection IssuesThe electrical system of an electric bicycle is complex, with various components interconnected through numerous wires. If there are problems with the wiring or connections between the pedal sensors, controller, or motor, it can disrupt signal transmission. Faulty or loose connections may cause the pedal assist system to malfunction or stop working altogether.
Sensor IssuesThe pedal assist system relies heavily on accurate sensor readings. If the sensors that detect pedal force are damaged, misaligned, or have loose connections, the system may fail to register the rider’s input. This can result in the pedal assist feature not functioning properly, as the system will be unable to respond to the rider's pedaling efforts.
Controller ProblemsThe controller acts as the "brain" of the electric bicycle, interpreting signals from the sensors and managing the motor’s power output. If the controller is malfunctioning, it may fail to process the sensor data correctly, which can prevent the motor from providing the appropriate level of assistance. This issue can lead to inconsistent or non-functioning pedal assist.
Solution
1. Check the Sensor
First, carefully inspect the pedal sensor to ensure there are no visible signs of damage or loose connections. If you find any issues, try reinstalling or replacing the sensor.
Reinstall the Sensor: If the sensor is loosely connected or improperly installed, a correct reinstallation might resolve the issue. Make sure the connection between the sensor and the controller is secure and stable.
Replace the Sensor: If the problem persists after reinstalling the sensor, the sensor itself might be faulty. In this case, please contact our customer support team (customers@kingbullbike.com), and we will send you a replacement sensor.
2. Check the Controller
If both the throttle and pedal assist functions are not working, you should inspect the bike’s controller.
Reinstall the Controller: Try reinstalling the controller to ensure it is properly connected to other components. If the issue persists after reinstalling, the controller may be defective.
Replace the Controller: If reinstalling the controller does not solve the problem, you may need to replace the controller. Please contact customer support for assistance or to obtain a new controller.
How to replace a sensor
To learn how to replace the sensor, please click here for detailed instructions.
Conclusion
The pedal assist system on an electric bicycle greatly enhances the riding experience, but it can malfunction due to various reasons. By understanding common causes of these issues and implementing the appropriate solutions, you can effectively restore the system’s functionality and ensure a smooth and safe ride.
Read more

MaintenanceTips & Cycling Knowledge
How to Replace the Speed Sensor on Your Electric Bike: A Simple DIY Guide
If your electric bike’s speedometer isn’t showing the correct speed, or if the screen constantly displays a frustrating "0 mph," your ebike speed sensor might be damaged or misaligned.
Luckily, dealing with an electric bike speedometer not working doesn't mean a costly trip to the repair shop. It’s a straightforward DIY fix you can easily handle at home with the right tools and a little patience. In this quick guide, we’ll walk you through exactly how to replace the speed sensor on your electric bike to get your ride tracking perfectly again.
Tools You’ll Need
Before you get started with your ebike speed sensor replacement, make sure you have the following tools and materials handy:
Hex key (Allen wrench) – For loosening bolts.
Multi-tool – For general adjustments.
Crank removal tool – Essential for accessing hidden sensors.
A new Kingbull speed sensor (or a compatible replacement sensor).
Zip ties – For neat cable management.
⚠️ Safety First: Always disconnect your electric bike’s battery and turn off the power completely before touching any electrical components to avoid accidental shorts or injuries.
1. Removing the Crank Arm
To get to the sensor, you usually need to remove the pedal crank arm first.
Step 1: Use the appropriate hex key to loosen and remove the main bolt securing the crank arm to the bottom bracket.
Step 2: Thread the crank removal tool into the crank arm carefully (make sure it's threaded straight to avoid stripping). Turn the tool clockwise using your wrench or hex key until the crank arm gently pops off the spindle, then set it aside.
2. Removing the Old Ebike Speed Sensor
Now that the crank is out of the way, you can see the sensor mechanism.
Step 3: Locate the old speed sensor near the bottom bracket or rear dropouts. It’s a small plastic component connected to the main ebike controller via a thin wire.
Step 4: Follow the cable back to the plug, and carefully disconnect the sensor from the controller. Pro Tip: Always pull directly on the plastic connector plugs—never pull on the wire itself, or you might tear the internal copper line.
Step 5: Unscrew or unclip the old speed sensor from its mounting bracket and remove it from the bike frame.
3. Installing the New Speed Sensor
Step 6: Place your new ebike speed sensor in the exact same position and orientation as the old one.
Step 7: Route the new cable along the frame safely, and plug it securely into the controller. You should feel or hear a slight "click" when it seals.
Step 8: Crucial Step! Check your ebike speed sensor alignment. Ensure the sensor sits close to the magnetic disc (usually a 1-2mm gap is ideal) but is positioned properly so it won’t rub against the moving crank arm or magnets. Use zip ties to strap down any loose wires.
4. Reinstalling the Crank Arm
Step 9: Line up the crank arm with the spindle (make sure it is pointing exactly 180 degrees opposite to the other pedal arm!). Push it onto the splines.
Step 10: Use your multi-tool or hex wrench to securely tighten the crank bolt. Make sure it is cranked down tight so it doesn't wobble loose while you are riding.
5. Testing Your New Sensor
Step 11: Reconnect your e-bike’s battery and power on the display.
Step 12: Lift the rear wheel off the ground (or place the bike on a repair stand) and manually spin the pedals. Look at your LCD display: if the speed readings update smoothly and accurately, you nailed it!
6. Advanced Troubleshooting: Still Not Working?
If your electric bike speedometer is still not working after the replacement, don't panic. Check these three common culprits:
Loose Connections: Unplug the connector and check for bent pins inside. Re-plug it firmly.
Magnet-to-Sensor Gap: If the magnet is too far from the sensor, it won't trigger a reading. Loosen the sensor slightly and push it closer to the magnetic ring (aim for the thickness of a coin).
Dirty Sensor Wheel: Wipe down the magnetic disc with a clean microfiber cloth. Mud or grease buildup can block the magnetic signal.
Wrapping It Up
And that’s all there is to it! By following these simple steps, you can successfully tackle an ebike speed sensor replacement and get back to enjoying smooth rides with real-time tracking.
Regular maintenance keeps your electric bike running like new. If you are still unsure about the process, encounter a weird error code, or need help finding the right replacement parts for your model, please feel free to contact the Kingbull support team anytime. We’re always here to help you stay on the road!
Read more

Maintenance
Kingbull Ebike Won't Turn On? Quick Troubleshooting & Self-Check Guide
What to Do When Your Kingbull Ebike Won’t Turn On: A Quick Self-Check Guide
Imagine this: You’re geared up and ready for a ride, but when you press the power button, your electric bike won’t turn on. It’s a frustrating moment for any rider, but don’t worry—most power issues are caused by simple, fixable factors.
In this guide, we’ll walk you through three essential self-check steps to help you diagnose and resolve ebike power problems quickly. Let’s get your Kingbull bike back to life!
Step 1: Inspect the Ebike Battery
The battery is the heart of your electric bike. If your bike isn't responding, the battery is the first place to look.
Check the Charge: Open the battery compartment and verify the charge level. If it’s completely depleted, plug it into the charger until it's full.
Proper Seating: Sometimes, a battery that isn't fully locked or seated correctly will fail to complete the electrical circuit. Ensure it is securely clicked into place.
Power Switch: Don't forget to check if the battery itself has a physical "On/Off" switch (often labeled 'I' and 'O').
Pro Tip: A secure electric bike battery connection is crucial for consistent performance.
Step 2: Examine the Display Cable
If the battery is charged but the screen remains dark, the issue might be the communication link between your display and the system.
Locate the Cable: Find the cable running from your LCD display to the main wiring harness.
Unplug and Inspect: Carefully unplug the connector and check for bent pins, dirt, or visible wear.
Align and Reconnect: When plugging it back in, make sure to align the directional arrows on the connectors. A loose or misaligned ebike display cable is a common culprit for power failure.
Step 3: Check the Controller Connections
The controller acts as the "brain" of your e-bike, managing power flow to the motor. It is typically housed inside the frame (near the middle).
Access the Controller: For Kingbull foldable electric bikes, you may need to fold the frame to access the controller compartment.
Verify Wiring: Use a basic tool to open the cover and inspect the internal wiring. Look for any disconnected plugs or signs of heat damage.
Secure the Plugs: Firmly reconnect any loose wires. Often, a simple vibration during a rough ride can loosen a connection.
Conclusion: Still Having Issues?
Performing these three simple checks—Battery, Display, and Controller—solves the vast majority of ebike startup issues. In most cases, a quick adjustment is all it takes to get you back on the road.
If you’ve followed these steps and your Kingbull ebike still won’t power on, our dedicated support team is here to help.
Contact Us: Reach out to our customer service for expert technical assistance.
Watch & Learn: Visit the Kingbull YouTube Channel for video tutorials on ebike maintenance and troubleshooting.
Happy Riding!
Read more
MaintenanceTips & Cycling Knowledge
How to Inflate Your Electric Bike Tires: A Step-by-Step Guide
All electric bikes, like regular bikes, need to inflate their tires when they are low on air pressure.Keeping your electric bike tires properly inflated is crucial for a smooth and safe ride. Whether you're a seasoned e-biker or new to the scene, this guide will walk you through the process of inflating your electric bike tires. Let’s dive in!
Why Proper Tire Inflation Matters
Before we get into the steps, it's important to understand why tire inflation is so crucial:
Safety: Properly inflated tires provide better grip and control.
Performance: Correct tire pressure ensures a smoother ride and better efficiency.
Longevity: Well-maintained tires last longer and are less prone to damage.
Step-by-Step Guide to Inflating Your Electric Bike Tires
Step 1: Gather Your Tools
You'll need:
A quality bike pump
A pressure gauge (if your pump doesn’t have one)
Your electric bike’s tire pressure recommendations (found in the manual or on the tire sidewall)
Step 2: Check the Recommended Tire Pressure
Look on the sidewall of your tires for the recommended PSI (pounds per square inch). This information is also usually found in your bike’s user manual. Ensuring you know the correct PSI is essential for avoiding over or under-inflation.
Step 3: Remove the Valve Cap
Locate the valve on your tire. There are two common types of valves:
Schrader Valve: The same type found on car tires.
Presta Valve: A narrower, often found on road bikes. If your bike has Presta valves, you’ll need to unscrew the small knurled nut at the top before you can pump air in.
Step 4: Attach the Pump
For a Schrader valve, simply press the pump head onto the valve and secure it.
For a Presta valve, after unscrewing the knurled nut, press the pump head onto the valve and secure it, usually by flipping a lever.
Step 5: Inflate the Tire
Begin pumping. Keep an eye on the gauge to ensure you’re adding the correct amount of air.
If your pump has a gauge, you’ll see the pressure rising as you pump. If not, periodically check the pressure with a separate gauge.
Step 6: Check the Pressure
Stop pumping occasionally to check the pressure. Ensure it matches the recommended PSI.
For Schrader valves, use the pressure gauge directly.
For Presta valves, close the knurled nut first, then check the pressure if using a separate gauge.
Step 7: Secure the Valve and Replace the Cap
Once your tire is inflated to the correct pressure:
Remove the pump head.
For Presta valves, screw the knurled nut back down.
Replace the valve cap on either type.
Step 8: Repeat for the Other Tire
Don’t forget to repeat the process for your rear tire!
Tips for Maintaining Tire Pressure
Regular Checks: Check your tire pressure at least once a month, or before long rides.
Weather Considerations: Tire pressure can fluctuate with temperature changes, so check more frequently in extreme weather.
Carry a Portable Pump: A compact, portable pump can be a lifesaver if you need to adjust pressure on the go.
Conclusion
Keeping your electric bike tires properly inflated is a simple yet essential task that enhances your riding experience and safety. By following these steps, you'll ensure your tires are always in top condition, ready for any adventure. Happy riding!
Read more


