


Explore News
MaintenanceTips & Cycling Knowledge
The Complete Guide to E-Bike Seat Adjustment: Key Tips for Comfort and Fit
When it comes to the comfort of electric bicycles, seat adjustment is of paramount importance. A properly adjusted seat not only enhances the riding experience but also helps reduce the discomfort that may arise from prolonged use.
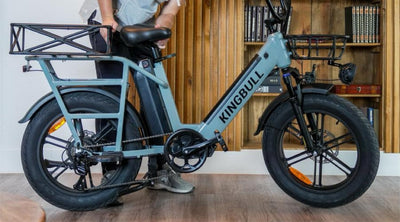
Adjusting Seat Height
The adjustment of seat height directly affects the rider's comfort and riding efficiency. An appropriate seat height should allow the rider's knees to be slightly bent while pedaling, avoiding discomfort caused by fully extended or overly bent knees. Seat height adjustment can be accomplished by modifying the length of the seat post, ensuring optimal power output and stability during the ride.
Common Issues and Solutions
Some customers have reported that the seat cannot be secured even after tightening the seat post clamp. This issue often arises because the seat is not adjusted to the correct position relative to the marking on the seat post. The seat should be adjusted within the marked range—neither below nor above the marking.
If the seat still cannot be fixed even after adjusting according to the marking, the issue might lie with the seat post clamp itself. In this case, you should:
Open the seat post clamp.
Tighten the screw of the seat post clamp.
Secure the seat post clamp again.
Following these steps should ensure that the seat remains securely in place after adjustment.
Seat Material and Design
When considering the material and design of bicycle seats, aside from adjustment functionalities, several factors contribute to comfort. A comfortable seat should offer adequate support and softness to reduce friction and pressure during long rides. It should also be breathable to wick away moisture, keeping riders dry and comfortable.
When purchasing a seat, it is crucial to consider its size and compatibility with your bike's seat post. The seat is usually secured with a seat clamp, which attaches to the seat post. The size of the clamp that secures the seat is approximately 4.8 cm, while the width of the seat post on the bike is 2.8 cm, ensuring a stable installation. If you are only adding a comfortable seat cover to the seat, you can choose based on personal preference without affecting compatibility with the seat post.
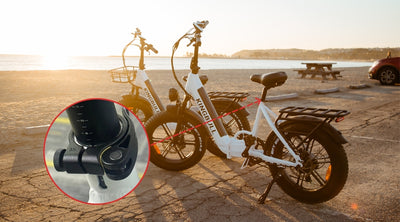
When carrying passengers, ensuring safety is paramount. Installing a rear seat armrest on the seat post can significantly enhance safety by providing passengers with a stable support to hold onto. This can help prevent injuries and maintain balance during sudden braking, sharp turns, or other unexpected movements. Additionally, a rear seat armrest can offer added comfort for passengers, making the ride more enjoyable. Ensuring the armrest is securely installed and made from durable materials is crucial to maximize its effectiveness in enhancing passenger safety.
Conclusion
A well-adjusted electric bicycle seat not only enhances riding comfort but also mitigates potential health issues and fatigue. This allows riders to fully enjoy the benefits and pleasure of cycling.
Read more
MaintenanceTips & Cycling Knowledge
Why My Electric Bike Won't Start After Delivery: Common Issues and Solutions
Upon receiving their electric bike, many customers report that despite charging the battery, their bike fails to start or the throttle doesn't respond, much like a traditional bike. This issue can be frustrating, especially after eagerly anticipating the arrival of a new mode of transportation. Understanding the common problems and their solutions can help resolve these issues quickly and get you back on the road.
Reasons Why Your Electric Bike Won't Start
Battery is Depleted
The first thing you should do after receiving your electric bike is to check the battery level. Long press the button in the middle of the battery. If the indicator light does not turn on, it means the battery is depleted.
Light Status
Battery Status
3 Green Lights & Red Light
80% -100% Power
2 Green Lights & Red Lights
60% - 80% Power
1 Green Lights & Red Lights
40% - 60% Power
Only Red Light
20% - 40% Power
No Light
0% Power
Battery is Still Charging
During the first charge after receiving their electric bike, After charging, they forget to unplug the charging cable before turning on the power, which prevents the bike from starting.
Power Switch on the Right Side of the Battery is Not Turned On
There is a power switch on the right side of the battery that needs to be switched to the "I" position to turn on the power.
Instrument Panel Power Button on the Left Handlebar is Not Pressed
Typically, electric bikes require a long press of the power button to activate the electric assist, similar to how a car needs to be started before it can run. The same applies to your bike; you need to long press the power button on the left handlebar to activate the display.
How to Start an Electric Bike
Activate the Battery:
Turn the red switch on the right side of the battery to the "l" position to power it on.
Check Battery Level:
Press and hold the button in the middle of the battery to check the current battery level.
Power On the E-Bike:
Press and hold the power button located next to the left handlebar to activate the e-bike.
Adjust Pedal Assist:
Briefly press the "+" or "-" buttons to adjust the pedal assist level according to your preference, ranging from levels 1 to 5.If the pedal assist level is set to 0, the electric bike will not operate.
Conclusion
If you have followed all the troubleshooting steps and your electric bike still won't start, don't hesitate to reach out to our customer service team at email customers@kingbullbike.com for further assistance. We are committed to ensuring that your riding experience is smooth and enjoyable. Remember, proper maintenance and understanding your e-bike's functions can prevent many common issues. Thank you for choosing Kingbull Bike, and happy riding.
Read more
Maintenance
How to Install a Backup Battery (External Battery Pack)
Installing a backup battery is a straightforward process that ensures you have an extra power source when needed. Whether you're upgrading your system or replacing an old battery, following the correct steps will help you complete the installation efficiently. In this guide, we'll walk you through the process step by step to ensure a secure and proper setup.
Step 1: Connect the Battery Wire
Open the wire board and carefully disconnect the red wire from the silver current device. Then, connect the red wire to the black dual-head current device, ensuring a secure connection.
Step 2: Attach the Backplate and Connect the Wiring
Remove the seat and position the backup battery’s backplate onto the frame. Secure it using the three matching screws. Next, route the current wire from the backup battery through the hole at the bottom of the frame and connect it to the black double-ended current unit.
Step 3: Insert the Battery and Test
Align the backup battery with the pin and insert it securely. Press the battery button to check its functionality—a lit battery indicates normal operation, with green showing the current battery level. Once confirmed, reattach the seat to complete the installation.
Conclusion
By following these simple steps, you can successfully install a backup battery and ensure your system remains powered when needed. Always double-check your connections and test the battery before finalizing the installation. If you encounter any issues, refer to the user manual or consult a professional. Now you're all set—enjoy your backup power with confidence!
Read more
MaintenanceTips & Cycling Knowledge
Battery Longevity of KINGBULL Electric Bikes
Introduction
Kingbull electric bikes come with premium lithium-ion batteries renowned for their quality and durability. In this article, we delve into the expected lifespan of these batteries and share essential charging practices to help you maximize their performance and longevity.
Battery Specifications and Charging Time
The Kingbull battery uses a charger that meets US standards, with a voltage of 48V and a current of 3A. On average, it takes approximately 5 to 8 hours to fully charge. So, how long can this battery last?
Grasping Charge Cycles
Kingbull electric bikes come with high-quality lithium-ion batteries rated for 1000 full charge cycles before needing replacement. A full charge cycle is defined as charging the battery from a fully discharged state to a fully charged state. If the battery is half-discharged before charging, it counts as half a charge cycle. Therefore, discharging the battery to 50% and then charging it to 100% twice equals one full charge cycle. Charging before the battery is fully discharged can effectively double its lifespan!
Battery Lifespan and Warranty
If you use our electric bike daily, completing one full charge cycle each day, the battery life can reach at least 1000 days or approximately 2.8 years. Considering battery degradation, our batteries are designed to last between 2.5 to 7 years. Additionally, our batteries come with a two-year warranty. The actual lifespan of the battery depends on several factors, including how frequently the owner discharges and charges the battery. Heavy users who deplete and recharge the battery daily can expect a lifespan of about 2.8 years, while occasional users may see the battery last 3 to 6 years. On average, we typically see a battery lifespan of around 5 years.
Factors Influencing Battery Lifespan
Frequency of Discharge and Charge
The frequency of discharging and charging the battery affects its actual lifespan. For example, users who fully discharge and charge their batteries every day for a week will have an estimated lifespan of about 2.8 years. Users who charge less frequently can expect the battery to last 3 to 6 years. On average, we observe a typical battery lifespan of about 5 years.
Proper Charging Habits
Maintaining proper charging habits is crucial to maximizing battery life. While lithium-ion batteries don't wear out from use, improper charging can impact their performance. We recommend charging the battery when it reaches about 50%-70% discharge and avoiding overcharging. Using the original charger that comes with the Kingbull ebike is essential, as the standard charger and battery are optimized to extend battery life. We strongly discourage using non-original chargers, as they can shorten the battery life and pose potential safety hazards. Proper charging habits and regular maintenance can significantly increase battery life. Frequent overcharging or deep discharging can severely damage the battery and shorten its lifespan. Charging when the battery is 50%-70% discharged is advisable, and charging for about an hour after the charger light turns green is recommended.
Adopt Good Riding Habits
Try to avoid sudden stops. Electric bikes experience the highest power load during start and stop cycles. Frequent, unstable currents can reduce battery life.
Avoid Exposing the Battery
Extreme weather conditions can impact the battery's actual lifespan. Exposed batteries are more susceptible to lifespan reduction due to weather changes and are more likely to suffer damage from impacts while riding. KINGBULL eBikes feature built-in batteries with aluminum alloy casings and frame tubes, providing double protection. The battery is protected within the frame, avoiding collisions. The leading safety design ensures the battery is waterproof, fireproof, and explosion-proof, enhancing safety.
Use the Original Charger
The standard charger and battery can significantly extend battery life. We do not recommend using non-original chargers, as they may shorten battery life and even cause dangerous situations. Protect the charger and use it in good condition for charging.
Conclusion
Kingbull electric bikes are equipped with top-quality lithium-ion batteries, renowned for their exceptional lifespan and durability. To ensure you get the most out of your battery, it’s crucial to follow optimal charging practices and regularly maintain your bike. Proper charging and usage can enhance battery performance and extend its lifespan, allowing your Kingbull electric bike to stay by your side for longer.
Read more

MaintenanceTips & Cycling Knowledge
Handling Error Codes
1. Error Code E034: Throttle Fault
If your electric bike screen says E034, it means there's somethirng funky with the throttle.
why does it occur
Usually, it's either the throttle sensor acting up or it's not hookeed up rightLots of things can cause this, like hiccups during manufacturingor damagefrom a rough ride.
Troubleshooting
Here's what you can try
1. Throttle Sensor Wire Connection Error
Check the throttle sensor wire. Unplug it, then plug it back inIf the E034message disappears, it was probably just a bad connection. Easy fix, just makesure everything's snug.
2. Throttle Damage
If the E034 message sticks around even after you've checkedthe wire, it'slikely the throttle itself is busted. No worries, though! Just reach out to ourcustomer service team, and we'll send you a new throttle.
Please do the test according to the video
2. Error Code E037: Brake Abnormality
If you see error code E037 on the display screen, it indicates a brake abnormality.
Why does it occur
A common cause of this problem is a bad brake sensor cable connection, partly due to a faulty display.
Which cables are the brake sensor ones
The yellow labeled ones as shown in the picture below are the brake sensor cables, one on the left and one on the right.
Troubleshooting
1.Bad brake sensor cable connection
1.1Which sensor works unwell
Reconnect the left and right sense cable separately until the E37 code disappears(For example, if E37 disappears after disconnecting the left side the trouble point is on the left side.)
1.2.How to fix it
Remove the lever firstly and unscrew the ① fixing screw, then tighten or loosen the ②nut shown below until the E37 code disappear.
If you unplug the brake cables on both sides at the same time and the screen does not display E037, there is a problem with the brakes on both sides and need to be replaced.
2.Display fault
If both sides are unplugged at the same time and the display still displays E037, it means there is a problem with the display, You need to reset the display. You can reset the display by following these steps:
Long-press the "+" and "-" buttons to enter the display settings. Then, short-press the power button until you reach the P16 setting.
Long-press the "-" button for 5 seconds to restore the factory settings.
Once you've made the adjustments, long-press the "+" and "-" buttons again to save the changes.
If the display still displays E037 after resetting, then need to replace the display.
Please do the test according to the video
PS: If the problem persists, please contact the customer service team.
Read more


