Electric Bike Chain Care Guide: Maintenance Secrets for Prolonged Life and Enhanced Performance
Electric Bike Chain Care Guide: Maintenance Secrets for Prolonged Life and Enhanced Performance

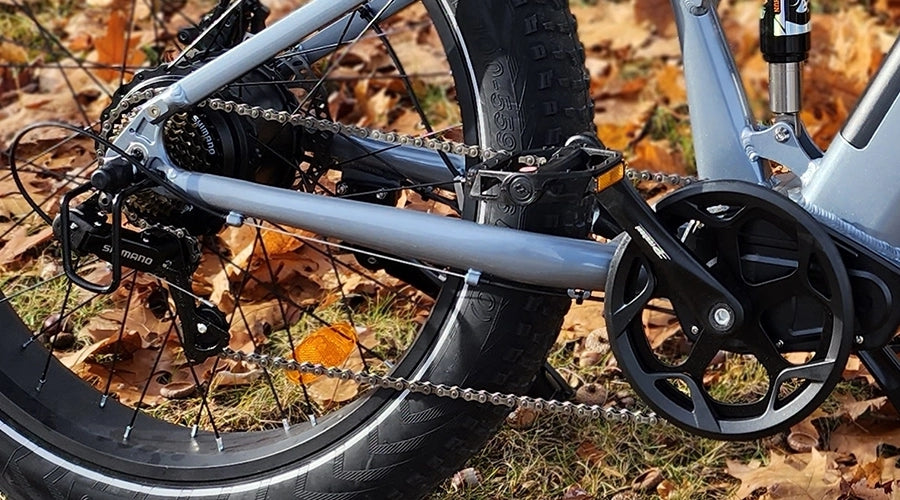
When you own an electric bike, maintaining the optimal condition of its chain is crucial. The chain serves as the core of the electric bike's power transmission system, directly impacting the efficiency and smoothness of your ride. However, due to factors such as dust, humidity, and other natural elements encountered during daily rides, the chain is susceptible to contamination and wear. To ensure your electric bike consistently performs at its best, we present a comprehensive guide to chain maintenance and care. From simple cleaning techniques to regular lubrication recommendations, this guide will assist you in ensuring the good health of your electric bike's chain, allowing you to experience enhanced performance during your rides.

Why Chain Maintenance Is Necessary

Linking the need for chain maintenance to the performance and lifespan of an electric bicycle emphasizes the critical role of regular upkeep in maintaining an optimal riding experience. The chain is a fundamental component of the electric bicycle's power transmission system, directly influencing the smoothness of rides and overall performance. Regularly maintaining the chain not only ensures the proper functioning of the mechanical components of the electric bicycle but also significantly extends the overall lifespan of the vehicle. With increasing riding mileage, the chain is susceptible to external environmental factors, dust, and moisture, leading to contamination and wear. Through routine maintenance, we can effectively reduce friction resistance in the chain, improve power transmission efficiency, and thereby enhance the overall performance of the entire bicycle.

Good chain maintenance not only impacts riding comfort and efficiency but also directly contributes to the overall safety of the electric bicycle. In cases where the chain is damaged or significantly worn, it may lead to unexpected failures during rides and potentially harm other components of the transmission system. Therefore, incorporating chain maintenance into a regular maintenance routine is a necessary step to ensure the long-term efficient operation of the electric bicycle, providing riders with a more reliable, smooth, and safe riding experience.

Cleaning Frequency and Steps for the Chain

Cleaning the chain is a crucial step in maintaining an electric bike, directly impacting the smoothness of rides and the lifespan of the chain. Here are more detailed recommendations regarding the frequency and steps for cleaning the chain:

Frequency of Cleaning the Chain

The frequency of cleaning the chain should be determined based on the following factors:

  1. Riding frequency: If you ride frequently, the chain is more exposed to dust, mud, and moisture, requiring more frequent cleaning.

  2. Environmental conditions: Riding on muddy paths or in damp weather makes the chain more susceptible to contamination, necessitating more frequent cleaning.

  3. Seasonal changes: In wet seasons, the chain is more prone to moisture, requiring more regular checks and cleaning.

In general, it is recommended to clean the chain every two weeks to a month. If your riding environment is more challenging, more frequent cleaning may be necessary.

The Steps to Clean the Chain

Cleaning the electric bike chain is a crucial step in maintaining the bike's overall condition. Here is a detailed guide on the steps and techniques for cleaning the chain thoroughly:

Preparation

  1. Prepare Chain Cleaning Tools: If you have specialized chain cleaning tools, fill them with bicycle-specific degreaser. Wrap the tool around the chain following the instructions, ensuring the storage compartment is in the correct position. If you don't have specialized tools, you can use a brush (toothbrush or nail brush) as an alternative.

  2. Pre-select Lubricant: Depending on the riding environment, choose between wet lubricant or dry lubricant to ensure effective lubrication under different conditions.

Removing Oil Stains from the Chain

  1. Apply Degreaser: If using specialized tools, add degreaser to the tool. Then, use your other hand to backpedal, allowing the tool's brush to clean all corners and crevices of the chain while collecting degreaser in the storage compartment.

  2. Use Brush for Cleaning: If you don't have specialized tools, apply degreaser to a brush (toothbrush or nail brush). Keep the brush on the top of the chain and then backpedal. Repeat this process on the bottom of the chain, ensuring you clean the chain links under the drivetrain.

Rinsing the Chain

Wash with Soapy Water: Use soapy water to wash the chain, ensuring the removal of excess degreaser and impurities.

Selecting and Lubricating the Chain

  1. Choose Lubricant: Depending on the riding conditions, choose between wet or dry lubricant.
  2. Apply Lubricant to the Chain: Carefully apply a small drop of lubricant to the top of each section of the chain. Ensure the lubricant aligns precisely with the rollers for optimal lubrication.
  3. Wipe Off Excess Lubricant: Use a cleaning cloth to wipe off any excess lubricant from the chain, ensuring the chain's surface is dry.

Following these steps and techniques will ensure that your electric bike chain stays clean, lubricated, and prolongs its lifespan, enhancing overall riding efficiency and comfort.

Checking and Replacing the Chain

Regularly checking and replacing the chain ensures optimal performance of your bicycle and minimizes the potential impact of chain wear on other components.

Checking the Chain

  1. Check Chain Tension: Ensure the chain tension is moderate. Too loose a chain may lead to chain derailment, while excessive tension can increase wear on gears and the chain.

  2. Inspect Chain Wear: Examine the chain for visible signs of wear, such as elongation of chain links or teeth embedding into chainrings. Excessive wear may necessitate replacement.

  3. Measure Chain Tension: Use a chain tension gauge to measure the tension of the chain. This helps determine if the chain is still within the normal working range.

  4. Observe Chain Deformation: Pay attention to whether the chain is twisted or deformed. Deformation may indicate damage to the chain.

  5. Check Chain Links: Ensure that the chain's connecting links or pins are not loose or missing. Any damaged links may lead to chain failure.

Replacing the Chain

  1. Prepare Tools: Ensure you have the necessary tools, such as a chain breaker, chain quick-link tool, and a wrench.

  2. Remove the Old Chain: Use a chain breaker or chain quick-link tool to remove the old chain from the bicycle.

  3. Measure the New Chain Length: Use the new chain and ensure its length is suitable for your bicycle. You can use a chain breaker to adjust the length.

  4. Install the New Chain: Attach the new chain to the bicycle, ensuring the correct connection of each chain link.

  5. Adjust Chain Tension: According to the bicycle manufacturer's recommendations, adjust the tension of the new chain. Typically, you should maintain the chain slightly slack but not too loose or tight.

  6. Connect the Chain: Use a chain quick-link tool or connecting pin to join the chain.

  7. Lubricate the Chain: After installing the new chain, lubricate it to ensure smooth operation. Choose an appropriate lubricant and apply it to each link of the chain.

  8. Test: After replacing the chain, conduct a brief test ride to ensure everything is functioning correctly.

 Conclusion

Maintaining your electric bike's chain is not just about preserving a crucial component; it's a commitment to a smoother, safer, and more enjoyable riding experience. The comprehensive guide provided here, from understanding why chain maintenance is necessary to the intricacies of cleaning, lubricating, and replacing the chain, empowers you to take control of your electric bike's health.