


Explore News

Tips & Cycling Knowledge
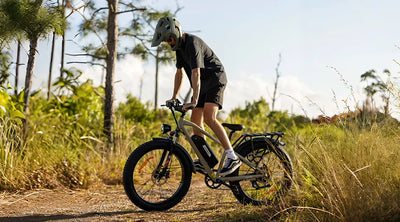
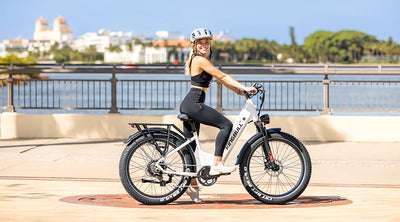
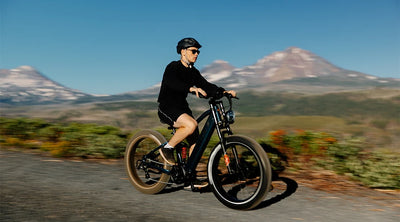
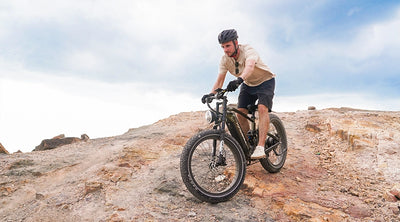
A Beginner’s Guide to Riding Electric Bikes: Everything You Need to Know
With the continuous development of society and advancements in technology, the emergence of electric bicycles has brought us a fresh cycling experience. However, before embarking on a ride, it is crucial to understand how to operate it safely. Whether you are riding a long-range electric bike for commuting or an all-terrain e-bike for off-road adventures, this guide will help you begin your journey safely and confidently.
What is an Electric Bicycle?
An electric bicycle, commonly known as an e-bike, is a bicycle equipped with an integrated electric motor and a rechargeable battery. This motor is designed to assist your pedaling efforts, making it easier to face steep inclines or travel at faster speeds.
Modern e-bikes come in various styles. For those looking for stability and comfort on any surface, fat tire electric bikes have become a top choice. A high-quality Kingbull electric bike, for example, combines power with ergonomic design to cater to both city streets and rugged trails.
Understanding E-Bike Functions and Performance
E-bikes offer a range of capabilities that enhance convenience. Here is a breakdown of what makes a Kingbull e-bike stand out:
Electric Assist System
The core of any e-bike is the assist system. Riders can adjust the intensity via a control panel. High-performance models like the Kingbull electric bike offer multiple assist levels, allowing you to tailor the power to your specific riding conditions, such as heavy headwinds or steep hills.
Range and Battery Life
If you are looking for a long-range electric bike, battery capacity is key. The distance you can travel on a single charge is influenced by terrain, rider weight, and the chosen assist level. Energy-efficient riding can extend this range significantly, making long-distance journeys a breeze.
Versatile Uses & All-Terrain Performance
Electric bicycles are suitable for urban commuting, leisure, and cargo transportation. For riders who enjoy exploring beyond the pavement, an all-terrain e-bike is essential. Models like fat tire e-bikes provide the necessary grip and shock absorption to handle sand, snow, and gravel.
Essential Preparations: Things To Do Before Riding
Before your first ride on a high-performance Kingbull electric bike, several essential preparations are necessary to ensure a safe, smooth, and enjoyable journey. Whether you are prepping for a city commute or an off-road adventure on an all-terrain e-bike, follow these key steps:
1. Check the Smart Display
First, confirm that the e-bike's display screen is functioning correctly. The interface on your Kingbull e-bike typically shows vital real-time data such as current battery level, pedal-assist level, speed, and total mileage. Ensure the display is readable and set to your preference so you can easily access information while navigating traffic or trails.
2. Battery Management for Long-Range Travel
To get the most out of a long-range electric bike, you must start with a full charge.
Charge the Battery: Ensure the battery has sufficient capacity to support your planned route.
Insert and Lock: Slide the battery correctly into the e-bike's integrated compartment. For Kingbull models, ensure it clicks and is securely locked in place to prevent power loss or theft during your ride.
3. Comprehensive Bike Inspection
A thorough mechanical check is vital, especially for heavy-duty fat tire electric bikes that handle more torque and weight.
Brake System: Test the brake levers to ensure they operate responsively. Check that the pads have enough thickness left. High-speed riding on an e-bike requires reliable stopping power.
Tire Pressure: For an all-terrain e-bike, tire pressure is crucial. Inspect the tires to ensure they are inflated to the recommended PSI range. Proper pressure on fat tire e-bikes enhances stability, grip, and battery efficiency.
Gears and Chain: Inspect the drivetrain. Ensure the chain is clean, well-lubricated, and free from debris. Proper lubrication extends the lifespan of your Kingbull electric bike and ensures smooth gear shifting.
4. Helmet and Safety Gear
Wear a Helmet: Never embark on a ride without a certified helmet. This is the most crucial piece of safety gear, providing vital protection for your head. Ensure it is fastened snugly.
Additional Protection: Depending on the terrain—especially when taking fat tire electric bikes off-road—consider wearing gloves for grip, protective eyewear against wind/debris, and a reflective vest for high visibility.
5. Familiarize Yourself with E-Bike Operations
Before hitting the road, take a moment to understand the specific controls of your Kingbull e-bike.
Control Mastery: Practice switching between assist levels and understand how the throttle (if equipped) engages.
Brake Feel: Test the brakes at a low speed to get a feel for the pressure required. Electric bikes often feature motor-cutoff switches in the brakes, so it’s important to understand how they react.
Safety Guidelines: Attention During the Ride
Riding an all-terrain e-bike is a thrilling experience, but maintaining safety is paramount. Pay close attention to these factors while in motion:
1. Strictly Follow Traffic Laws:
Adhere to all local regulations, including speed limits, traffic signals, and bicycle lane markings.
2. Maintain Constant Vigilance:
Stay alert to your surroundings. Because a long-range electric bike can reach higher speeds than a traditional cycle, extra caution is needed. Use mirrors to check your blind spots before changing lanes or turning.
3. Adapt to Electric Assistance:
Start with a low assist level to get accustomed to the acceleration. Avoid using maximum power on steep downhill slopes or sharp turns to maintain total control.
4. Strategic Braking:
Avoid abrupt "panic" braking. E-bikes are heavier, and fat tire electric bikes may have different traction levels; give yourself plenty of space to slow down gradually.
5. Appropriate Footwear:
Wear closed-toed shoes with a good grip to ensure your feet stay firmly on the pedals, especially when riding over bumpy terrain on an all-terrain e-bike.
6. Battery Monitoring:
Keep an eye on your display. If your battery runs low, your long-range electric bike may lose its assist power, making the return trip much more physically demanding.
7. Weather and Road Surface:
Exercise extreme caution on wet, slippery, or muddy trails. Fat tire e-bikes offer great traction, but speed should still be reduced in adverse weather to prevent skidding.
8. Route Planning:
When exploring new areas, plan your route to include bike-friendly paths and know where charging stations are located if you plan to push your Kingbull e-bike to its range limits.
Post-Ride Care: Maintaining Your Investment
After finishing your journey, follow these steps to ensure your Kingbull electric bike is ready for the next adventure:
1. Power Down:
Immediately turn off the electric assist system. This prevents accidental acceleration when moving the bike and helps preserve the battery's health.
2. Smart Charging:
Connect the battery to its official charger. For the best longevity, try to keep the battery in a climate-controlled environment and avoid leaving it at 0% for long periods.
3. Detailed Post-Ride Inspection:
Look for any loose bolts or debris caught in the wheels. Since all-terrain e-bikes encounter more dirt and vibration, a quick 2-minute check can prevent future repairs.
4. Cleaning and Lubrication:
Wipe away dust and mud from the frame and motor casing. Keeping your fat tire electric bikes clean prevents corrosion and maintains the "like-new" look of your Kingbull.
5. Secure Storage:
Store your e-bike in a dry, well-ventilated space. Avoid leaving it in direct sunlight or freezing temperatures, as extreme heat/cold can damage battery cells. Always use a high-quality lock to prevent theft.
6. Maintain Maintenance Records:
Track your mileage. Regular professional check-ups every 500-1000 miles (depending on the manufacturer's recommendation) will keep your long-range electric bike performing at its peak.
7. Accessory Care:
Store your charger, keys, and any removable displays in a dedicated, safe location so they are ready for your next ride.
Pro Tips for E-Bike Success
Familiarize Yourself: Read your Kingbull electric bike manual to understand maximum speed and riding modes.
Control Your Speed: Don't chase extreme speeds; adapt to the road environment.
Maintain Balance: E-bikes have a different center of gravity than traditional bikes. Practice turns in a safe area first.
Proper Posture: Keep your upper body upright and elbows relaxed to reduce fatigue.
By following these comprehensive steps, you ensure that every ride on your Kingbull electric bike is safe, efficient, and exceptionally fun!
Summary
Electric bicycles provide a convenient, eco-friendly way to commute. By choosing a reliable long-range electric bike and following safety protocols, you can enjoy a seamless riding experience. Whether you prefer the ruggedness of fat tire electric bikes or the versatility of an all-terrain e-bike, safety and regular maintenance remain the top priorities.
Read more

Tips & Cycling Knowledge
Don’t Ride Without These 5 Best E-Bike Accessories
Electric bikes are no longer just a commuter tool—they're a movement. Whether you're navigating urban traffic or tackling rugged weekend trails, the "electric assist" transforms the riding experience, offering unparalleled freedom and efficiency.
But to truly unlock the full potential of your electric bicycle and ensure every trip is safe, comfortable, and hassle-free, you need more than just a great bike. Serious riders know that having the best e-bike accessories makes all the difference. These five core pieces of must-have electric bike gear are the unheralded heroes that solve real-world problems like riding anxiety, safety risks, and storage limits.
Ready to upgrade your ride? Here is the essential e-bike equipment you need in your cockpit.
1. The E-Bike Helmet: Your Non-Negotiable Electric Bike Safety Gear
When it comes to electric bike safety gear, a high-quality helmet is non-negotiable. Whether you’re cruising at a casual 15 mph or pushing the limits at 28 mph, your helmet is the single most critical piece of safety equipment. Because e-bikes travel at higher average speeds than traditional bicycles, head injuries can be more severe. A properly fitted helmet significantly reduces impact force and drastically lowers the risk of serious injury.
Proper Fit is Key: Choose a certified e-bike helmet that fits snugly and features an adjustable dial-fit system to prevent shifting during high-speed rides.
Ventilation Matters: Look for aerodynamic designs with ample air vents to keep your head cool, especially during long summer commutes.
2. The Water Bottle Cage: Stay Hydrated, Stay Focused
Even with the electric motor assisting your pedaling, e-biking remains a physical activity. Staying hydrated is vital for maintaining peak performance, energy levels, and concentration, particularly during long-distance rides or in hot weather.
A solid water bottle cage mounted directly to your e-bike frame is a simple yet powerful e-bike commuter accessory:
Convenience & Safety: It allows you to take frequent, small sips without breaking your stride or taking your eyes off the road.
Load Management: Keeps the heavy water weight off your back (unlike a heavy backpack) and frees up valuable storage space for other essential e-bike equipment.
Style and Stability: Look for lightweight aluminum or durable composite plastic cages that hold your bottle securely, even over bumpy terrains.
3. The Phone Mount: The Command Center for E-Bike Navigation
Your smartphone is your navigator, entertainment system, and lifeline on the road. A reliable, heavy-duty phone mount secures your device directly to your handlebars, keeping essential information—like turn-by-turn directions, riding metrics, and incoming calls—in clear view.
Rugged Durability: Prioritize phone mounts with secure, all-weather clamping systems to prevent your device from dropping due to high-speed vibrations or bumps.
Hands-Free Operation: Keep your hands where they belong—on the handlebars—and avoid the dangerous distraction of fumbling for a phone in a pocket or bag.
Screen Accessibility: Allows you to quickly glance at maps or track your stats via e-bike apps without needing to pull over.
4. Smart Storage Solutions: Conquer Your Gear Clutter
From patch kits and rain gear to laptop and lunch, you’re going to need reliable storage space. Choosing the right e-bike storage bags is the key to truly "lightening your load" and ensuring you have everything you need for the journey.
Choose a solution tailored to your unique riding style:
Front Handlebar Bag: Perfect for quick access to snacks, wallets, keys, and phones. Look for waterproof materials and quick-release systems.
Rear Rack Pannier Bag: Ideal for e-bike commuters and bike tourists. These offer maximum capacity for groceries, work items, or a change of clothes. Ensure they attach securely to your e-bike’s rear rack.
Kingbull Ultra-Capacity E-Bike Backpack: Built for riders who need serious storage without sacrificing style or smarts. This premium Kingbull e-bike backpack combines rugged, lightweight construction with smart features like a built-in USB charging port—plus a fully waterproof design to protect your tech and gear in any weather. Stay organized on the go with multi-compartment storage that fits your laptop, gear, and daily essentials.
5. High-Security Bike Lock: Essential Peace of Mind
The unfortunate truth of urban cycling is that theft is always a threat. A premium bicycle lock is your primary defense and a non-negotiable investment to protect your valuable e-bike. Never rely on a built-in wheel lock alone.
Security Rating: Look for heavy-duty locks with Sold Secure ratings and utilize the "two-lock" method to secure both the frame and wheels to an immovable object.
Types of E-Bike Locks: Heavy-duty U-locks offer maximum security against bolt cutters, while folding locks provide a better balance between high security and portability/storage convenience.
Portability: Since you’ll carry it daily, choose a lock that comes with a frame mount so it won't interfere with your ride.
Conclusion: Gear Up for the Ultimate E-Bike Experience
The e-bike lifestyle is all about freedom, efficiency, and fun. By investing in these 5 best e-bike accessories, you’re not just buying gear—you’re investing in your safety, comfort, and the pure joy of the ride. Don't wait until you're halfway through a long ride to regret not being prepared.
Explore our collection of premium Electric Bike Gear & Accessories today, pack your Kingbull e-bike backpack, and enjoy the open road with total peace of mind!
E-Bike Accessories FAQ
Q1: What are the most important safety accessories for an electric bike?
A1: The most critical electric bike safety gear includes a certified e-bike helmet, high-visibility LED lights (front and rear), a loud bike horn or bell, and a high-security lock to protect your investment.
Q2: Can I use regular bicycle accessories on an e-bike?
A2: While accessories like water bottle cages and phone mounts are universal, some gear—like helmets, tires, and locks—should be specifically rated for e-bikes due to the higher speeds and heavier weight of electric bicycles.
Q3: How do I choose the best lock for my electric bike?
A3: To secure an expensive e-bike, look for heavy-duty U-locks or folding locks with a high security rating. Using two different types of locks simultaneously is the best way to deter thieves.
Read more
Tips & Cycling Knowledge
Do You Need Insurance for Your E-Bike in the U.S.? A Complete Guide
Electric bikes (e-bikes) are booming in popularity across the U.S. — from daily commuters in big cities to weekend riders exploring trails. But while most people think about range, speed, or motor power when buying an e-bike, one important question often gets overlooked: Do I need insurance for my e-bike?
The answer depends on where you live, how you ride, and the type of e-bike you own. Let’s break it down.
Why Consider Insurance for Your E-Bike?
Theft is common. E-bikes are valuable and attractive to thieves. A stolen e-bike can mean a big financial loss.
Accidents happen. If you accidentally collide with a pedestrian or vehicle, you could face liability costs.
Repairs can be costly. Batteries, motors, and frames aren’t cheap to replace if damaged.
Peace of mind. Insurance can make riding stress-free, especially for daily commuters.
Types of Insurance That May Cover E-Bikes
1. Homeowners or Renters Insurance
Often covers theft of personal property, including e-bikes, if stolen from your home or garage.
Usually does not cover accidents, liability, or damage while riding.
Important: Some policies exclude e-bikes with motors. Always confirm with your insurance provider.
2. Specialized E-Bike Insurance
Providers like Velosurance, Spoke Insurance, or Markel Insurance offer dedicated e-bike coverage. These typically include:
Theft (at home or on the road)
Collision or crash damage
Liability if you injure someone or damage property
Medical payments for injuries
Roadside assistance in some cases
👉 Best for frequent riders, commuters, or anyone with a high-value e-bike.
3. Personal Liability or Umbrella Policies
Protects you if you cause injury or damage while riding.
Often used to supplement other coverage.
4. Health Insurance
Covers your own medical costs if you get hurt in an accident.
Does not cover bike repairs or damage to others.
5. Motorcycle/Moped Insurance (in Some States)
If your e-bike is faster or more powerful (class 3 or modified), your state might classify it as a moped.
In this case, you may be legally required to carry insurance similar to motorcycle coverage.
Which Insurance Is Right for You?
Casual riders with low-speed e-bikes (Class 1 or 2):Homeowners/renters + health insurance may be enough.
Daily commuters or higher-value e-bike owners:Specialized e-bike insurance is worth it.
High-speed e-bike riders (Class 3, 28 mph):Check your state laws — you may need motorcycle-style coverage.
Final Tips Before You Ride
✅ Always lock your e-bike with a high-quality lock — insurance won’t stop theft but can reduce the financial hit.✅ Keep receipts, photos, and serial numbers — this makes claims easier.✅ Check your state’s e-bike classification laws before choosing coverage.
Bottom Line
While not legally required in most states, insurance for your e-bike is a smart investment if you ride frequently, commute daily, or own a higher-value model. The right policy can protect you from theft, costly repairs, and liability — giving you confidence every time you hit the road.
Read more
Tips & Cycling Knowledge
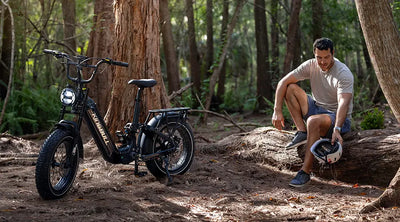
E-Bike Camping Guide: Your Green Outdoor Adventure Awaits
Summer breeze gently blowing, sunshine just right – perfect weather for a spontaneous camping trip! If you're considering embarking on a green outdoor adventure with your electric bike, this guide is exactly what you need.
Packing camping gear
E-Bike Equipment: Spare batteries, charger, basic repair tools, panniers
Camping Gear: Lightweight tent, sleeping bag, portable stove, lighting
E-bike camping requires an even smarter packing strategy. Every extra item adds difficulty to your ride and drains more battery power. Especially for overnight camping trips, traveling light is essential.
Route Planning Essentials
Range Calculation
Plan daily riding distances considering:
Battery capacity and actual range
Terrain elevation and wind effects
Load impact on range (typically reduces 20-30%)
Charging point distribution
Campsite Selection
Find campsites with electrical outlets
Consider sunlight conditions for solar charging
Ensure safe storage for your e-bike
Safety Considerations
Riding Safety
Wear helmet and reflective gear
Install front and rear lights for visibility
Carry first aid kit and emergency contacts
Inform others of your travel plans
Equipment Security
Use high-quality locks, park bike near tent at night
Waterproof battery protection
Regularly check bolt tightness
Charging Strategy
Multiple Charging Options
Campsite Charging: Choose official campsites with power outlets
Solar Charging: Carry portable solar panels
Power Banks: Large capacity power banks for emergency backup
En-route Charging: Coffee shops, gas stations, and public venues
Eco-Friendly Camping
Follow "Leave No Trace" principles
Use eco-friendly toiletries
Respect wildlife and vegetation
Choose sustainable camping gear
Practical Tips
Test ride with gear before departure
Prepare detailed emergency contact list
Learn basic bike maintenance skills
Monitor weather forecasts and prepare accordingly
Join e-bike camping communities to share experience
E-bike camping offers a revolutionary outdoor experience, allowing us to explore nature in a more eco-friendly and healthy way. With proper preparation and planning, you'll enjoy an unforgettable green adventure!
At Kingbull Bikes, we're passionate about helping you discover the freedom of electric cycling. Our reliable e-bikes are designed to handle both urban commutes and outdoor adventures, making them perfect companions for your camping journeys. Ready to start your green adventure? Explore our collection and find the perfect e-bike for your next outdoor expedition!
Read more

Tips & Cycling Knowledge
California Summer Cycling Guide: 5 Scenic Routes You’ll Want to Ride
When summer arrives, California transforms into a cyclist’s paradise. From coastal highways to mountain valleys, from lush city parks to iconic national parks, the Golden State offers a little something for every kind of rider. Whether you're a weekend cruiser or a long-distance adventurer, there's a trail out there waiting for you.
Here are five handpicked summer cycling routes—each one packed with views, fresh air, and the kind of freedom only a good ride can bring:
🚴 1. Golden Gate Bridge to Sausalito
A true classic. Start from San Francisco, ride across the Golden Gate Bridge with sweeping views of the Bay, and end your journey in the charming town of Sausalito. You can even take a ferry back for a relaxing finish to your day.
Route Highlights: Ocean breeze, stunning views, great for city explorers and casual riders.
🌲 2. Yosemite Valley Bike Path
Ride through towering granite cliffs, under waterfalls, and along peaceful meadows inside Yosemite National Park. Dedicated bike paths keep you away from heavy traffic and deep in nature. Best enjoyed early in the morning or around sunset for quieter, cooler conditions.
Route Highlights: Fresh air, immersive natural beauty—perfect for those looking to slow down and disconnect.
🏖️ 3. Santa Barbara Coastal Route
Cycle along Cabrillo Boulevard with the Pacific Ocean on one side and palm-lined streets and Spanish-style buildings on the other. It’s a mellow, feel-good ride. Bonus: the sunsets here are unforgettable.
Route Highlights: Relaxed pace, postcard views—great for beginners or anyone craving a chill ride.
🌄 4. Griffith Park Loop, Los Angeles
Looking for nature without leaving the city? Griffith Park offers just that. The route includes scenic roads, a few solid climbs, and views of the Hollywood sign. Ride up to the Griffith Observatory for a real payoff.
Route Highlights: Urban meets wilderness; a bit challenging, but totally worth it.
🌅 5. Bayshore Bikeway, San Diego
This loop route is ideal for a full-day adventure. Cruise past Coronado Island and along the San Diego waterfront on mostly dedicated bike paths. Flat terrain makes for easy riding, with plenty of scenic spots to stop and enjoy.
Route Highlights: Smooth, scenic, and versatile—perfect for an all-day cruise.
✅ Tips to Make Your Summer Ride More Enjoyable:
Ride early or late to avoid the midday heat.
Don’t forget sun protection—a good pair of sunglasses, sunscreen, and breathable clothing go a long way.
Stay hydrated and bring light snacks for longer routes.
Consider an electric bike, especially for routes with hills or in hot weather. A good e-bike can help you ride farther, climb easier, and enjoy the journey without overexerting.
One Last Thought
Riding isn’t just about reaching a destination—it’s about the moments in between. The unexpected turns, the wind in your face, the view that makes you stop and just breathe. If you’re looking for a little more freedom this summer, maybe it’s time to grab your ebike and explore what California has waiting for you.
Read more
Tips & Cycling Knowledge
How to Change a Class 2 E-Bike to Class 3: Unlock Your Kingbull's Speed Potential
Welcome, e-bike enthusiasts! Ever wondered how to fine-tune your ride for the perfect balance of effort and speed? One of the most impactful adjustments you can make is unlocking your e-bike's speed limit.
By understanding the differences between Class 2 vs. Class 3 e-bikes, you can tailor your experience to truly savor every journey—whether you're looking for a leisurely cruise or a more exhilarating commute. This guide will walk you through the precise P-setting adjustment to boost your performance safely.
Note: Before you perform this e-bike speed hack, always stay mindful of local laws and regulations to ensure a safe and responsible ride.
Class 2 vs. Class 3: What’s the Difference?
Most Kingbull electric bikes come factory-set as Class 2, meaning they have a throttle and a maximum assisted speed of 20 mph. By upgrading to Class 3, you unlock pedal assist (PAS) up to 28 mph, making it ideal for keeping up with city traffic or shortening your commute.
Step-by-Step Guide: How to Adjust the Pedal-Assist Speed Limit
Ready to unleash the full potential of your electric bike? Follow these steps to access the ebike display settings and unlock Class 3 performance.
Step 1: Enter the Settings (P-Gear) Menu
With your Kingbull display screen powered on, press and hold the "+" and "-" buttons simultaneously for about 2-3 seconds. This will take you into the P-setting interface.
Step 2: Navigate to P08 (Speed Limit Setting)
The P08 menu is the specific parameter that controls the maximum speed of your motor. Briefly press the Power button repeatedly until "P08" appears on the screen.
Step 3: Enter the Unlock Password
For security and to prevent accidental changes, the P08 setting is password-protected.
Short-press the "+" button to enter the password input screen.
The default password is 1010.
Use the "+" button to select the number and the Power button to confirm and move to the next digit.
After entering 1, 0, 1, 0, press the power button one final time to verify.
Step 4: Increase Your Speed Limit to 28 MPH
Once the password is accepted, you will see the current speed limit (usually 32km/h or 20mph). Use the "+" button to increase the value. To achieve Class 3 status, set the limit to 45km/h (equivalent to 28 mph).
Step 5: Save and Exit
To finalize your new ebike speed settings, press and hold the "+" and "-" buttons simultaneously again until the display returns to the main screen. Your changes are now saved!
Important Considerations for Your Upgraded Ride
1. Throttle-Only Mode vs. Pedal Assist
Please note that even after unlocking Class 3, the throttle-only mode remains fixed at a maximum of 20 mph to comply with safety standards. The increased 28 mph speed only applies to Pedal Assist (PAS) levels.
2. Battery Range & Motor Wear
Higher speeds require more power. Increasing your speed to 28 mph may slightly reduce your ebike battery range. We recommend monitoring your battery levels during your first few Class 3 rides.
3. Safety First
Always prioritize your safety. At 28 mph, we highly recommend wearing a high-quality helmet and checking your tire pressure and brakes regularly to handle the increased velocity.
Conclusion: Tailor Your Kingbull Experience
We believe that adjusting your e-bike should be straightforward, leading to a ride that truly feels like your own. Whether you are tackling rugged trails or navigating cityscapes, unlocking your speed gives you the versatility you need.
Still have questions? Watch our [YouTube Tutorial] for a visual walkthrough of these steps, or contact our support team!
Happy riding, and wishing you countless thrilling and safe journeys on your Kingbull electric bike! 🚴🔋
Read more