


Explore News

Tips & Cycling Knowledge
Cadence vs Torque Sensor: What’s the Difference and Which E-Bike Fits You Best?
When shopping for an electric bike, one term you’ll often come across is “pedal assist.” But did you know that there are two main types of pedal assist sensors that can dramatically change the way your ride feels?
In this guide, we’ll break down the Cadence Sensor vs. Torque Sensor debate—explaining what they are, how they feel on the road, and which one suits your lifestyle best. We’ll also show how these technologies come to life in KINGBULL’s current e-bike lineup, including our latest models for commuting and off-road adventures.
What Is a Cadence Sensor (a.k.a. Speed Sensor)?
A cadence sensor is the most common type of pedal assist technology. It detects when you're pedaling and sends a signal to the motor to start assisting. It doesn’t care how hard you’re pedaling—only that the pedals are in motion.
🔧 How It Works:
RPM Measurement: It measures your pedal rotation speed.
Engagement: When you start pedaling, the motor kicks in after a brief rotation delay.
Consistent Power: The level of motor assistance is determined by the PAS (Pedal Assist System) level you select on your display, not by your physical effort.
🚲 The Riding Experience:
Predictable and consistent: Once the motor engages, it provides a steady boost.
Low-Effort Cruising: Ideal for riders who want the motor to do most of the heavy lifting.
The "Scooter" Feel: It feels more like a traditional bike with an automatic "push."
✅ Best For:
Casual riders looking for leisure.
Seniors who need consistent support without straining.
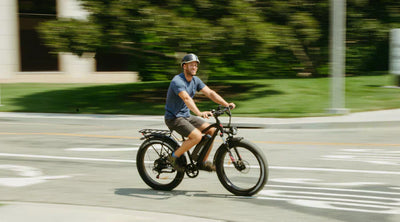
Commuters who want an easy, sweat-free ride to the office.
📍 KINGBULL Models with Cadence Sensors:
Literider 2.0: Lightweight, foldable, and super easy to ride—perfect for city commuters and urban storage.
Hunter 2.0: Rugged and ready for adventure, this off-road beast gives you the extra power without needing to pedal hard on tough trails.
What Is a Torque Sensor?
A torque sensor is a more advanced technology that takes your pedal pressure into account. The harder you push the pedals, the more power the motor provides. It’s a dynamic system that creates a more natural, intuitive riding experience.
🔧 How It Works:
Real-Time Force Sensing: It measures the actual torque (force) you apply to the pedals.
Dynamic Output: The motor output adjusts instantly to your effort.
Intuitive Support: It’s like having a smart riding partner who knows exactly when you need a boost for a hill.
🚲 The Riding Experience:
Smooth and Responsive: There is virtually no delay; the bike feels like an extension of your own legs.
Bionic Boost: Feels like riding a traditional bicycle, but with superhuman strength.
Better Control: Enhanced balance and safety, especially when navigating stop-and-go traffic or technical inclines.
✅ Best For:
Fitness riders who still want to feel the burn.
Riders tackling varied terrain or steep hills where precision matters.
Performance enthusiasts seeking the most premium, natural ride feel.
📍 KINGBULL Models with Torque Sensors:
Verve: A compact, foldable e-bike with a premium feel—responsive, agile, and incredibly commuter-friendly.
Jumper GO: Our high-performance e-bike for riders who want speed, control, and a high-end experience. Now available for pre-order with a $600 Early Bird discount!
🔍 Cadence vs Torque: A Side-by-Side Comparison
Feature
Cadence Sensor
Torque Sensor
Motor Response
On/Off style (Speed-based)
Proportional to pedal force
Ride Feel
More like a scooter/moped
Natural, like a traditional bike
Best For
Easy riding, commuting
Fitness, dynamic terrain, hills
Energy Efficiency
Can drain battery faster
More efficient, conserves power
KINGBULL Models
Literider 2.0, Hunter 2.0
Verve, Jumper GO
Frequently Asked Questions (FAQ)
1. Does a torque sensor make an e-bike faster than a cadence sensor?
Not necessarily. Top speed is usually governed by the motor’s watt rating and local regulations. However, a torque sensor feels faster "off the line" because it responds instantly to your foot pressure, whereas a cadence sensor requires a partial pedal rotation to kick in.
2. Which sensor type is better for battery life?
Generally, torque sensors are more energy-efficient. Because the motor only provides high power when you are working hard, it doesn't "waste" energy when you are pedaling lightly. Cadence sensors provide a set amount of power regardless of effort, which can deplete the battery faster if used on high assist levels.
3. Can I climb hills with a cadence sensor?
Yes! E-bikes like the KINGBULL Hunter 2.0 are excellent hill climbers. With a cadence sensor, you simply need to keep the pedals moving, and the motor will provide the full power of your selected assist level to help you reach the top without exhaustion.
Final Thoughts: So, Which One Is Right for You?
If you want a reliable, low-effort ride—something that gets you from A to B with minimal exertion—go with a cadence sensor model like the Literider 2.0 or Hunter 2.0.
But if you crave a natural, responsive ride and want to feel in sync with your bike, the Verve or Jumper GO with torque sensors will be your perfect match.
Whether you're cruising through the city or climbing mountain trails, knowing the difference between cadence and torque sensors ensures you choose the bike that fits your rhythm.
Ready to ride smarter? 👉 [Explore the KINGBULL E-bike Collection Now]
Read more

Tips & Cycling Knowledge
Kingbull Ebike Battery Guide: What Do the 3 Green and 1 Red Lights Mean?
Kingbull Ebike Battery Indicator Guide: Understanding Your Power Level
At KINGBULL, we want you to feel confident and informed when it comes to taking care of your electric bike—especially the ebike battery, which is the heart of your ride. Proper battery maintenance is key to extending the range and lifespan of your electric bicycle.
One common question our riders ask is: “Why does my ebike battery still show one red light after it’s fully charged?”
Let’s clear that up for you so you can get back to enjoying your ebike adventures!
Decoding the Lights: 3 Green + 1 Red = Fully Charged
When your Kingbull ebike battery indicator lights up with three green lights and one red light, it means your battery is at peak capacity (80%–100%) and ready for the road. This is a standard design for many high-quality electric bike batteries and is not a sign of a malfunction.
Here’s a quick breakdown of what the indicator lights mean for your ebike power level:
Light Pattern
Battery Power Level
Status
✅ 3 green + 1 red
80%–100%
Fully Charged & Ready
✅ 2 green + 1 red
60%–80%
Optimal Riding Range
✅ 1 green + 1 red
40%–60%
Mid-Level Power
❗ Only red
20%–40%
Recharge Your Ebike Soon
So, next time you unplug your ebike charger and see that single red light—relax! That’s simply how the KINGBULL battery system signals it is fully energized.
How to Properly Check Your Ebike Battery Status
To get the most accurate reading of your electric bike's remaining charge, follow these steps:
Unplug the charger from the wall outlet.
Disconnect the charger from the ebike battery port.
Press the indicator button to check the lights.
Pro Tip: Checking the battery while it is still plugged in may give an inaccurate reading.
Smart Ebike Battery Charging & Maintenance Tips
To maximize your ebike battery life and ensure long-term performance, follow these expert-approved habits:
Flexible Charging: You can charge the battery while it's mounted on the electric bike or remove it for indoor charging—whichever is more convenient.
Top It Off: There is no need to wait until the battery is empty. You can recharge your lithium-ion ebike battery after every ride.
Temperature Control: Avoid charging in extreme temperatures. The ideal range for ebike battery health is between 14°F and 104°F (-10°C to 40°C).
No Memory Effect: Modern Kingbull ebike batteries do not suffer from "memory effect," so feel free to recharge even after short trips.
Ebike Charging Safety First!
Your safety is our top priority. Although KINGBULL electric bikes use advanced battery management systems (BMS), you should stop charging and contact us immediately if you notice:
Charging takes significantly longer than the standard 5-7 hours.
Any unusual smoke, odor, or leaking fluid.
The ebike battery or charger becomes excessively hot to the touch.
Understanding the Ebike Charger: Sounds and Lights
While charging your Kingbull battery, you might hear a faint humming sound. This is normal behavior for an ebike charger as it converts voltage to power your ride.
Charger Indicator Meanings:
🔴 Steady Red Light: Charging is in progress.
🟢 Steady Green Light: Charging is complete.
The smart charger will automatically stop drawing power once the ebike battery is full, preventing overcharging.
Final Checklist Before You Ride
Before heading out on your next pedal-assist journey, ensure your battery is securely locked:
Hold the battery firmly with one hand.
Turn the release switch to the "Lock" position.
Pull up slightly to ensure it's clicked in. This prevents the battery from falling out during high-speed ebike rides and deters theft.
Conclusion
We hope this guide makes your ebike battery care easier. Proper charging ensures that your Kingbull electric bike stays reliable for years to come.
Have more questions about your ebike? Our KINGBULL support team is always here to help.
Stay charged. Stay safe. Ride KINGBULL.
Read more
Tips & Cycling Knowledge
Say Goodbye to Post-Ride Butt Pain: Here's How!
Hey there, fellow cycling enthusiasts! We’ve all been there—you finish an amazing ride, but the next day your butt feels like it went to war. Don’t worry—we’re here to help. In this post, we’ll break down why it happens, how to prevent it, and what to do if you're already sore. Let’s ride smart and pain-free!
The Science of Butt Pain
When you’re on your bike, your sit bones carry most of your weight. Over time, that pressure can restrict blood flow and irritate soft tissues. Add in the constant friction between your skin and the saddle—and boom—pain, soreness, and even inflammation.
Pre-Ride Prevention
1. Choose the Right Saddle
Fit matters: Measure your sit bones to find the right width.
Riding style counts: Narrow saddles = speed and flexibility. Wide saddles = comfort and long distances.
Ventilation helps: Saddles with airflow (like the Hunter 2.0 model) keep you dry and cool.
Material matters: Gel = shock absorption. Memory foam = custom comfort.
2. Check Your Handlebar Height
Too low? You lean forward and overload your hips.
Too high? Your posture suffers.Find the sweet spot for even weight distribution.
3. Adjust Saddle Height
Small changes can make a big difference. Adjust to your comfort during the ride and based on terrain.
Wear the Right Clothing
- Moisture-Wicking Tops
Skip the cotton! Choose polyester or nylon blends that dry fast and keep you comfortable.
- Cycling Shorts, Trousers, or Capris
Padded shorts are your best friend. For cooler rides, go with breathable, wind-resistant trousers.
- Proper Sports Underwear
Ladies: supportive sports bras.Gents: sweat-wicking base layers.Everyone wins with breathable, stretchy materials.
- Wind-Proof Jackets & Breathable Socks
Dress for the weather and protect your skin. Don’t forget reflective details for night rides!
Prepare Your Body
Warm-Up Exercises: Get those muscles moving before hitting the road.
Core Training: A stronger core = better posture = less butt pain.
During the Ride
- Switch Up Your Sitting Position
Stand up every 15–20 minutes or shift side to side to reduce pressure points.
- Pedal Smart
Aim for a smooth cadence of 80–100 RPM. Less impact, more efficiency.
- Plan Your Route
Schedule short breaks every 30–60 minutes. Use that time to stretch and let your muscles recover.
After the Ride: Recovery Tips
- Move Around
Don’t just crash on the couch. A short walk helps circulation and speeds up recovery.
- Try Heat or Cold Therapy
Heat: Use a warm compress to relax tight muscles.
Cold: Ice packs reduce swelling and numb pain (especially in the first 48 hours).
- Pain Relief
Over-the-counter meds like ibuprofen can help, as can anti-inflammatory creams or gels.
Bonus Tips for a Happier Ride
Stay Clean: Shower ASAP after riding. Keep your skin dry to prevent irritation.
Inspect Your Gear Regularly:
Saddle: Any cracks or deformities? Replace it!
Shorts: Is the padding worn out? Time for new ones.
Tires, brakes, gears: Always check before hitting the road.
Final Thoughts
The freedom of the ride is one of life’s simple joys—but it doesn’t have to come with discomfort. With the right gear, smart habits, and proper recovery, you can say goodbye to post-ride butt pain for good.
So check your setup, dress for the ride, and keep pedaling with joy. The open road is calling!
Read more
Tips & Cycling Knowledge
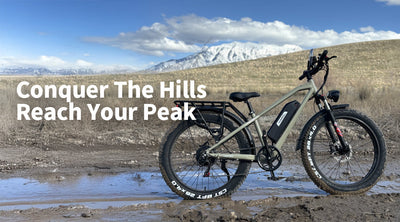
Conquer the Hill, Reach Your Peak——Tips for Climbing Hills on E-Bike
Riding an e-bike is amusing, but most e-bike riders are not satisfied with just riding on the flat and broadened land. They can be fond of crossing through the jungles and climbing up the hills at a thrilling speed. That's what we call "explore and challenge". While e-bikes make climbing easier, there’s still room to boost your efficiency and enjoyment. Read this passage for essential techniques for every ascent!
Gear up to Go up:
Shift Early
Don’t wait until you’re struggling on the hill to shift gears, as this can put unnecessary strain on both your legs and the e-bike’s motor. Instead, anticipate the incline ahead and shift to a lower gear before you start climbing. By doing this, you’ll maintain a smooth and steady cadence, making the climb feel more manageable and efficient. Proper gear shifting not only reduces physical effort but also ensures the motor operates optimally, extending its lifespan and conserving battery power. Planning ahead is the key to a seamless and enjoyable uphill ride!
High Torque Motor
If you’re shopping for an e-bike or considering an upgrade, prioritize one with a high-torque motor. Torque is the force that provides the power needed to tackle steep hills, making climbs feel effortless and smooth. A high-torque motor ensures consistent performance, even on challenging inclines, and reduces the strain on both the rider and the bike. Whether you’re a daily commuter or an adventure seeker, investing in a high-torque motor will transform your uphill riding experience, giving you the confidence to conquer any hill with ease.
Keep the Momentum:
Continuous Pedaling
Continuous pedaling creates a steady flow of power, making the climb smoother and preventing sudden stops or stalls that can disrupt your momentum. By maintaining a rhythmic cadence, you’ll also reduce strain on both the motor and your legs, making the uphill ride feel more manageable. This approach not only enhances efficiency but also extends your battery life, allowing you to tackle longer climbs with confidence and ease.
Minimize Braking
Avoid unnecessary braking while climbing, as it disrupts your momentum and forces you to expend extra energy to regain speed. Each time you brake, you lose the forward motion that helps carry you up the hill, making the climb feel more strenuous. Instead, focus on maintaining a steady and consistent pace throughout the ascent. By doing so, you’ll conserve energy, reduce strain on the motor, and make the climb more efficient. Planning your approach and anticipating the terrain ahead will help you keep a smooth rhythm, ensuring a more enjoyable and effortless uphill ride.
Regulate Your Position:
Lean Forward
Shift your weight slightly forward while climbing to keep the front wheel grounded and improve traction, especially on steeper slopes. This adjustment ensures better grip and stability, preventing the front wheel from lifting and helping you maintain control. Leaning forward also distributes your weight more evenly, enhancing balance and making it easier to navigate challenging inclines. By adopting this position, you’ll reduce the risk of slipping or losing momentum, allowing you to climb more efficiently and confidently. Proper weight distribution is a simple yet effective way to conquer hills with greater ease and safety.
Stay Relaxed
Keep your grip on the handlebars firm but not tense, and consciously relax your shoulders to avoid unnecessary strain. Tension in your upper body wastes energy and can lead to fatigue, making the climb feel more difficult than it needs to be. By staying loose and maintaining a relaxed posture, you’ll conserve strength and endurance, allowing you to tackle the hill more efficiently. A calm and controlled approach not only improves your riding experience but also helps you maintain better balance and control throughout the ascent.
Smart Throttle Use:
Assist But Don't Rely
Use the throttle to give yourself a boost when needed, such as when starting on a steep incline or when you need a quick burst of power. However, avoid relying on it entirely, as this can drain your battery quickly and reduce your overall riding range. Instead, combine throttle assistance with consistent pedaling to maximize efficiency. This balanced approach not only helps conserve battery life but also ensures a smoother and more controlled ride. By working in harmony with your e-bike’s motor, you’ll enjoy longer rides and a more enjoyable climbing experience.
Adjust Power
This setting provides the extra boost you need to tackle steep inclines with ease, reducing the physical effort required from your legs. By increasing the motor’s support, you can maintain a comfortable pace and conserve your energy for longer rides. However, remember to switch back to a lower assistance level on flat terrain to maximize battery efficiency. Using power modes strategically ensures a smoother, more enjoyable ride, whether you’re conquering hills or cruising on flat roads.
Final Thoughts
Climbing hills on an e-bike doesn’t have to be a struggle. By shifting early, maintaining momentum, perfecting your position, and using the throttle smartly, you can make uphill rides feel almost effortless. Remember, it’s all about working with your e-bike’s technology to get the most out of your ride. Do you have any good suggestions for riding bike on hills? Come and share your opinions with us!
Read more

Tips & Cycling Knowledge
How Often Should You Replace Your Electric Bike Tires? A Key to Safe Riding
Electric bikes (e-bikes) have become an increasingly popular and efficient means of transportation due to their convenience and eco-friendly nature. However, many riders tend to overlook the maintenance and replacement of e-bike tires, even though they are a critical component for safety and performance. So, how often should you replace your e-bike tires? In this post, we’ll explore tire replacement guidelines, the factors affecting tire lifespan, and essential maintenance tips to ensure your safety while riding.
Factors That Affect E-Bike Tire Lifespan
The lifespan of your e-bike tires depends on several factors, including the following:
Riding Frequency and Terrain: Frequent riding or riding on rough terrains accelerates tire wear. Tires wear out much faster when used on sandy, muddy, or mountain roads.
Tire Quality: Tires from different brands and models vary in quality, durability, and lifespan. Choosing high-quality tires might involve a higher upfront cost but will reduce the need for frequent replacements.
Tire Pressure: Maintaining the right tire pressure is crucial. Both underinflation and overinflation can cause tires to wear out more quickly and increase the risk of blowouts.
Riding Habits: Hard braking, sharp turns, and other aggressive riding habits can also accelerate tire wear.
Environmental Factors: Prolonged exposure to sunlight and rain can affect the rubber, causing it to degrade and crack over time.
How to Know When Your E-Bike Tires Need Replacing
In addition to tracking the age and mileage of your tires, you can assess whether your tires need replacing by checking the following:
Tread Wear: Inspect the tread pattern. If the tread has worn down to the wear markers (usually 1.6mm or less), it’s time to replace the tire.
Aging: Check for visible cracks, bulges, or hardening on the sidewalls of the tire. These are signs of aging, and a tire in this condition should be replaced to avoid safety risks.
Damage: If your tire is punctured, cut, or frequently losing air, or if you notice it pulling to one side, it’s time for a replacement.
Recommended Tire Replacement Cycle for E-Bikes
Depending on how and where you ride, the recommended replacement cycle for your e-bike tires can vary. Here’s a general guideline:
Regular Use: If you mostly ride on city streets with good riding habits, it’s recommended to check your tires every 2-3 years for wear and aging. If the tread is noticeably worn or the tire is showing signs of aging, replace it.
Frequent Use or Harsh Terrain: If you ride frequently or on rough terrain, such as mountain trails or sandy paths, consider replacing your tires every year or two. Harsh conditions accelerate wear and tear.
Routine Inspections: Every six months, check your tire pressure, tread wear, and sidewall condition. Clean any debris, such as stones or nails, from the tread to prevent punctures.
Daily Tire Maintenance Tips
To extend the lifespan of your e-bike tires, proper care and maintenance are essential. Here are some maintenance tips:
Maintain Proper Tire Pressure: Check your tire pressure regularly and make sure it falls within the manufacturer’s recommended range. Both overinflation and underinflation can accelerate tire wear.
Avoid Aggressive Riding: Minimize hard braking and sharp turns to reduce the stress on your tires and prolong their lifespan.
Avoid Harsh Terrains: While some high-quality tires can handle rough terrain, prolonged use on dirt, sand, or muddy surfaces will wear them down faster. Avoid riding on these surfaces when possible.
Regular Cleaning: Periodically clean your tires, removing debris like stones, glass, or nails that can damage the tire and cause punctures.
CST 4.0 Fat Tires: Features and Replacement Mileage Guidelines
For riders who prefer to take on more challenging terrains, CST 4.0 Fat Tires offer a great option. Kingbull electric bikes are powered by the well-known brand CST 4.0 fat tires, CST fat tires have become the choice of American consumers because of their reliable performance. With their wider tread, these tires provide excellent grip and stability on soft or uneven surfaces like sand, snow, and mud. The lifespan of these tires can vary depending on riding conditions, riding habits, and the environment. Here’s an approximate replacement mileage for CST 4.0 Fat Tires:
Ideal Conditions (flat asphalt, good riding habits): 2,500-3,750 miles (4,000-6,000 km)
General Conditions (city roads, occasional rough terrain): 1,800-3,100 miles (3,000-5,000 km)
Harsh Conditions (mountain, sand, frequent off-road use): 1,200-2,500 miles (2,000-4,000 km)
Keep in mind that these are just rough estimates. The actual replacement timeline should depend on factors such as tread wear, aging, and how you ride. Regular inspections are key to maintaining safety.
Conclusion
Your e-bike tires are a crucial element in ensuring safe and comfortable riding. Regular checks and timely replacements are necessary to keep your bike performing at its best and to reduce the risk of accidents. By following the guidelines above, you’ll be able to keep track of when your tires need replacing and maintain their longevity.
IRemember to adjust and replace your e-bike tires according to the actual situation, and always keep an eye on the wear and aging of your tires. Safe riding starts with quality tires!
Read more
Tips & Cycling Knowledge
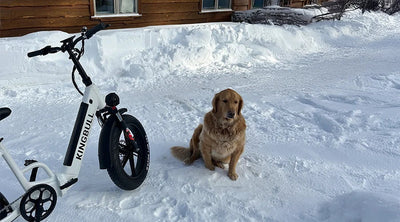
Who Let the Dogs Out-How to Ride with Your Furry Friends?
While we are rushing out for fresh air on our e-bike, our furry puppies are also eager to go out with us, running freely on the grassland and exploring the melting town, especially in this warm and blooming season. It is a good idea to ride along with your lovely pet dogs, but how can we and our furry friends enjoy the leisure outdoor time together? Here are some tips for you.
Train Your Dog First & Start Slow
Dogs aren’t born knowing how to jog beside an e-bike—patience is key! Begin with short, slow rides to let your dog adjust to the rhythm of running alongside you.
Warm up walk first
Before hopping on your e-bike, begin with a short warm-up walk. Attach your dog’s leash and walk beside you, keeping it rolled slowly by your side. This helps your dog associate the bike with calm, positive experiences while learning to stay focused on your movements. Use a relaxed leash to avoid tension, and let them sniff or explore briefly to ease nerves. Reward steady pacing with treats or praise, reinforcing that the bike isn’t a threat. This simple ritual builds trust and familiarity, ensuring smoother rides ahead!
Gradual Acceleration
Begin pedaling at a slow, walking pace to match your dog’s natural rhythm. As they grow comfortable running alongside the bike, gradually increase your speed in small increments. Watch for signs of confidence, like steady pacing and relaxed body language, and avoid sudden bursts of speed. This step-by-step approach helps your dog build stamina and trust, ensuring a safe and enjoyable biking experience for both of you.
Pick The Right Gear
Safety gear isn’t just for humans! The right equipment keeps your dog secure and comfortable during rides.
Bike Attachments
Choosing the right bike attachment is essential for a safe and enjoyable ride. For medium to large dogs, opt for a hands-free leash, such as a spring-loaded “bike tow leash,” which absorbs shock and keeps your dog at a safe distance from the wheels. For smaller dogs, consider a secure front/back basket or trailer designed for pets, ensuring they’re comfortably seated and protected. Always test the attachment at home first to ensure your dog feels safe and the equipment is stable before hitting the road
Hydration on the Go
Hydration is crucial during biking adventures. Carry a lightweight, collapsible water bowl and a bottle of fresh water for your dog. Offer frequent breaks, particularly on warm days, to prevent overheating. Watch for signs of dehydration, like excessive panting, and let your dog drink small amounts regularly. Staying hydrated keeps your pup energized and ready for the next leg of the journey!
Know Your Dog’s Limit
Not every dog is built for marathon e-biking sessions. Respect their physical and mental limits to keep adventures enjoyable.
Watch for fatigue
Always monitor your dog for signs of fatigue during your ride. Heavy panting, slowing down, lagging behind, or suddenly lying down are clear indicators that it’s time to stop and rest. Overexertion can lead to heatstroke or injury, so take breaks in shaded areas and offer water. Pay attention to your dog’s energy levels and adjust the ride length or intensity to ensure they stay happy, healthy, and ready for more adventures.
Awareness of Weather
Weather awareness is critical when biking with your dog. Avoid riding in extreme heat or cold, as dogs are more vulnerable to temperature changes. In summer, opt for early mornings or evenings when it’s cooler, and stick to shaded trails to prevent overheating. In winter, protect their paws from icy surfaces. Always check the forecast and prioritize your dog’s comfort and safety to ensure a fun, stress-free adventure.
Conclusion
Cycling with your dog on e-bike isn’t just about exercise—it’s about teamwork, trust, and shared joy. By starting slow, using the right gear, and respecting your pup’s needs, you’ll turn every ride into a wagging-tail adventure. Kingbull bike is such a great fellow with you and your pet dogs, so grab that leash, pump those tires, and let the good times roll! Take some photos to reminisce these unforgettable moments and share your stories with us!
Read more