How To Troubleshoot An Electric Bike?
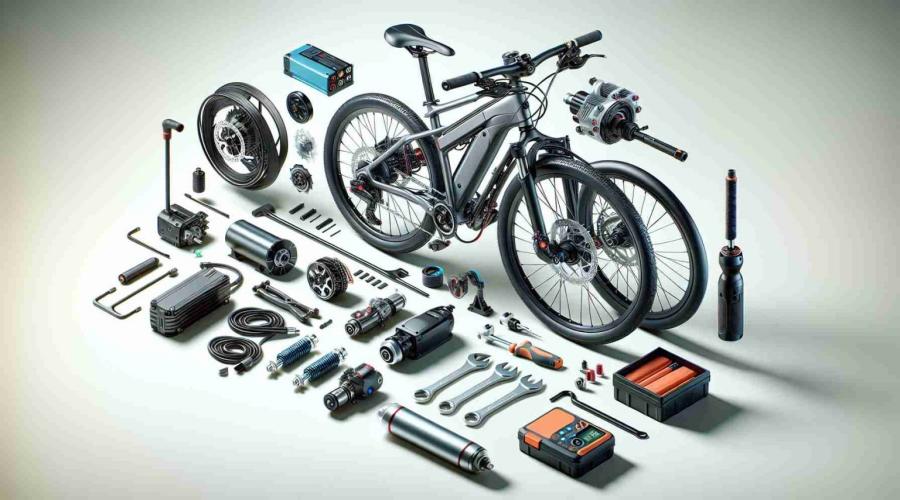
"Discover the secrets to maintaining your electric bike with our troubleshooting guide. From diagnosing power and battery issues to tackling electrical and mechanical problems, we'll walk you through step-by-step solutions. Save time and money while gaining a deeper understanding of your e-bike's inner workings for uninterrupted rides ahead."
The ability to troubleshoot an electric bike is a valuable skill for any e-bike owner. Mastering e-bike troubleshooting saves time, money, and hassle. Gain a deeper understanding of your bike's mechanics and make informed decisions when seeking help.
Keep reading to learn how to identify and solve electric bike problems step by step. With our guidance, keep your journey smooth and uninterrupted.
Understanding Common Electric Bike Issues
Despite their efficiency and enjoyment, electric bikes can encounter common technical issues. Below are these issues with their symptoms, causes, and potential solutions

Power and Battery Problems
1.Battery not charging or holding a charge. If your electric bike battery is not charging or holding a charge, check the battery connections to make sure they’re secure and free from corrosion. If everything appears to be in order, try charging the battery using a different charger or power source to rule out any faults with the charging equipment. If the battery still does not charge, you may need to inspect the battery cells for any signs of damage or wear.
2.Sudden power loss during rides. Experiencing a sudden power loss during an e-bike ride can be alarming, but there are a few steps you can take to address the issue. First, check the battery charge level, to ensure it hasn't depleted completely. If the battery charge is low, switch to a lower power assist mode or pedal without assistance to conserve the remaining power. If none of this helps, consider manually pedaling the bike to reach your destination. Then seek assistance from an e-bike technician to diagnose and resolve the power loss issue.
3.Inconsistent or weak motor assistance. If you're experiencing inconsistent or weak motor assistance on your electric bike, there are a few troubleshooting steps you can take to address the issue. First, check the battery charge level to ensure it's adequately charged. You should also examine the motor cables and connections to ensure they’re securely attached and free from damage or corrosion. If everything appears to be in order, review your e-bike's settings and make sure the power assist mode is properly adjusted to your desired level.
Electrical System and Wiring
1.Malfunctioning display or controls. The first thing to do when faced with a malfunctioning display or controls is to check the connections between the display/control unit and the wiring harness to make sure they’re secure. If the connections are intact, try resetting the display/control unit by turning off the bike and disconnecting the battery for a few minutes before reconnecting it. If the problem persists, check if the display/control unit has any error codes or error messages, as they can provide clues about the underlying issue.
2.Loose or damaged wiring connections. If you're experiencing loose or damaged wiring connections, carefully inspect the wiring connections, looking for any signs of loose or disconnected wires, frayed insulation, or damaged connectors. If you find any issues, gently reconnect or tighten the loose connections and secure them properly. In the case of damaged wiring, it's best to replace the affected sections with new wires of the appropriate gauge and insulation. If you're unsure about handling electrical repairs, seek help from a qualified technician or bike shop.
3.Issues with lights or other electrical components. When it comes to issues related to lights or other electrical components, it’s vital to start by checking the connections between the affected components and the main wiring harness to ensure they’re securely attached. If the connections are secure, inspect the components themselves for any signs of damage, such as loose bulbs or cracked casings. Replace any faulty bulbs or damaged components with compatible replacements. If the problem persists, check the fuse for the lighting system and replace it if necessary. It's also a good idea to test the electrical system using a multimeter to ensure the proper voltage is reaching the components.
Mechanical and Performance Issues
1.Braking problems or unusual noise. Braking problems or unusual noises can put a damper on your electric bike ride, but fear not! There are steps you can take to tackle these issues and get back to enjoying smooth, quiet rides. First, check the brake pads for wear and tear, ensuring they have sufficient thickness and are properly aligned with the brake discs. If necessary, replace the brake pads with new ones. Next, examine the brake cables for any signs of fraying or stretching, and adjust or replace them if needed. It's also crucial to inspect the brake calipers and discs for any damage or warping, as this can affect braking performance and create unwanted noise.
2.Shifting difficulties or chain slipping. If facing gear shifting difficulties or chain slipping, first check the cable tension to make sure it's properly adjusted. A simple tweak might be all it takes to restore seamless shifting. Next, inspect the derailleur and jockey wheels for any debris or signs of wear. Cleaning and lubricating these components can work wonders in improving shifting performance.
3.Unbalanced or wobbly wheels. Are your electric bike wheels feeling a bit wobbly or unbalanced? First things first, check the spoke tension to make sure they're properly tightened. A quick adjustment with a spoke wrench might be all it takes to straighten things out. Next, inspect the rims for any dents or damage that could be causing the wobbling. If you find any issues, it might be time to replace the rim or seek professional help. Don't forget to check the tire pressure to make sure it's at the recommended level for a firm grip on the road.
Troubleshooting Steps and Solutions

Preparing for Troubleshooting
1.Safety precautions and equipment needed. Before you start troubleshooting anything, it's essential to gear up and prioritize safety and make sure you have the right safety equipment on hand. This includes safety glasses, and gloves.Arm yourself with a toolkit containing essentials like screwdrivers, wrenches, pliers, and a multimeter to help you diagnose those mysteries lurking in your e-bike's electrical realm.
2.Familiarizing yourself with the bike's manual. The bike's manual is a valuable resource that holds the key to unlocking a deeper understanding of your electric bike. Take the time to read through it thoroughly, paying attention to sections that cover important topics such as operation, maintenance, troubleshooting, and safety guidelines.
Basic Checks and Inspections
1.Ensuring power source and connections. Start by verifying the battery's secure connection and full charge. Check for loose cables or corrosion on battery terminals, ensuring tight and clean connections. Next, inspect wiring between the battery, motor, and controller for secure, undamaged connections. Take time to check power switches and buttons for proper function and responsiveness. Additionally, watch for any visible wear or damage on power cables and replace them if needed.
2.Assessing battery health and charge levels. check for physical damage, swelling, or leaks. Use the bike's built-in battery indicator or a multimeter to measure voltage if not available. Compare readings to manufacturer specs and consider battery age, which can affect capacity.
3.Examining tires, brakes, and drivetrain components. Start by inspecting the tires for any signs of wear, cuts, or punctures. Make sure they’re properly inflated to the recommended pressure for a smooth and comfortable ride. Moving on to the brakes, check the brake pads for wear and replace them if they’re worn down. Test the brake levers to ensure they engage smoothly and provide sufficient stopping power.
Next, examine the drivetrain components, including the chain, cassette, and derailleurs. Look for signs of rust, dirt buildup, or stretched chain links. Clean and lubricate the chain regularly, and consider replacing it if it's excessively worn. Check the shifting performance, ensuring smooth and precise gear changes.
Troubleshooting Specific Issues
Step-by-step instructions for common problems.Following step-by-step instructions for common problems is a smart and efficient approach to troubleshooting your electric bike. These instructions are often provided by the manufacturer.
Electrical System Repairs and Wiring Fixes
1.Identifying and repairing loose or damaged connections. Loose or damaged connections can cause various issues, such as intermittent power loss, malfunctioning components, or unreliable performance. To identify loose connections, carefully inspect all wiring connections throughout the electrical system, paying close attention to plugs, terminals, and junctions. Look for any signs of looseness, corrosion, or frayed wires. Repairing loose connections involves securely reconnecting or tightening the affected components, ensuring a snug and reliable fit. For damaged connections, such as broken wires or connectors, consider replacing the damaged parts with new ones or using electrical tape or connectors to repair the damage.
2.Replacing faulty electrical components if necessary. If you encounter faulty electrical components during the troubleshooting process, it may be necessary to replace them. Faulty components can hinder the performance and reliability of your e-bike, affecting various aspects such as power delivery, control systems, or sensor functionality. When identifying a faulty component, carefully inspect it for visible damage, signs of wear, or any other indications of malfunction.
If the component is confirmed to be faulty and beyond repair, it's important to source a replacement part from the manufacturer or a trusted supplier. Follow the manufacturer's instructions or seek professional assistance if needed to ensure proper installation and compatibility.
Mechanical Repairs and Adjustments

Step-by-step instructions for basic repairs and adjustments
Performing basic repairs and adjustments for mechanical issues on your electric bike can help keep it running smoothly. Here are step-by-step instructions to guide you through the process:
- Identify the issue: Start by identifying the specific mechanical problem you're facing, such as a loose saddle, misaligned brakes, or a noisy chain.
- Gather the necessary tools: Make sure you have the appropriate tools on hand for the repair or adjustment you need to make. This may include wrenches, screwdrivers, Allen keys, or a chain tool.
- Consult the bike's manual: Refer to your electric bike's manual for specific instructions and diagrams related to the repair or adjustment you're undertaking. The manual will provide valuable guidance and ensure you follow the correct procedure.
- Prepare your workspace: Find a clean, well- lit area where you can comfortably work on your bike. Ensure the bike is stable by propping it up on a stand or against a sturdy surface.
- Follow the step-by-step instructions: Carefully follow the step-by-step instructions provided in the manual or reputable online resources.
- Test and fine-tune: Once you've completed the repair or adjustment, test the affected component to ensure it's functioning correctly.
- Safety check: Before taking your electric bike out for a ride, conduct a thorough safety check. Inspect the repaired or adjusted component, test the brakes, and ensure all bolts and fasteners are securely tightened.
Common troubleshooting and accessories replacement of kingbull ebike
Troubleshooting
Accessories Installation & Replacement
Conclusion
Developing troubleshooting skills is crucial for any e-bike owner because it allows you to solve common problems and keep your bike performing at its best. It all starts with understanding common e-bike problems and being prepared to troubleshoot them using safety precautions and the necessary tools.It's also valuable to check the manufacturer's product manual or your local bike store for guidance. By following these steps and recommendations, you'll be able to effectively troubleshoot and enjoy a seamless riding experience while extending the life of your e-bike.







Leave a comment