










Explore News

Tips & Cycling Knowledge
Kingbull Ebike Winter Maintenance: Safe Charging Tips & Cold Weather Riding Guide
Electric bikes (e-bikes) have become an increasingly popular mode of transportation, offering an eco-friendly and convenient way to travel. Whether you own a Kingbull electric mountain bike designed for rugged trails or a sleek commuter model, knowing how to charge your electric bike correctly is essential to keep it running smoothly and ensure its longevity. In this comprehensive guide, we’ll cover everything you need to know about charging your e-bike battery safely and effectively.
Understanding Your E-Bike Battery: The Key to Extending Battery Life
Before diving into the charging process, it’s important to familiarize yourself with your e-bike’s battery type and specifications. Most e-bikes use lithium-ion (Li-ion) batteries due to their high energy density, long lifespan, and relatively light weight. These batteries are the most vital component and typically last between 3 to 5 years, depending on usage and care. Understanding your battery is the first step in proper e-bike battery maintenance.
Battery Capacity (Wh - Watt-hours): This determines how far you can ride on a single charge and is a key factor in e-bike range.
Voltage (V): Indicates the power level; common e-bike batteries range from 36V to 48V. Always use the recommended charger that matches your battery voltage to prevent damage.
Charging Time: Depending on the battery’s capacity and the charger’s output, e-bike charging time can take anywhere from 3 to 7 hours.
💡 Pro-Tip for Battery Health: For maximum electric bike battery lifespan, try to keep the charge level between 20% and 80% for regular, short rides. Only charge to 100% when you need the full range for a long trip.
You can click here to view battery information for each Kingbull electric bike model.
How to Properly Charge Your Kingbull Electric Bike: Safe Charging Practices
We have received feedback from many customers regarding issues with charging their Kingbull electric bikes. In the following sections, we will guide you on how to properly charge your Kingbull electric bike. There are two main methods of charging, both of which should be performed in a dry, well-ventilated area at room temperature (50°F-77°F), as extreme temperatures can degrade battery life.
Method 1: Charging the Battery Off the Bike (Recommended for Storage)
Charging the battery separately allows you to choose an optimal, controlled charging environment.
Remove the Battery: Start by carefully removing the battery from the bike. Make sure the bike is turned off before doing this. Kingbull electric mountain bikes have a key that allows you to safely detach the battery.
Connect the Charger to the Battery FIRST: Connect the charger to the battery’s charging port. Ensure the connection is secure. This sequence helps prevent a small electrical arc.
Plug in the Charger to the Wall: Plug the charger into a power outlet (ideally a surge protector). The charger’s indicator light will usually turn red to show that charging is in progress. Once the battery is fully charged, the light will typically turn green.
Disconnect Safely: Once the light turns green, unplug the charger from the wall outlet FIRST, then disconnect it from the battery. Avoid overcharging your e-bike battery by not leaving it connected for days on end.
Reattach the Battery: After the battery is fully charged, carefully reattach the battery to the bike, making sure it’s securely locked in place.
Method 2: Charging the Battery On the Bike (Convenient Daily Charging)
Make sure the power is turned off before charging. It should be noted that our electric bike cannot be started during the charging process. Therefore, when you complete charging, you need to unplug the charger before you can start the electric bike.
Locate the Charging Port: Locate the charging port on your Kingbull electric bike. The charging port is located on the right side of the battery. You will need to open the rubber cover to access the charging port.
Connect the Charger to the Battery Port: Connect the charger to the battery’s charging port on the bike. Make sure the connection is tight and secure to prevent any interruptions during the charging process.
Plug in the Charger to the Wall: Plug the charger into a power outlet. The indicator light on the charger should turn red to indicate that charging is in progress. When the battery is fully charged, the light will turn green.
Monitor the Charging Process: During charging, it’s recommended to periodically check the charger and the bike to ensure everything is functioning correctly. Once the battery is fully charged, unplug the charger.
Why Does the Charger Make Noise During Charging?
Hearing a noise from the charger while it’s plugged in and charging your Kingbull electric bike is usually normal and not a cause for concern.
Kingbull e-bike chargers are equipped with a cooling fan to prevent the charger from overheating during the charging process. When the charger is actively working, the fan may turn on to regulate the temperature, which can produce a soft whirring or humming noise. This is a standard feature designed to protect the charger and your lithium-ion battery from heat damage. Ensure the charger is placed on a hard, non-flammable surface with good airflow.
The Impact of Cold Weather on E-Bike Lithium-Ion Batteries & Proactive Maintenance Strategies
During the harsh winter months, the chemical activity within lithium-ion batteries naturally decreases. To ensure your Kingbull electric bike continues to deliver peak performance in cold weather, please adhere to the following e-bike battery maintenance tips:
Never Charge Below Freezing: Charging a battery in temperatures below 0°C (32°F) can cause irreversible internal damage to the cells. Before connecting the power, always bring your battery indoors and allow it to warm up to room temperature (15°C–25°C / 59°F–77°F).
Optimize Your Charging Environment: Always seek a dry, well-ventilated, and climate-controlled space (such as an indoor room or a tempered garage) for charging. This prevents moisture buildup and ensures stable energy intake.
Winter Storage Best Practices: If you plan to store your e-bike for an extended period during winter, keep the battery's State of Charge (SoC) between 40% and 70%. Check the levels once a month to prevent the battery from entering a "deep discharge" state, which can permanently reduce capacity.
Expect a Temporary Reduction in Range: Be aware that low temperatures increase the viscosity of the electrolyte, which may lead to a 20% to 30% decrease in riding range. This is a normal characteristic of lithium batteries; your full mileage will naturally return once the weather warms up.
Kingbull E-Bike Winter Riding Safety and Mechanical Maintenance Guide
Riding in snow, ice, road salt, and mud presents unique challenges for even the most experienced cyclists. To protect your investment and ensure your safety, follow these essential winter e-bike maintenance and safety best practices:
Anti-Corrosion Cleaning: Road salt and de-icing chemicals are highly corrosive to metal components and electrical connections. After every ride, use a damp cloth to wipe down your e-bike frame, drivetrain, and motor housing. To prevent rust, apply a winter-specific wet chain lube to keep your gears shifting smoothly in slushy conditions.
Monitor Tire Pressure (PSI): Cold air is denser; for every 10°C (18°F) drop in temperature, tire pressure can decrease significantly. Regularly check the PSI of your Kingbull fat tires. Maintaining the correct pressure ensures optimal traction and grip on slippery surfaces, which is critical for winter riding safety.
Enhance Lighting and Visibility: Winter days mean shorter hours of daylight and frequent overcast skies. Always verify that your integrated LED headlights and taillights are clean and functioning perfectly. For added safety, we recommend wearing high-visibility reflective gear to remain visible to motorists in low-light or foggy environments.
Proactive Brake System Inspection: Moisture, grit, and ice can accelerate the wear of your brake pads. Before setting off, always perform a "squeeze test" to check your braking response. Ensuring your brakes are in top condition is vital for managing the increased stopping distances required on icy roads.
Conclusion: E-Bike Battery Best Practices
Properly charging your electric bike is crucial for ensuring a long battery life and maintaining optimal performance. By following these safe charging tips and best practices, you can charge your e-bike safely and effectively, helping you enjoy many more miles of smooth, eco-friendly rides, whether you're commuting or tackling a challenging trail with your electric mountain bike.
If you have any questions about electric bike battery maintenance or charging issues, you can contact us via email at customers@kingbullbike.com.
Happy riding!
Read more

Ebike Reviews
Kingbull Literider review: Powerful folding electric bike for $1,000 | Repost From palmsolo.substack.com
Hyperdrive Hits
5/5 Medals of Yavin: Full featured foldable ready to roll
Reasonable $999 price
Metal fenders, lights, rear rack, and lots of power
Solid build and attractive color options
Center handle for easy carry
There are a lot of options available when it comes to folding e-bikes and my inbox keeps filling up with offers to try out a number of them. I try to filter through these bikes to find ones that stand out a bit from others and decided to give a Kingbull model a try.
The brand name is a bit unique and I did not know what to expect as so many of these folding fat tire bikes start to look the same over time. I was pleasantly surprised when I opened the bike and saw the high quality fit, finish, and build of the Kingbull Literider. I enjoyed riding it on local roads and single track trails through the woods.
Rating:
I’m awarding the Kingbull Literider five (5) Medals of Yavin. The bike is priced at just under $1,000 and I personally feel that is the right price level for a fat tire folding bike. These types of bike are great for those who want to get places quickly and are not going to ride a bike for extended exercise purpose. The Literider is good for putting in the back of a truck or SUV and taking it out to a job site or ride along the waterfront.
The Good and the Bad
It’s pretty rare for me to not find something that can be improved with a product and for things like electric bikes the pros and cons can depend on your riding needs.
Pros
Full featured bike with fenders, lights, mirrors, and other accessories
Lots of available power and torque, enough to propel me up steep hills in throttle mode
Solid and accurate advertised range
Frame mounted battery for easy access
Big, bright color LCD
Brilliant front headlight and rear brake light
UL2849 certified
IPX4 water resistant rating on the bike
Cons
Right at that $1,000 price point
Heavy 71 pound bike weight
No water bottle mounting points
Experiences
One nice feature with most foldable e-bikes is that they ship nearly fully ssembled and in smaller boxes. I opened the box and then unfolded the frame, handlebar stem, and pedals then attached the front wheel and it was ready to go. Make sure to install the front metal fender and headlight BEFORE you put on the wheel. I learned my lesson on past bikes of this type.
Kingbull includes all of the tools you need to assemble the bike and maintain it so you don’t need any of your own tools. The company also provides some key accessories, including dual rear view handlebar mirrors, a lock, phone holder, bungee cords, and air pump. These are not the highest quality accessories, but they get the basics right and are better than nothing.
The bike folds up easily with the handlebars, center, and pedals all making it more compact for fitting into a vehicle trunk, storing in a garage, and even transporting on public transit. It is quite a big heavy bike at 71 pounds so be careful picking it up and moving it around.
The saddle is very comfortable and provides good cushion for your rear. The right side twist throttle works well and the bike was powerful enough to propel me all of the way up my steepest hills with no pedal assist, a feat not achieved by many e-bikes. The 7-speed Shimano is also nice to have for making your ride smooth and functional.
Kingbull incorporates the same LCD color display I have seen on newer Lectric bikes so that’s a good thing. It has that obvious energy bar along the top with big numbers for all of the data. The same three button controller is used for the display and mounted on the left side.
An additional two button controller is also positioned on the left side and this activates the headlight and the horn. Too often I see e-bikes with no horns so it is great to see Kingbull include an electronic horn that is powerful and easy to find for activation.
The Kingbull Literider is a powerful bike and supports throttle and assist speeds up to 20 mph out of the box. Simple directions are found in the detailed manual to help you unlock the speed to 28 mph, but understand that your battery range will be reduced with these faster speeds.
Specifications
Specifications alone don’t mean much, but they are useful for comparing similar devices and checking that you are getting value for your money.
Frame: Aluminum alloy
Motor: 750W (1300W peak) rear hub with 80 Nm of torque
Battery: 48V, 720 Wh, 15 Ah
Bike weight: 71 pounds
Bike capacity: 400 pounds
Pedal assist: Five levels cadence sensor with half-twist throttle
Max speed: Default is 20 mph, but easily unlockable to 28 mph.
Range: Advertised as up to 50 miles with pedal assist 1 and 30 miles with throttle only. My experience shows a bit less since I am 55 pounds heavier than the test rider and don’t have many true flat surface to ride on.
Transmission: Shimano 7-speed
Brakes: Hydraulic disc brakes
Lights: Front 48V LED and rear taillight with brake light
Display: Color LCD
Durability: Certified as dust proof and water proof (no specific ratings provided)
Tires: 20 x 4 inch CST tires
Colors: Red, White, Black, Green
Bottom Line
While I have my favorite e-bike brands, I also like to keep my eye out for other compelling brands and liked what I experienced with the Kingbull Literider. The MSRP is shown as $1,699 and that is way too high for what is offered here, but that current $999 price seems a bit low too.
This full featured folding fat tire bike has everything you could want in a bike with this form factor and Kingbull even includes a few handy accessories. It’s a powerful bike with good range and high quality build. The front suspension forks and comfortable seat mean you can enjoy the bike for hours on end and I did while I was testing it out.
Read more

Purchase Guide
Best Commuter Guide: The best electric bike for commuting and city riding
Electric bikes are gradually replacing cars as the primary means of transportation for people to ride and commute in cities. However, there are many types of electric bikes, and for beginners, choosing a suitable commuter electric bike is always hesitant. In this article, we will tell you how to choose the right electric bike for you according to your own situation.
3 Electric Bikes Perfect for Commuting
First, I would like to introduce you to 3 electric bikes that are very suitable for riding in the city. If you are confused about choosing an electric bike, you can refer to our recommendations.
Literider - Folding Electric Bike
Kingbull Literider is a well-known electric bike in the United States, and has been rated by many Youtubers and media as the best folding electric bike under $1,000.
Literider uses 20-inch all-terrain tires, and its folding design allows it to show excellent performance in outdoor riding. The maximum battery life is 50 miles, which fully meets people's daily use needs.Literider is light in weight and the handlebars can be adjusted in height, so it is not only suitable for young people to ride, but many elderly people have given Literider high praise.
Discover - 26 Inch All Terrain Electric Bike
Kingbull Discover is designed for urban riding. Its sturdy all-aluminum frame gives commuters the best safe riding experience. Discover is available in two styles, Step-Thru and Step-Over, designed specifically for the preferences of men and women.
The sturdy frame can give people a better sense of security. If you like a stronger type, Discover will be a better choice.The 840Wh battery can provide a maximum range of 60 miles, and the motor peak can reach 1300W, which can easily cope with long uphill sections.
Hunter - Best Price Commuter Ebike
If you have a lower budget, the Kingbull Hunter is the best choice. Hunter is priced at only $899, but still retains excellent features and configurations.Hunter weighs only 59 pounds, which is lighter than most electric bikes. With 26-inch CST tires and hydraulic brakes, it can provide a comfortable riding experience on any road.The 750W motor and 720Wh battery provide strong power and endurance for your daily riding, with a maximum speed of up to 28Mph.
Key Points When Choosing an Electric Bike
If you are planning to pick up and buy an electric bike, here are some directions you need to refer to.
1. Budget: You need to know clearly what price range of electric bike you need. The price of electric bikes varies, ranging from less than $500 to more than $500. Different prices will bring different quality and after-sales service. You need to balance between budget and quality. Our recommendation is an electric bike around $1,000.
2. Frame type: The frame type determines the height limit of the rider. Most women will choose Step Thru electric bike, because this type of electric bike does not have too many height restrictions. Men are more likely to choose Step Over electric bike, which is more stable when riding, but not suitable for short riders.
3. Maximum range: It is particularly important to choose an electric bike with a suitable range according to your daily needs. A higher range means a higher price, so you don’t have to pursue an excessively large range.
4. Brakes and shock absorbers: Electric bicycles are usually faster, so for safe riding, you need better brakes and shock absorbers. Cheap electric bicycles often use mechanical shock absorbers and brakes, which are much less effective than hydraulic shock absorbers and brakes.
5. After-sales service: Make sure the seller provides complete after-sales service. The care and maintenance of electric bicycles is relatively complicated, and it is more reliable to buy an electric bicycle with a warranty. Kingbull provides a 2-year warranty and complete after-sales technical support.
Make Sure You Ride Safely
If you are riding an e-bike for the first time, please be prepared to ensure that you ride safely.E-bikes are very different from traditional bicycles. They are not only faster, but also have many different functions. We have sorted out the main things that beginners should pay attention to before riding. We recommend that you read it before your first ride.
A Beginner’s Guide To Riding Electric Bikes
Conclusion
In this article, we introduce some electric bikes suitable for urban riding and commuting. If you are considering buying a bike, we provide the important points you need to pay attention to.Kingbull is a professional electric bike manufacturer. we provide high-quality, cost-effective electric bikes, no matter what type of electric bike you need, we are able to provide the best choice.
Read more
Maintenance
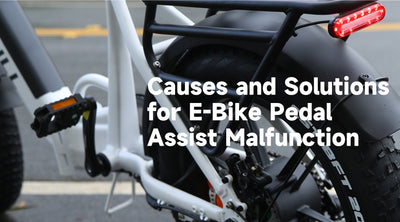
Causes and Solutions for E-Bike Pedal Assist Malfunction
Electric bicycles have seen a surge in popularity, thanks to their eco-friendly nature and the convenience they offer for urban commuting and recreational riding. Central to their appeal is the pedal assist system, which provides riders with an extra boost of power, making cycling easier and more enjoyable. However, like any complex system, the pedal assist can sometimes malfunction, leading to a frustrating disruption in the riding experience. In this blog, we’ll delve into the common causes of pedal assist malfunctions and offer practical solutions to help you get back on the road smoothly.
How the Electric Bicycle Pedal Assist System Works
The pedal assist system on an electric bicycle is a sophisticated technology designed to provide riders with additional power, making cycling easier and more efficient. When a rider begins pedaling, built-in sensors immediately detect changes in pedal force. These sensors are typically located around the pedals or the bike's bottom bracket, and they accurately capture the rider’s effort and cadence. Once the sensor detects the pedal force, it transmits this data to the motor controller.
The motor controller serves as the brain of the system, processing the information received from the sensors and adjusting the motor’s power output accordingly. If the rider increases their effort, such as when climbing a hill or facing strong resistance, the controller automatically boosts the motor’s output, providing more assistance to help the rider conserve energy. Conversely, if the rider reduces their pedaling effort or stops altogether, the controller correspondingly decreases the motor’s output, or even shuts it off when assistance is no longer needed. This intelligent coordination ensures that the electric bicycle delivers a smooth and energy-efficient riding experience by dynamically adjusting power based on the rider's needs.
Common Causes of Pedal Assist Malfunction
Wiring and Connection IssuesThe electrical system of an electric bicycle is complex, with various components interconnected through numerous wires. If there are problems with the wiring or connections between the pedal sensors, controller, or motor, it can disrupt signal transmission. Faulty or loose connections may cause the pedal assist system to malfunction or stop working altogether.
Sensor IssuesThe pedal assist system relies heavily on accurate sensor readings. If the sensors that detect pedal force are damaged, misaligned, or have loose connections, the system may fail to register the rider’s input. This can result in the pedal assist feature not functioning properly, as the system will be unable to respond to the rider's pedaling efforts.
Controller ProblemsThe controller acts as the "brain" of the electric bicycle, interpreting signals from the sensors and managing the motor’s power output. If the controller is malfunctioning, it may fail to process the sensor data correctly, which can prevent the motor from providing the appropriate level of assistance. This issue can lead to inconsistent or non-functioning pedal assist.
Solution
1. Check the Sensor
First, carefully inspect the pedal sensor to ensure there are no visible signs of damage or loose connections. If you find any issues, try reinstalling or replacing the sensor.
Reinstall the Sensor: If the sensor is loosely connected or improperly installed, a correct reinstallation might resolve the issue. Make sure the connection between the sensor and the controller is secure and stable.
Replace the Sensor: If the problem persists after reinstalling the sensor, the sensor itself might be faulty. In this case, please contact our customer support team (customers@kingbullbike.com), and we will send you a replacement sensor.
2. Check the Controller
If both the throttle and pedal assist functions are not working, you should inspect the bike’s controller.
Reinstall the Controller: Try reinstalling the controller to ensure it is properly connected to other components. If the issue persists after reinstalling, the controller may be defective.
Replace the Controller: If reinstalling the controller does not solve the problem, you may need to replace the controller. Please contact customer support for assistance or to obtain a new controller.
How to replace a sensor
To learn how to replace the sensor, please click here for detailed instructions.
Conclusion
The pedal assist system on an electric bicycle greatly enhances the riding experience, but it can malfunction due to various reasons. By understanding common causes of these issues and implementing the appropriate solutions, you can effectively restore the system’s functionality and ensure a smooth and safe ride.
Read more

MaintenanceTips & Cycling Knowledge
How to Replace the Speed Sensor on Your Electric Bike: A Simple DIY Guide
If your electric bike’s speedometer isn’t showing the correct speed, or if the screen constantly displays a frustrating "0 mph," your ebike speed sensor might be damaged or misaligned.
Luckily, dealing with an electric bike speedometer not working doesn't mean a costly trip to the repair shop. It’s a straightforward DIY fix you can easily handle at home with the right tools and a little patience. In this quick guide, we’ll walk you through exactly how to replace the speed sensor on your electric bike to get your ride tracking perfectly again.
Tools You’ll Need
Before you get started with your ebike speed sensor replacement, make sure you have the following tools and materials handy:
Hex key (Allen wrench) – For loosening bolts.
Multi-tool – For general adjustments.
Crank removal tool – Essential for accessing hidden sensors.
A new Kingbull speed sensor (or a compatible replacement sensor).
Zip ties – For neat cable management.
⚠️ Safety First: Always disconnect your electric bike’s battery and turn off the power completely before touching any electrical components to avoid accidental shorts or injuries.
1. Removing the Crank Arm
To get to the sensor, you usually need to remove the pedal crank arm first.
Step 1: Use the appropriate hex key to loosen and remove the main bolt securing the crank arm to the bottom bracket.
Step 2: Thread the crank removal tool into the crank arm carefully (make sure it's threaded straight to avoid stripping). Turn the tool clockwise using your wrench or hex key until the crank arm gently pops off the spindle, then set it aside.
2. Removing the Old Ebike Speed Sensor
Now that the crank is out of the way, you can see the sensor mechanism.
Step 3: Locate the old speed sensor near the bottom bracket or rear dropouts. It’s a small plastic component connected to the main ebike controller via a thin wire.
Step 4: Follow the cable back to the plug, and carefully disconnect the sensor from the controller. Pro Tip: Always pull directly on the plastic connector plugs—never pull on the wire itself, or you might tear the internal copper line.
Step 5: Unscrew or unclip the old speed sensor from its mounting bracket and remove it from the bike frame.
3. Installing the New Speed Sensor
Step 6: Place your new ebike speed sensor in the exact same position and orientation as the old one.
Step 7: Route the new cable along the frame safely, and plug it securely into the controller. You should feel or hear a slight "click" when it seals.
Step 8: Crucial Step! Check your ebike speed sensor alignment. Ensure the sensor sits close to the magnetic disc (usually a 1-2mm gap is ideal) but is positioned properly so it won’t rub against the moving crank arm or magnets. Use zip ties to strap down any loose wires.
4. Reinstalling the Crank Arm
Step 9: Line up the crank arm with the spindle (make sure it is pointing exactly 180 degrees opposite to the other pedal arm!). Push it onto the splines.
Step 10: Use your multi-tool or hex wrench to securely tighten the crank bolt. Make sure it is cranked down tight so it doesn't wobble loose while you are riding.
5. Testing Your New Sensor
Step 11: Reconnect your e-bike’s battery and power on the display.
Step 12: Lift the rear wheel off the ground (or place the bike on a repair stand) and manually spin the pedals. Look at your LCD display: if the speed readings update smoothly and accurately, you nailed it!
6. Advanced Troubleshooting: Still Not Working?
If your electric bike speedometer is still not working after the replacement, don't panic. Check these three common culprits:
Loose Connections: Unplug the connector and check for bent pins inside. Re-plug it firmly.
Magnet-to-Sensor Gap: If the magnet is too far from the sensor, it won't trigger a reading. Loosen the sensor slightly and push it closer to the magnetic ring (aim for the thickness of a coin).
Dirty Sensor Wheel: Wipe down the magnetic disc with a clean microfiber cloth. Mud or grease buildup can block the magnetic signal.
Wrapping It Up
And that’s all there is to it! By following these simple steps, you can successfully tackle an ebike speed sensor replacement and get back to enjoying smooth rides with real-time tracking.
Regular maintenance keeps your electric bike running like new. If you are still unsure about the process, encounter a weird error code, or need help finding the right replacement parts for your model, please feel free to contact the Kingbull support team anytime. We’re always here to help you stay on the road!
Read more

Maintenance
Kingbull Ebike Won't Turn On? Quick Troubleshooting & Self-Check Guide
What to Do When Your Kingbull Ebike Won’t Turn On: A Quick Self-Check Guide
Imagine this: You’re geared up and ready for a ride, but when you press the power button, your electric bike won’t turn on. It’s a frustrating moment for any rider, but don’t worry—most power issues are caused by simple, fixable factors.
In this guide, we’ll walk you through three essential self-check steps to help you diagnose and resolve ebike power problems quickly. Let’s get your Kingbull bike back to life!
Step 1: Inspect the Ebike Battery
The battery is the heart of your electric bike. If your bike isn't responding, the battery is the first place to look.
Check the Charge: Open the battery compartment and verify the charge level. If it’s completely depleted, plug it into the charger until it's full.
Proper Seating: Sometimes, a battery that isn't fully locked or seated correctly will fail to complete the electrical circuit. Ensure it is securely clicked into place.
Power Switch: Don't forget to check if the battery itself has a physical "On/Off" switch (often labeled 'I' and 'O').
Pro Tip: A secure electric bike battery connection is crucial for consistent performance.
Step 2: Examine the Display Cable
If the battery is charged but the screen remains dark, the issue might be the communication link between your display and the system.
Locate the Cable: Find the cable running from your LCD display to the main wiring harness.
Unplug and Inspect: Carefully unplug the connector and check for bent pins, dirt, or visible wear.
Align and Reconnect: When plugging it back in, make sure to align the directional arrows on the connectors. A loose or misaligned ebike display cable is a common culprit for power failure.
Step 3: Check the Controller Connections
The controller acts as the "brain" of your e-bike, managing power flow to the motor. It is typically housed inside the frame (near the middle).
Access the Controller: For Kingbull foldable electric bikes, you may need to fold the frame to access the controller compartment.
Verify Wiring: Use a basic tool to open the cover and inspect the internal wiring. Look for any disconnected plugs or signs of heat damage.
Secure the Plugs: Firmly reconnect any loose wires. Often, a simple vibration during a rough ride can loosen a connection.
Conclusion: Still Having Issues?
Performing these three simple checks—Battery, Display, and Controller—solves the vast majority of ebike startup issues. In most cases, a quick adjustment is all it takes to get you back on the road.
If you’ve followed these steps and your Kingbull ebike still won’t power on, our dedicated support team is here to help.
Contact Us: Reach out to our customer service for expert technical assistance.
Watch & Learn: Visit the Kingbull YouTube Channel for video tutorials on ebike maintenance and troubleshooting.
Happy Riding!
Read more


