


Explore News

Purchase GuideTips & Cycling Knowledge
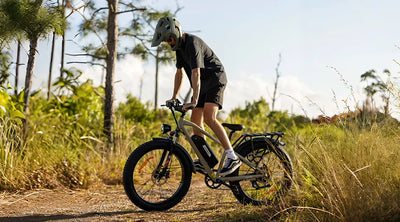
Discover the Future of Off-Road Riding: The Magic of the Four-Bar Suspension System
When it comes to adventure and freedom on two wheels, off-road electric bikes have taken the spotlight. Whether you're navigating through rugged trails or conquering steep hills, comfort and stability are key to a thrilling ride. Today, we’re shining a light on the unsung hero of your riding experience—the four-bar suspension system.
What is a Four-Bar Suspension System?
Imagine tearing through bumpy terrain, with the four-bar suspension working like a trusty sidekick, perfectly smoothing out every jolt. This advanced suspension design features four flexible links that distribute impact forces effectively, allowing you to glide over rough patches as if you were cruising on smooth pavement.
The Secret to a Comfortable Ride
Riding is no longer a battle against bumps. The four-bar system optimizes tire contact with the ground, significantly reducing vibrations. As you race through mountain trails or explore sandy paths, you'll hardly notice the small bumps and dips. It’s all about “easy riding, pure enjoyment”!
Unmatched Control and Handling
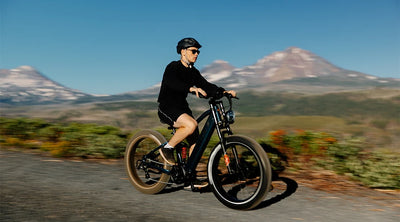
But the four-bar suspension isn’t just about comfort; it’s also about enhancing your control. When you hit those sharp turns, the improved tire grip gives you the confidence to tackle any challenge. Whether you're speeding down steep slopes or maneuvering through muddy paths, you’ll feel a sense of stability and precision, like having an extra pair of hands guiding you through every twist and turn.
Advantages Over Traditional Systems
Compared to traditional fork and rear shock designs, the four-bar suspension truly shines. Its complex structure may seem daunting, but it translates into superior suspension performance. Riders can easily adjust the shock travel for different terrains, providing a customized riding experience. Looking to maximize your fun on the trails? The four-bar system is your ticket to adventure.
Real Riders, Real Experiences
Our customers who ride bikes equipped with the four-bar suspension system have shared that their experiences have transformed dramatically. From reaching challenging mountain tops to cruising along picturesque forest trails, this system empowers them to explore freely without worrying about the rough terrain.
Conclusion
The four-bar suspension system is a revolutionary feature in off-road electric bikes. It not only enhances your comfort and stability but also brings an unmatched joy to your rides. So, on your next adventure, choose an electric bike with a four-bar suspension and turn every ride into an unforgettable journey.
Are you ready to embrace a new riding experience? Let’s hit the trails together and uncover the beauty of exploration!
Read more

Tips & Cycling Knowledge
How to Remove the Speed Limit on an Electric Bike
1. 🚨 Safety and Regulations: Why Every E-Bike Needs a Speed Limiter
To understand how to remove the speed limit on an electric bike, you must first acknowledge its fundamental purpose. The speed limiter is mandatory, ensuring rider safety and adherence to traffic laws globally.
Riding Safety Assurance: High speeds drastically increase the probability of accidents. The limiter keeps the Ebike’s top speed within safe limits, ensuring adequate reaction and braking distance.
Legal Compliance (US E-bike Law): In the United States, maximum speeds (typically not exceeding 28 MPH) are legally mandated. The limiter ensures your E-bike complies, preventing legal issues when riding on public roads.
Extended Component Life: By limiting motor power, the speed limiter protects the battery, motor, and controller from excessive strain, effectively extending the lifespan and reliability of your Kingbull E-Bike.
2. Seeking Extreme Speed? Understanding the Full Risks of Ebike Speed Limit Removal
We acknowledge that some riders look for higher speeds for commuting efficiency or thrill. However, pursuing an Ebike speed unlock carries severe consequences that must be understood.
Risk Factor
Consequence and Warning
Severe Safety Hazard
Braking Failure: Your E-bike's components are not rated for high speeds. Emergency braking distance will multiply, significantly increasing the risk of a serious accident.
Legal & Liability Issues
Legal Exposure: Riding a modified, over-speed E-bike on public roads can be deemed operating an unregistered motorized vehicle, leading to heavy fines and potential legal liability.
Immediate Warranty Voidance
Warranty Policy: Kingbull’s warranty explicitly states that any illegal modification, including electric bike speed limiter removal, will immediately void your vehicle’s warranty.
Component Damage
Reduced Lifespan: Removing the power limit forces the motor, controller, and battery to operate under constant high stress, which will drastically reduce the lifespan of all key components, risking motor burnout.
If you still need to consider adjusting the speed limit, we strongly recommend consulting the original seller or official customer service first to ensure you understand any official, reversible options for your specific model.
3. 🚫 Official Stance: How to Safely Handle E-Bike Speed Adjustment
Due to the extreme legal and safety risks, we focus on providing safe, compliant, and authorized solutions for your performance needs.
How to Inquire About Electric Bike Speed Adjustment
If you have performance requirements and wish to explore the possibility of an Ebike speed unlock, please follow these steps:
Contact Official Technical Support: Ask our specialists whether your specific model (e.g., Kingbull Electric Bike) has any official, reversible settings or controls for speed adjustment.
Inquire About Certified Upgrades: For permanent performance optimization, ask about official, certified speed upgrade controllers or tuning accessories designed to work safely with your specific motor system. This is far safer than attempting generic online hacks.
❗ Key Advice: Brands like Kingbull do not recommend users perform unauthorized Ebike speed limiter removal. Always seek advice and solutions through official channels to protect your safety and your investment.
4. 📈 Legal and Scientific Ways to Increase E-Bike Speed
Before resorting to "speed hacks," you can legally and safely optimize your Kingbull E-Bike's speed and efficiency through these proven methods:
Maintain Peak Battery Charge: Higher battery voltage ensures the motor receives optimal power output, maximizing your Ebike's top speed.
Optimize Riding Posture: Adopt a lower, more aerodynamic stance to minimize wind resistance, which is the biggest factor affecting speed. This is the cheapest and most effective way to gain speed.
Upgrade to Low-Rolling Resistance Tires: Switching to smoother, high-quality urban tires reduces friction with the road surface, naturally improving efficiency and speed.
Controller Upgrade (Official Certified): If your E-bike is heavily restricted, you may opt to purchase an officially compatible high-performance controller, primarily for use in private settings.
Conclusion
Successfully navigating the question of how to remove the speed limit on an electric bike means acknowledging the trade-off. While the thrill of faster speeds exists, the price includes severe safety risks, legal penalties, and the loss of your vehicle's lifespan.
Kingbull E-Bikes offer a maximum speed that balances performance with safety and legal compliance. Always consider the potential risks before any modification, and choose officially certified, safe solutions for your performance needs.
Read more

Tips & Cycling Knowledge
Kingbull Ebike Winter Maintenance: Safe Charging Tips & Cold Weather Riding Guide
Electric bikes (e-bikes) have become an increasingly popular mode of transportation, offering an eco-friendly and convenient way to travel. Whether you own a Kingbull electric mountain bike designed for rugged trails or a sleek commuter model, knowing how to charge your electric bike correctly is essential to keep it running smoothly and ensure its longevity. In this comprehensive guide, we’ll cover everything you need to know about charging your e-bike battery safely and effectively.
Understanding Your E-Bike Battery: The Key to Extending Battery Life
Before diving into the charging process, it’s important to familiarize yourself with your e-bike’s battery type and specifications. Most e-bikes use lithium-ion (Li-ion) batteries due to their high energy density, long lifespan, and relatively light weight. These batteries are the most vital component and typically last between 3 to 5 years, depending on usage and care. Understanding your battery is the first step in proper e-bike battery maintenance.
Battery Capacity (Wh - Watt-hours): This determines how far you can ride on a single charge and is a key factor in e-bike range.
Voltage (V): Indicates the power level; common e-bike batteries range from 36V to 48V. Always use the recommended charger that matches your battery voltage to prevent damage.
Charging Time: Depending on the battery’s capacity and the charger’s output, e-bike charging time can take anywhere from 3 to 7 hours.
💡 Pro-Tip for Battery Health: For maximum electric bike battery lifespan, try to keep the charge level between 20% and 80% for regular, short rides. Only charge to 100% when you need the full range for a long trip.
You can click here to view battery information for each Kingbull electric bike model.
How to Properly Charge Your Kingbull Electric Bike: Safe Charging Practices
We have received feedback from many customers regarding issues with charging their Kingbull electric bikes. In the following sections, we will guide you on how to properly charge your Kingbull electric bike. There are two main methods of charging, both of which should be performed in a dry, well-ventilated area at room temperature (50°F-77°F), as extreme temperatures can degrade battery life.
Method 1: Charging the Battery Off the Bike (Recommended for Storage)
Charging the battery separately allows you to choose an optimal, controlled charging environment.
Remove the Battery: Start by carefully removing the battery from the bike. Make sure the bike is turned off before doing this. Kingbull electric mountain bikes have a key that allows you to safely detach the battery.
Connect the Charger to the Battery FIRST: Connect the charger to the battery’s charging port. Ensure the connection is secure. This sequence helps prevent a small electrical arc.
Plug in the Charger to the Wall: Plug the charger into a power outlet (ideally a surge protector). The charger’s indicator light will usually turn red to show that charging is in progress. Once the battery is fully charged, the light will typically turn green.
Disconnect Safely: Once the light turns green, unplug the charger from the wall outlet FIRST, then disconnect it from the battery. Avoid overcharging your e-bike battery by not leaving it connected for days on end.
Reattach the Battery: After the battery is fully charged, carefully reattach the battery to the bike, making sure it’s securely locked in place.
Method 2: Charging the Battery On the Bike (Convenient Daily Charging)
Make sure the power is turned off before charging. It should be noted that our electric bike cannot be started during the charging process. Therefore, when you complete charging, you need to unplug the charger before you can start the electric bike.
Locate the Charging Port: Locate the charging port on your Kingbull electric bike. The charging port is located on the right side of the battery. You will need to open the rubber cover to access the charging port.
Connect the Charger to the Battery Port: Connect the charger to the battery’s charging port on the bike. Make sure the connection is tight and secure to prevent any interruptions during the charging process.
Plug in the Charger to the Wall: Plug the charger into a power outlet. The indicator light on the charger should turn red to indicate that charging is in progress. When the battery is fully charged, the light will turn green.
Monitor the Charging Process: During charging, it’s recommended to periodically check the charger and the bike to ensure everything is functioning correctly. Once the battery is fully charged, unplug the charger.
Why Does the Charger Make Noise During Charging?
Hearing a noise from the charger while it’s plugged in and charging your Kingbull electric bike is usually normal and not a cause for concern.
Kingbull e-bike chargers are equipped with a cooling fan to prevent the charger from overheating during the charging process. When the charger is actively working, the fan may turn on to regulate the temperature, which can produce a soft whirring or humming noise. This is a standard feature designed to protect the charger and your lithium-ion battery from heat damage. Ensure the charger is placed on a hard, non-flammable surface with good airflow.
The Impact of Cold Weather on E-Bike Lithium-Ion Batteries & Proactive Maintenance Strategies
During the harsh winter months, the chemical activity within lithium-ion batteries naturally decreases. To ensure your Kingbull electric bike continues to deliver peak performance in cold weather, please adhere to the following e-bike battery maintenance tips:
Never Charge Below Freezing: Charging a battery in temperatures below 0°C (32°F) can cause irreversible internal damage to the cells. Before connecting the power, always bring your battery indoors and allow it to warm up to room temperature (15°C–25°C / 59°F–77°F).
Optimize Your Charging Environment: Always seek a dry, well-ventilated, and climate-controlled space (such as an indoor room or a tempered garage) for charging. This prevents moisture buildup and ensures stable energy intake.
Winter Storage Best Practices: If you plan to store your e-bike for an extended period during winter, keep the battery's State of Charge (SoC) between 40% and 70%. Check the levels once a month to prevent the battery from entering a "deep discharge" state, which can permanently reduce capacity.
Expect a Temporary Reduction in Range: Be aware that low temperatures increase the viscosity of the electrolyte, which may lead to a 20% to 30% decrease in riding range. This is a normal characteristic of lithium batteries; your full mileage will naturally return once the weather warms up.
Kingbull E-Bike Winter Riding Safety and Mechanical Maintenance Guide
Riding in snow, ice, road salt, and mud presents unique challenges for even the most experienced cyclists. To protect your investment and ensure your safety, follow these essential winter e-bike maintenance and safety best practices:
Anti-Corrosion Cleaning: Road salt and de-icing chemicals are highly corrosive to metal components and electrical connections. After every ride, use a damp cloth to wipe down your e-bike frame, drivetrain, and motor housing. To prevent rust, apply a winter-specific wet chain lube to keep your gears shifting smoothly in slushy conditions.
Monitor Tire Pressure (PSI): Cold air is denser; for every 10°C (18°F) drop in temperature, tire pressure can decrease significantly. Regularly check the PSI of your Kingbull fat tires. Maintaining the correct pressure ensures optimal traction and grip on slippery surfaces, which is critical for winter riding safety.
Enhance Lighting and Visibility: Winter days mean shorter hours of daylight and frequent overcast skies. Always verify that your integrated LED headlights and taillights are clean and functioning perfectly. For added safety, we recommend wearing high-visibility reflective gear to remain visible to motorists in low-light or foggy environments.
Proactive Brake System Inspection: Moisture, grit, and ice can accelerate the wear of your brake pads. Before setting off, always perform a "squeeze test" to check your braking response. Ensuring your brakes are in top condition is vital for managing the increased stopping distances required on icy roads.
Conclusion: E-Bike Battery Best Practices
Properly charging your electric bike is crucial for ensuring a long battery life and maintaining optimal performance. By following these safe charging tips and best practices, you can charge your e-bike safely and effectively, helping you enjoy many more miles of smooth, eco-friendly rides, whether you're commuting or tackling a challenging trail with your electric mountain bike.
If you have any questions about electric bike battery maintenance or charging issues, you can contact us via email at customers@kingbullbike.com.
Happy riding!
Read more

MaintenanceTips & Cycling Knowledge
How to Replace the Speed Sensor on Your Electric Bike: A Simple DIY Guide
If your electric bike’s speedometer isn’t showing the correct speed, or if the screen constantly displays a frustrating "0 mph," your ebike speed sensor might be damaged or misaligned.
Luckily, dealing with an electric bike speedometer not working doesn't mean a costly trip to the repair shop. It’s a straightforward DIY fix you can easily handle at home with the right tools and a little patience. In this quick guide, we’ll walk you through exactly how to replace the speed sensor on your electric bike to get your ride tracking perfectly again.
Tools You’ll Need
Before you get started with your ebike speed sensor replacement, make sure you have the following tools and materials handy:
Hex key (Allen wrench) – For loosening bolts.
Multi-tool – For general adjustments.
Crank removal tool – Essential for accessing hidden sensors.
A new Kingbull speed sensor (or a compatible replacement sensor).
Zip ties – For neat cable management.
⚠️ Safety First: Always disconnect your electric bike’s battery and turn off the power completely before touching any electrical components to avoid accidental shorts or injuries.
1. Removing the Crank Arm
To get to the sensor, you usually need to remove the pedal crank arm first.
Step 1: Use the appropriate hex key to loosen and remove the main bolt securing the crank arm to the bottom bracket.
Step 2: Thread the crank removal tool into the crank arm carefully (make sure it's threaded straight to avoid stripping). Turn the tool clockwise using your wrench or hex key until the crank arm gently pops off the spindle, then set it aside.
2. Removing the Old Ebike Speed Sensor
Now that the crank is out of the way, you can see the sensor mechanism.
Step 3: Locate the old speed sensor near the bottom bracket or rear dropouts. It’s a small plastic component connected to the main ebike controller via a thin wire.
Step 4: Follow the cable back to the plug, and carefully disconnect the sensor from the controller. Pro Tip: Always pull directly on the plastic connector plugs—never pull on the wire itself, or you might tear the internal copper line.
Step 5: Unscrew or unclip the old speed sensor from its mounting bracket and remove it from the bike frame.
3. Installing the New Speed Sensor
Step 6: Place your new ebike speed sensor in the exact same position and orientation as the old one.
Step 7: Route the new cable along the frame safely, and plug it securely into the controller. You should feel or hear a slight "click" when it seals.
Step 8: Crucial Step! Check your ebike speed sensor alignment. Ensure the sensor sits close to the magnetic disc (usually a 1-2mm gap is ideal) but is positioned properly so it won’t rub against the moving crank arm or magnets. Use zip ties to strap down any loose wires.
4. Reinstalling the Crank Arm
Step 9: Line up the crank arm with the spindle (make sure it is pointing exactly 180 degrees opposite to the other pedal arm!). Push it onto the splines.
Step 10: Use your multi-tool or hex wrench to securely tighten the crank bolt. Make sure it is cranked down tight so it doesn't wobble loose while you are riding.
5. Testing Your New Sensor
Step 11: Reconnect your e-bike’s battery and power on the display.
Step 12: Lift the rear wheel off the ground (or place the bike on a repair stand) and manually spin the pedals. Look at your LCD display: if the speed readings update smoothly and accurately, you nailed it!
6. Advanced Troubleshooting: Still Not Working?
If your electric bike speedometer is still not working after the replacement, don't panic. Check these three common culprits:
Loose Connections: Unplug the connector and check for bent pins inside. Re-plug it firmly.
Magnet-to-Sensor Gap: If the magnet is too far from the sensor, it won't trigger a reading. Loosen the sensor slightly and push it closer to the magnetic ring (aim for the thickness of a coin).
Dirty Sensor Wheel: Wipe down the magnetic disc with a clean microfiber cloth. Mud or grease buildup can block the magnetic signal.
Wrapping It Up
And that’s all there is to it! By following these simple steps, you can successfully tackle an ebike speed sensor replacement and get back to enjoying smooth rides with real-time tracking.
Regular maintenance keeps your electric bike running like new. If you are still unsure about the process, encounter a weird error code, or need help finding the right replacement parts for your model, please feel free to contact the Kingbull support team anytime. We’re always here to help you stay on the road!
Read more

Tips & Cycling Knowledge
The Secret to Smoother Rides: Understanding Electric Bike Suspension Systems
If you're into electric bikes or just getting started, you've probably wondered: why do some bikes feel like you're floating on air while others make you feel every bump in the road? The secret lies in the suspension system—the unsung hero of a smooth ride. Today, we're going to break down what you need to know about electric bike suspension systems, the different types, how to choose the right one for your ride, and some tips to keep things running smoothly.
What’s a Suspension System Anyway?
Simply put, a suspension system is your bike’s shock absorber. When you hit bumps, potholes, or rough terrain, the suspension takes the hit so you don't have to. Instead of every jolt being passed up to your hands, arms, and back, the suspension helps cushion the blow, making your ride feel a lot smoother.
There are two main types of suspension you'll find on electric bikes:
Front Suspension (Fork Suspension): This is the most common type and is installed on the front wheel. Since most of the bumps hit your bike from the front, a good front suspension helps keep the ride comfortable by absorbing shocks before they reach your handlebars. A solid front suspension means your arms won't feel like they've done a workout after every ride!
Rear Suspension: You’ll find rear suspension on more rugged, off-road electric bikes. If you're the kind of person who loves the thrill of tackling mountain trails or bumpy backroads, rear suspension keeps the back half of your bike steady and helps you stay in control no matter how rough the terrain gets.
Types of Suspension: Spring vs. Hydraulic
Now, not all suspension systems are created equal. The two big players in the suspension game are spring suspension and hydraulic suspension. They both absorb shocks, but they do it a little differently.
Spring Suspension: This is the old-school kind, using metal springs to take the brunt of the impact. It’s reliable and durable, but sometimes it can feel a bit stiff, especially when you hit larger bumps. You’ll notice the difference, but it might not completely erase the jolt.
Hydraulic Suspension: This is where things get fancy. Hydraulic suspension uses compressed fluid to cushion the ride, giving you a smoother and more responsive experience. It's like the luxury version of suspension—soft, controlled, and perfect for riders who crave comfort across all terrains. Riding a bike with hydraulic suspension feels more like driving a cushy SUV than a bumpy bicycle.
Tips for Choosing the Right Suspension
When it comes to choosing the right suspension for your electric bike, it’s all about matching it to your riding style. Here are a few quick tips:
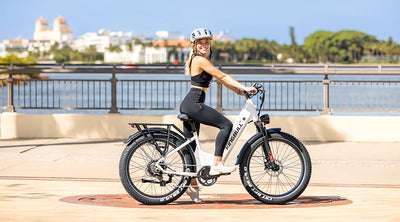
For City Commuters: If you're mostly cruising through city streets, a good front suspension will do the trick. It’ll help you glide over cracks, potholes, and speed bumps without feeling like you're riding a jackhammer. Luckily, all Kingbull electric bikes come equipped with high-performance front suspensions, ensuring a smooth and comfy ride no matter what the city throws at you.
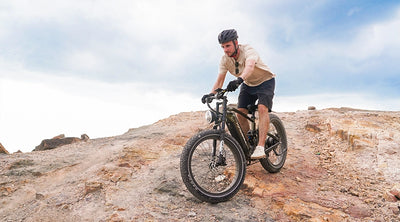
For Off-Road Adventurers: If your idea of fun involves taking on rough trails, rocky paths, or sandy beaches, then a front and rear suspension combo is your best bet. This setup gives you the balance and control you need for tackling unpredictable terrain without losing your cool. Our Kingbull Rover off-road electric bike, for example, comes with both front and rear suspension, so you’re ready for anything—from mountain biking to beach riding.
Is Hydraulic Suspension Worth It?: If you’re serious about comfort or plan to ride on a variety of surfaces, hydraulic suspension is worth every penny. The hydraulic front suspension in Kingbull electric bikes delivers a silky-smooth ride—whether you're commuting or exploring off the beaten path. While it costs a bit more, the performance boost and durability make it an investment that pays off with every ride.
Maintenance Tips for Your Suspension
Your bike’s suspension system might not get as much attention as other parts, but it works hard to keep you comfortable. Here are some quick tips to keep your suspension in tip-top shape:
Keep It Clean: Dirt and mud can get into your suspension and cause it to wear down faster. If you're riding through muddy areas, give your bike a quick wash afterward, especially around the suspension.
Regular Checkups: Every few months, check how your suspension is performing. Listen for any strange noises, and pay attention to whether it feels less smooth than usual. If it seems stiff or sluggish, it might be time for some maintenance or a fluid change.
Don’t Overload It: Your suspension system has a weight limit, so be careful not to overload your bike, especially on rough rides. Too much weight can wear out your suspension faster and lead to a less comfortable ride.
The Bottom Line
A good suspension system can make all the difference between a bumpy, uncomfortable ride and a smooth, enjoyable one. Whether you're zipping through city streets or tearing up off-road trails, choosing the right suspension for your electric bike is key to making sure every ride feels like a dream. Kingbull electric bikes are equipped with high-quality hydraulic front suspensions across the board, and if you're after the ultimate off-road experience, our Rover model delivers with front and rear suspension, giving you unbeatable control and comfort on any terrain.
So, the next time you're out riding, take a moment to appreciate your suspension system—it’s the secret sauce to a smooth, effortless ride!
Read more

Tips & Cycling Knowledge
Discover the Best Electric-Powered Campsites in the USA
Planning your next camping adventure and want to ensure you have access to electric power? Whether you're charging your electric bike, keeping your gadgets powered up, or simply enjoying the convenience of modern amenities, we've got you covered. Here’s your ultimate guide to the best electric-powered campsites in the USA, guaranteeing a memorable and hassle-free outdoor experience.
1. Yosemite National Park, California
North Pines Campground
Yosemite National Park is a paradise for nature lovers, and North Pines Campground is perfect for those seeking electric hook-ups. Nestled among towering pines, this campground offers stunning views and easy access to the Merced River. Electric sites are limited, so book early!
Amenities:
Electric hook-ups
Drinking water
Restrooms
Picnic tables and fire rings
Highlights:
Scenic river views
Proximity to Yosemite Valley attractions
Ample hiking and biking trails
2. Zion National Park, Utah
Watchman Campground
Located near the park's south entrance, Watchman Campground provides electric hook-ups in a picturesque setting. With the iconic Zion Canyon as your backdrop, this campground is ideal for exploring the park's renowned trails and enjoying star-filled nights.
Amenities:
Electric hook-ups
Drinking water
Restrooms and showers
Picnic tables and fire rings
Highlights:
Electric hook-ups available
Easy access to Zion Canyon
Shuttle service to major trailheads
3. Great Smoky Mountains National Park, Tennessee/North Carolina
Elkmont Campground
Elkmont Campground is a fantastic option for those visiting the Great Smoky Mountains. This campground offers a mix of electric and non-electric sites, ensuring you stay connected while immersing yourself in the park's rich biodiversity.
Amenities:
Electric hook-ups
Drinking water
Restrooms
Picnic tables and fire rings
Seasonal on-site store
Highlights:
Electric hook-ups available
Historic sites within the campground
Close to Cades Cove and Clingmans Dome
4. Acadia National Park, Maine
Blackwoods Campground
Blackwoods Campground is your gateway to the rugged beauty of Acadia National Park. While the campground itself doesn't offer electric hook-ups, it provides easy access to nearby RV parks with full amenities, ensuring you can recharge and relax after a day of exploring.
Amenities:
Drinking water
Restrooms and showers
Picnic tables and fire rings
Trash disposal facilities
Highlights:
Proximity to Bar Harbor and Cadillac Mountain
Beautiful coastal scenery
Access to hiking and biking trails
5. Glacier National Park, Montana
Fish Creek Campground
Fish Creek Campground is a serene spot located on the west side of Glacier National Park. This campground offers electric hook-ups and is perfect for those who want to explore the park's stunning landscapes without sacrificing modern conveniences.
Amenities:
Electric hook-ups
Drinking water
Restrooms and showers
Picnic tables and fire rings
Trash disposal facilities
Highlights:
Electric hook-ups available
Close to Lake McDonald
Access to the Going-to-the-Sun Road
Tips for Camping with Electric Bikes
Bringing your electric bike on a camping trip adds a whole new level of fun and convenience. Here are some tips to make the most of your electric bike while camping:
Plan Your Charging: Ensure your campsite has electric hook-ups or nearby charging stations. Portable solar chargers can be a great backup.
Pack Essentials: Bring a sturdy bike lock, helmet, and any necessary repair tools. A small portable pump can be handy for quick tire adjustments.
Explore Local Trails: Many national parks and campgrounds offer fantastic biking trails. Research ahead to find the best routes and scenic spots.
Stay Safe: Always follow park rules and guidelines, wear reflective gear if riding at dusk or dawn, and carry a map or GPS device.
Conclusion
Exploring the great outdoors doesn't mean you have to leave behind the comforts of modern technology. These top electric-powered campsites in the USA offer the perfect blend of nature and convenience, ensuring you have a memorable camping experience. So pack your gear, charge up your electric bike, and get ready for an adventure of a lifetime!
For more tips and guides on camping and electric bikes, subscribe to our newsletter and stay updated with the latest from the world of outdoor adventures. Happy camping!
Read more