


Explore News

Tips & Cycling Knowledge
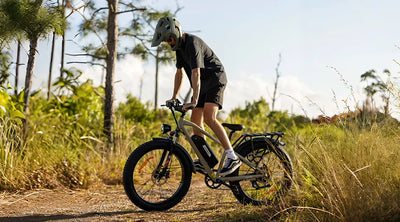
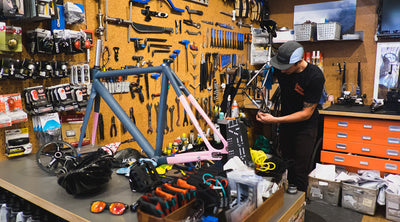
Keep Your E-Bike Rust-Free: Simple Tips
If you own an electric bicycle, you know that it can sometimes rust. Can rust affect an e-bike? The answer is yes. For instance, energy consumption deteriorates: due to the deformation and rusting of the chain, sliding resistance increases, leading to poorer efficiency of the electric bicycle. Chain noise increases: rust on the chain can cause it to run less smoothly, increasing noise, which negatively impacts the surrounding environment. The chain is prone to breaking: wear and tear on the chain can gradually occur, often unnoticed! Regularly check the condition of the chain. If you adjust the chain tension beyond its usage limit, it will not improve any symptoms and, in the worst case, can lead to severe accidents, such as the chain snapping at high speeds.
Common Rust Areas on Electric Bicycles
Rust on electric bicycles is a common issue unrelated to riding frequency. Rust can accumulate over time, and if you ride in wet weather, you must check for rust more frequently. Here are areas to check for rust on your electric bicycle:
Chain: One of the most rust-prone parts of the bike.
Wheel Spokes: Since spokes may constantly come into contact with water, rust can accumulate here.
Rims: A hidden spot that requires regular checks for rust.
Handlebars: After a while, your handlebars may rust. Check underneath the handlebars for hidden rust. Using handlebar covers is recommended to better protect your bike’s handlebars.
Practical tips for removing rust from your e-bike
Rust on an electric bicycle can ruin an enjoyable ride and damage the bike’s overall appearance. Removing rust doesn’t necessarily require professional bicycle cleaning services,in most cases, you can clean it yourself. Depending on the extent of the rust, you might need different cleaning products. After removing the rust, you can continue enjoying your rides. Here’s how to remove rust from your bicycle in a few minutes.
Using Oil
Has your bike chain rusted? You know this can cause poor performance. Therefore, you need to remove the rust as soon as possible. If the chain is rusty, you can directly use oil to solve the problem. Here’s a simple step-by-step method to remove rust from your bike chain using just a small amount of oil and a cloth:
Apply oil to the chain, ensuring every link is evenly coated.
Let it sit for 5-10 minutes to allow the oil to penetrate the chain’s crevices.
Wipe it off with a cloth and repeat as necessary.
Coca-Cola
Do you have Coca-Cola at home? Then you already have a rust removal solution for your electric bicycle. Due to its acidic properties, this drink can break down rust in minutes. You’ll need a can of Coca-Cola, a spray bottle, and a brush or similar tool. Here’s a step-by-step method to remove rust from your bike using Coca-Cola:
Pour the Coca-Cola into a spray bottle.
Spray it on the rusty areas.
Scrub the rust off with a brush or similar tool.
Baking Soda
What can’t baking soda do? Believe it or not, you can quickly and easily remove rust from your bicycle using trusty baking soda. You’ll need a box of baking soda, water, a bowl, a cloth, and a small brush. Here’s a step-by-step method to clean your electric bike using baking soda:
Mix baking soda and water in a bowl at a 1:1 ratio, stirring until it forms a thick paste.
Apply the baking soda paste directly to the rust spots, leaving it on for 15 minutes to penetrate and break down the rust.
Scrub off the baking soda using a scrubbing pad, a plastic brush, or a steel wool pad. If you don’t have a scrubbing brush, a toothbrush can substitute.
After 10 minutes, wipe the baking soda paste off. Let it sit for another 10-15 minutes to dissolve any stubborn rust spots. Then, use a dry microfiber cloth to wipe it off. Make sure to dry the bike thoroughly to prevent it from rusting again.
Lime Juice
Rust on a bicycle hates acidic solutions, and there’s nothing more acidic than lime juice. This is another inexpensive drink that can remove rust from your electric bicycle in minutes. You’ll need some lime juice, a steel wool pad, some water, and a clean cloth. Here’s how to remove rust using lime juice:
Pour lime juice onto the steel wool pad.
Scrub the rusted areas.
Rinse with water.
Wipe with a clean cloth.
Using Vinegar
You probably have some condiments in your kitchen, like vinegar. The good news is that vinegar can be the key to permanently removing rust from your bike. All you need to remove rust with vinegar is white vinegar (its higher acidity makes it more effective than other rust removers), a spray bottle, baking soda, rubbing alcohol, and a clean cloth. Here’s a step-by-step method for using vinegar to remove rust from your e-bike:
Pour white vinegar into a spray bottle. While you can pour the vinegar directly onto the rust, using a spray bottle ensures even coverage.
Spray it on the rusted areas. If you apply it directly, use a sponge or a ball of aluminum foil, which can also act as a scrubbing brush.
Wait 10-15 minutes, then rinse off the vinegar. Vinegar will continue to corrode the metal parts of the bike if not thoroughly washed off. To prevent this, rinse the bicycle thoroughly with a hose after removing the rust.
Dry the bicycle completely before storing it. Any leftover moisture can cause it to rust again. Use a cloth soaked in industrial alcohol to wipe down the bike and remove any excess water. Store the bicycle in a cool, dry place to prevent further rusting.
Tip: If the rust is severe, you can disassemble the bike parts and soak them in a vinegar solution.
Chemical Rust Removers
If all else fails, you’ll need to resort to the ultimate solution—chemical rust removers. While not one of those great DIY solutions, chemical rust removers can handle the toughest rust on your electric bicycle. Before using rust removers, wear protective gloves and goggles, as these chemicals can harm your eyes or skin. Read the instructions carefully to ensure safe use. Here’s how to remove rust using chemical rust removers:
Spray the rust remover on the rusted areas.
Wait 30 minutes to overnight (check the instructions for specific times), then wipe it off with a clean cloth. If the rust is severe, leave the rust remover on the affected area overnight.
Preventing Rust on Your E-Bike
Any e-bike needs to be maintained; rust can reduce its performance and overall value. If left untreated, rust can make riding uncomfortable or even impossible. Don't let rust eat away at your bike. Take a little time to maintain your e-bike using one of the simple methods listed above, and it will look and perform longer than you think.
化学除锈剂
Read more

Tips & Cycling Knowledge
Potential Risks to Be Aware of When Using Electric Bicycles
Electric bicycles, or e-bikes, have become increasingly popular due to their convenience, eco-friendliness, and ability to assist with long-distance travel and hilly terrain. However, as with any mode of transportation, there are potential risks that users need to be aware of to ensure their safety and the safety of others. Here are some key risks associated with using electric bicycles and how to mitigate them.
Battery and Electrical Issues
One of the most significant risks associated with e-bikes is related to their batteries and electrical systems. Lithium-ion batteries, commonly used in e-bikes, can overheat, catch fire, or even explode if not handled properly.
Mitigation:
Always use the charger provided by the manufacturer.
Avoid overcharging the battery and monitor it while charging.
Store the battery in a cool, dry place away from direct sunlight.
Regularly inspect the battery and electrical connections for any signs of damage or wear.
Speed and Control
E-bikes can reach higher speeds than traditional bicycles, which can lead to accidents if not properly controlled. The increased speed can also make it more challenging to navigate through traffic or crowded areas.
Mitigation:
Familiarize yourself with the e-bike's controls and speed settings before riding.
Always wear a helmet and other protective gear.
Obey traffic laws and ride at a safe speed, especially in congested areas.
Practice riding in a safe, open area to get used to the e-bike's handling and braking.
Maintenance and Mechanical Failures
Like any vehicle, e-bikes require regular maintenance to ensure they function correctly. Mechanical failures, such as brake malfunctions or tire blowouts, can lead to accidents.
Mitigation:
Regularly check the brakes, tires, chain, and other components for wear and tear.
Schedule routine maintenance with a professional, especially if you're unfamiliar with bike repairs.
Keep the e-bike clean and lubricated to ensure smooth operation.
Weight and Handling
E-bikes are typically heavier than traditional bicycles due to the battery and motor. This extra weight can affect handling, especially when maneuvering or lifting the bike.
Mitigation:
Be mindful of the e-bike's weight when riding, especially when turning or stopping.
Use both brakes evenly to maintain control.
When lifting the e-bike, use proper lifting techniques to avoid injury.
Theft
E-bikes are often more expensive than regular bicycles, making them a target for theft. The risk of theft can be higher if the e-bike is left unattended in public places.
Mitigation:
Invest in a high-quality lock and always lock your e-bike to a secure, immovable object.
Remove the battery and take it with you if possible when leaving the e-bike unattended.
Park the e-bike in well-lit, high-traffic areas where it can be easily seen by others.
Weather Conditions
Adverse weather conditions, such as rain, snow, or ice, can make riding an e-bike more dangerous. Wet or slippery surfaces can reduce traction and increase stopping distances.
Mitigation:
Check the weather forecast before riding and avoid riding in severe weather conditions.
Use tires that are suitable for different weather conditions and have good tread.
Wear appropriate clothing and gear to stay dry and visible.
Pedestrian and Traffic Interactions
Riding an e-bike on roads and shared paths means interacting with pedestrians and other vehicles. Miscommunication or misunderstanding can lead to collisions.
Mitigation:
Use hand signals to indicate your intentions to other road users.
Equip your e-bike with lights and a bell to increase visibility and audibility.
Stay aware of your surroundings and anticipate the actions of others.
Conclusion
While electric bicycles offer numerous benefits, including convenience and environmental friendliness, it is crucial to be aware of the potential risks associated with their use. Regular maintenance, wearing appropriate safety gear, and adhering to traffic laws and safety guidelines can significantly mitigate these risks. Choose a model that suits your riding needs and physical condition, and always stay vigilant to enhance your safety awareness. By understanding and taking appropriate precautions, you can fully enjoy the benefits of electric bicycles while ensuring your safety. Happy riding, and stay safe!
Read more

Tips & Cycling Knowledge
Camping and Travel Essentials: How to Choose the Perfect Electric Bike
Electric bikes have become an increasingly popular choice for camping and travel enthusiasts. They provide an eco-friendly, efficient, and fun way to explore the great outdoors, all while making it easier to carry your gear and tackle challenging terrains. However, with so many options available, choosing the perfect e-bike for your adventures can be daunting. This guide will help you navigate through the key factors to consider when selecting an electric bike for camping and travel.
Determine Your Needs
Before diving into the specifics, it’s essential to understand your unique requirements. Consider the following questions:
What types of terrain will you be riding on? (e.g., paved roads, gravel paths, mountain trails)
How far do you plan to travel on average?
Will you be carrying camping gear or additional passengers?
What is your budget?
Battery Life and Range
One of the most critical factors for an e-bike used in camping and travel is its battery life and range. You’ll need a bike that can cover the distances you plan to travel without frequent recharging. Look for e-bikes with:
A high-capacity battery (measured in watt-hours, Wh)
A long range on a single charge (at least 40-60 miles is ideal for longer trips)
Removable batteries for easy charging and potential swapping on extended journeys
Motor Power and Performance
The motor’s power, measured in watts, determines how much assistance the bike provides, especially on hills and rough terrains. Consider:
A mid-drive motor for balanced weight distribution and efficient power delivery
At least a 500W motor for tackling steep inclines and off-road conditions
Responsiveness for a smooth and powerful riding experience
Durability and Build Quality
For camping and travel, your e-bike needs to be robust and reliable. Pay attention to:
Frame material: Aluminum and carbon fiber are lightweight yet strong
Quality of components: Look for reputable brands for gears, brakes, and suspension
Water and dust resistance: Ensure the e-bike is designed to withstand various weather conditions
Comfort and Ergonomics
Long rides require a comfortable bike. Features to look for include:
An adjustable saddle and handlebars to fit your height and riding posture
A suspension system (front fork or full suspension) for absorbing shocks on rough trails
Ergonomic grips and a comfortable saddle
Portability and Storage
Consider how you will transport and store your e-bike when not in use:
Folding e-bikes are great for easy storage and transportation in RVs or car trunks
Removable batteries and wheels for reducing weight and bulk during transport
Accessories and Add-ons
For a complete camping and travel experience, consider e-bikes that offer:
Rack mounts for attaching panniers and carrying camping gear
Integrated lights for visibility and safety during night rides
Fenders to keep you clean and dry in wet conditions
Test Ride and Reviews
Finally, before making a purchase, test ride a few models to get a feel for their performance and comfort. Additionally, read reviews and seek recommendations from other camping and travel enthusiasts to ensure you’re making an informed decision.
Spot Center for All Bikes
📍15370 Fairfield Ranch Rd Unit G Chino Hills, CA 91709-Eric Villegas
📞909-380-9332
Kingbull Literider
Technical Specifications
Motor
1300W (peak), 750W (sustained), 48V
Throttle
Half Twist
Sensor
Cadence (Speed)
Top Speed
28 MPH
Range
Up to 50 miles
Battery
Removable lithium-ion 48V, 15Ah
Weight
73lbs
Folding Dimensions
Height: 32 inches, Length: 38 inches
Pedal Assist
5 Level
Frame
6061 AluminumAlloy With Internal Battery
Tires
20" x 4.0" CST All-terrain Tires
Shift Lever
Shimano 7 speed
Fork
Hydraulic Fork With 80 mm Travel
Rear Derailleur
Shimano 7 speed
Price
$949
Kingbull Discover
Technical Specifications
Motor
1300W (peak), 750W (sustained), 48V
Throttle
Half Twist
Sensor
Cadence (Speed)
Top Speed
28 MPH
Range
Up to 60 miles
Battery
Removable lithium-ion 48V, 17.5Ah
Weight
77lbs
Pedal Assist
5 Level
Frame
6061 AluminumAlloy With Internal Battery
Tires
26" x 4.0" CST All-terrain Tires
Shift Lever
Shimano 7 speed
Fork
Hydraulic Fork With 80 mm Travel
Rear Derailleur
Shimano 7 speed
Price
$1049
Conclusion
Choosing the perfect electric bike for camping and travel involves carefully considering your needs, the bike’s specifications, and additional features that enhance your experience. By focusing on battery life, motor power, durability, comfort, portability, and accessories, you can find an e-bike that perfectly complements your outdoor adventures. Happy riding!
Read more
MaintenanceTips & Cycling Knowledge
Battery Longevity of KINGBULL Electric Bikes
Introduction
Kingbull electric bikes come with premium lithium-ion batteries renowned for their quality and durability. In this article, we delve into the expected lifespan of these batteries and share essential charging practices to help you maximize their performance and longevity.
Battery Specifications and Charging Time
The Kingbull battery uses a charger that meets US standards, with a voltage of 48V and a current of 3A. On average, it takes approximately 5 to 8 hours to fully charge. So, how long can this battery last?
Grasping Charge Cycles
Kingbull electric bikes come with high-quality lithium-ion batteries rated for 1000 full charge cycles before needing replacement. A full charge cycle is defined as charging the battery from a fully discharged state to a fully charged state. If the battery is half-discharged before charging, it counts as half a charge cycle. Therefore, discharging the battery to 50% and then charging it to 100% twice equals one full charge cycle. Charging before the battery is fully discharged can effectively double its lifespan!
Battery Lifespan and Warranty
If you use our electric bike daily, completing one full charge cycle each day, the battery life can reach at least 1000 days or approximately 2.8 years. Considering battery degradation, our batteries are designed to last between 2.5 to 7 years. Additionally, our batteries come with a two-year warranty. The actual lifespan of the battery depends on several factors, including how frequently the owner discharges and charges the battery. Heavy users who deplete and recharge the battery daily can expect a lifespan of about 2.8 years, while occasional users may see the battery last 3 to 6 years. On average, we typically see a battery lifespan of around 5 years.
Factors Influencing Battery Lifespan
Frequency of Discharge and Charge
The frequency of discharging and charging the battery affects its actual lifespan. For example, users who fully discharge and charge their batteries every day for a week will have an estimated lifespan of about 2.8 years. Users who charge less frequently can expect the battery to last 3 to 6 years. On average, we observe a typical battery lifespan of about 5 years.
Proper Charging Habits
Maintaining proper charging habits is crucial to maximizing battery life. While lithium-ion batteries don't wear out from use, improper charging can impact their performance. We recommend charging the battery when it reaches about 50%-70% discharge and avoiding overcharging. Using the original charger that comes with the Kingbull ebike is essential, as the standard charger and battery are optimized to extend battery life. We strongly discourage using non-original chargers, as they can shorten the battery life and pose potential safety hazards. Proper charging habits and regular maintenance can significantly increase battery life. Frequent overcharging or deep discharging can severely damage the battery and shorten its lifespan. Charging when the battery is 50%-70% discharged is advisable, and charging for about an hour after the charger light turns green is recommended.
Adopt Good Riding Habits
Try to avoid sudden stops. Electric bikes experience the highest power load during start and stop cycles. Frequent, unstable currents can reduce battery life.
Avoid Exposing the Battery
Extreme weather conditions can impact the battery's actual lifespan. Exposed batteries are more susceptible to lifespan reduction due to weather changes and are more likely to suffer damage from impacts while riding. KINGBULL eBikes feature built-in batteries with aluminum alloy casings and frame tubes, providing double protection. The battery is protected within the frame, avoiding collisions. The leading safety design ensures the battery is waterproof, fireproof, and explosion-proof, enhancing safety.
Use the Original Charger
The standard charger and battery can significantly extend battery life. We do not recommend using non-original chargers, as they may shorten battery life and even cause dangerous situations. Protect the charger and use it in good condition for charging.
Conclusion
Kingbull electric bikes are equipped with top-quality lithium-ion batteries, renowned for their exceptional lifespan and durability. To ensure you get the most out of your battery, it’s crucial to follow optimal charging practices and regularly maintain your bike. Proper charging and usage can enhance battery performance and extend its lifespan, allowing your Kingbull electric bike to stay by your side for longer.
Read more

MaintenanceTips & Cycling Knowledge
Handling Error Codes
1. Error Code E034: Throttle Fault
If your electric bike screen says E034, it means there's somethirng funky with the throttle.
why does it occur
Usually, it's either the throttle sensor acting up or it's not hookeed up rightLots of things can cause this, like hiccups during manufacturingor damagefrom a rough ride.
Troubleshooting
Here's what you can try
1. Throttle Sensor Wire Connection Error
Check the throttle sensor wire. Unplug it, then plug it back inIf the E034message disappears, it was probably just a bad connection. Easy fix, just makesure everything's snug.
2. Throttle Damage
If the E034 message sticks around even after you've checkedthe wire, it'slikely the throttle itself is busted. No worries, though! Just reach out to ourcustomer service team, and we'll send you a new throttle.
Please do the test according to the video
2. Error Code E037: Brake Abnormality
If you see error code E037 on the display screen, it indicates a brake abnormality.
Why does it occur
A common cause of this problem is a bad brake sensor cable connection, partly due to a faulty display.
Which cables are the brake sensor ones
The yellow labeled ones as shown in the picture below are the brake sensor cables, one on the left and one on the right.
Troubleshooting
1.Bad brake sensor cable connection
1.1Which sensor works unwell
Reconnect the left and right sense cable separately until the E37 code disappears(For example, if E37 disappears after disconnecting the left side the trouble point is on the left side.)
1.2.How to fix it
Remove the lever firstly and unscrew the ① fixing screw, then tighten or loosen the ②nut shown below until the E37 code disappear.
If you unplug the brake cables on both sides at the same time and the screen does not display E037, there is a problem with the brakes on both sides and need to be replaced.
2.Display fault
If both sides are unplugged at the same time and the display still displays E037, it means there is a problem with the display, You need to reset the display. You can reset the display by following these steps:
Long-press the "+" and "-" buttons to enter the display settings. Then, short-press the power button until you reach the P16 setting.
Long-press the "-" button for 5 seconds to restore the factory settings.
Once you've made the adjustments, long-press the "+" and "-" buttons again to save the changes.
If the display still displays E037 after resetting, then need to replace the display.
Please do the test according to the video
PS: If the problem persists, please contact the customer service team.
Read more