


Explore News

Tips & Cycling Knowledge
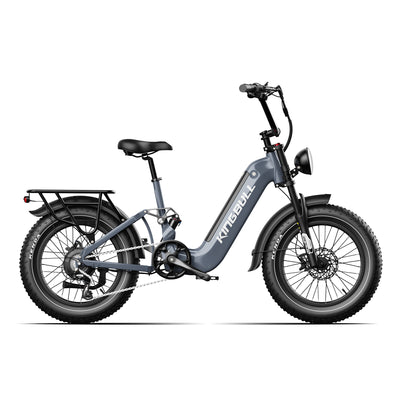
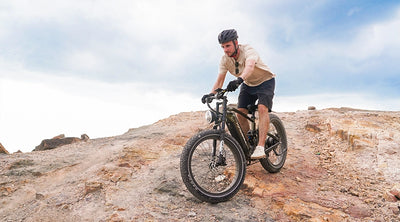
Ebike Safety Tips: Staying Safe on City Streets
Riding an ebike can be a fun and efficient way to get around, but it's important to prioritize safety. Here are some essential tips to help you stay safe while navigating city streets.
Understanding Local Regulations
Before you hit the road, make sure you understand the specific rules and regulations in your city. While there can be variations, some common regulations include:
Yield to Pedestrians: Always give the right-of-way to pedestrians, especially in crosswalks.
Avoid Sidewalks: Riding on sidewalks can be dangerous for both you and pedestrians.
Ride with the Flow of Traffic: Always ride in the same direction as vehicular traffic. Riding against traffic is extremely dangerous.
Signal Your Intentions: Use hand signals to indicate when you plan to turn or stop. This helps other road users anticipate your movements.
Stay in Designated Bike Lanes: If there's a designated bike lane, use it. If not, ride as far to the right as is safe, but avoid the door zone of parked cars.
Wear a Helmet: Always wear a properly fitted helmet to protect your head in case of a fall.
Obey Traffic Signals and Signs: Treat stop signs and red lights just like you would in a car.
Use Lights at Night: Equip your ebike with front and rear lights and use them whenever visibility is reduced.
Additional Safety Tips
Be Visible: Wear bright-colored clothing and reflective gear, especially at night or in low-light conditions.
Check Your eBike Regularly: Ensure your tires are properly inflated, brakes are working, and lights are functioning.
Be Aware of Your Surroundings: Scan your surroundings constantly, and be prepared to react to unexpected situations.
Ride Defensively: Assume that other road users may not see you. Give yourself plenty of space and avoid taking unnecessary risks.
Obey Speed Limits: While ebikes can go fast, it's important to obey speed limits and ride at a safe speed for the conditions.
Tips for Sharing the Road
Maintain a Safe Following Distance: Leave plenty of space between yourself and other vehicles.
Be Predictable: Ride in a straight line and avoid weaving in and out of traffic.
Use Your Bell: Use your bike bell to alert pedestrians and other cyclists of your presence.
Be Courteous: Show respect for other road users, and they'll be more likely to respect you.
By following these tips, you can enjoy a safe and enjoyable ebike riding experience. Remember, safety should always be your top priority.
Read more

Tips & Cycling Knowledge
How to Charge Your Electric Bike While Camping: Top Methods to Keep Your Adventure Going
Electric bikes are a game-changer for commuting and exploring the outdoors. However, when you're camping off the grid, keeping your electric bike charged can be a challenge. Don't worry—here’s a comprehensive guide on how to charge your electric bike while camping, ensuring your adventures never run out of power!
1. Portable Solar Chargers: Harness the Power of the Sun
Imagine enjoying a sunny camping day while your electric bike gets charged by the sun. Portable solar chargers are perfect for this. With efficient solar panels and a compatible charging controller, you can convert sunlight into energy for your bike's battery.
Pro Tip: Place your solar panels in direct sunlight and keep them free from shadows. Consider setting up multiple panels around your tent to maximize charging efficiency.
2. Portable Generators: Your Power Backup Plan
If you prefer a more controlled power source, a portable generator is your go-to solution. These compact devices can charge your electric bike’s battery anytime, regardless of weather conditions. Use your generator in the evening to ensure your bike is fully charged for the next day’s ride.
Note: Be mindful of noise levels and fuel supplies. Opt for a low-noise model and ensure you have enough fuel to last through your trip.
3. Campsite Power Outlets: Embrace Modern Camping Amenities
Many U.S. campgrounds, like KOA (Kampgrounds of America) and state parks, offer power outlets. Booking a site with electrical hookups allows you to easily charge your electric bike, eliminating the worry of running out of battery.
Tip: Bring a long extension cord to comfortably charge your bike from your tent without stretching cables too far.
Related Article: Learn more about finding campgrounds with electrical hookups in our guide to the best campsites with power in the U.S.
4. Car Inverters: Charge on the Go
For road-trippers who love the freedom of the open road, a car inverter is a game-changer. It converts your vehicle’s 12V battery power to 120V, allowing you to charge your electric bike while traveling.
Usage Tip: Avoid running the inverter for extended periods to prevent draining your car’s battery. Plan your charging times to keep both your car and bike batteries in good shape.
5. Spare Batteries: Double the Power, Double the Fun
If you prefer not to rely on external devices, carrying spare batteries is a straightforward solution. Swap out a depleted battery for a fully charged spare to keep your adventures going.
Pro Tip: Charge spare batteries in advance and store them safely. Bringing multiple batteries can extend your riding time and ensure you’re always prepared.
Related Product: Check out our high-quality spare batteries designed for electric bikes to ensure you're never left without power.
Enjoy Uninterrupted Electric Bike Adventures
Charging your electric bike while camping might seem challenging, but with these solutions, it’s a breeze. Whether you choose to harness the sun with portable solar chargers, control your power with a generator, enjoy campsite amenities, use a car inverter, or carry spare batteries, you can ensure your bike is always ready for your next adventure.
Ready to gear up for your next camping trip? Explore our range of electric bikes and accessories to find everything you need for an epic outdoor adventure.
Happy riding, and enjoy the great outdoors!
Read more

Tips & Cycling Knowledge
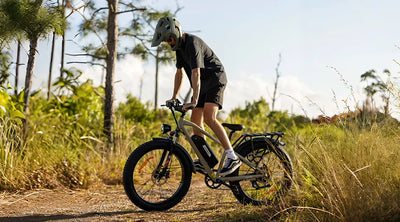
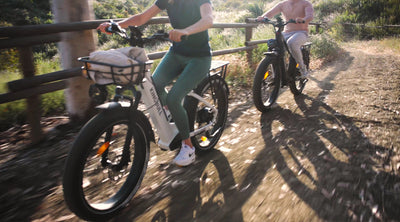
How to Maximize the Use of Electric Bikes in Urban Settings
Electric bikes are becoming increasingly popular as a sustainable and efficient mode of transportation in urban environments. At Kingbull Bikes, we believe in empowering urban commuters with stylish, high-quality, and eco-friendly ebikes that offer exceptional value. Here’s how you can make the most out of your Kingbull electric bike in the city:
1. Embrace Efficient Commuting
Kingbull electric bikes are designed to streamline your commute. Utilize the electric assist feature to effortlessly navigate through city traffic and arrive at your destination faster. Take advantage of bike lanes and alternate routes to avoid congestion and reduce travel time.
2. Explore Beyond Your Route
Beyond commuting, Kingbull ebikes enable you to explore your city like never before. Discover new neighborhoods, parks, and local attractions with ease. Kingbull Literider's foldable design allows for easy storage as well.
3. Enhance Sustainability
Choosing ebikes contribute to environmental sustainability. Reduce your carbon footprint by opting for emission-free transportation. Our ebikes produce zero tailpipe emissions and consume minimal energy compared to conventional vehicles, promoting cleaner air and reducing urban congestion.
4. Integrate with Public Transit
Maximize your mobility options by combining your electric bike with public transit. Extending your commuting range without the hassle of parking or uber.
5. Optimize Storage and Portability
Our foldable ebikes are designed for urban living. Easily store your Kingbull bike in small apartments, offices, or urban dwellings. Ideal for city residents with limited space.
6. Navigate Urban Terrain with Ease
Navigate diverse urban landscapes confidently with Kingbull electric bikes. Equipped with robust CST tires and advanced braking systems, our bikes provide stability and safety in various riding conditions. Enjoy smooth rides on city streets, bike paths, and rough terrains alike.
7. Stay Connected and Informed
Stay informed about local cycling regulations and safety guidelines to ensure a secure and enjoyable riding experience. Use cycling apps and GPS navigation to plan efficient routes, monitor battery life, and access real-time traffic updates, enhancing your urban commuting efficiency.
8. Customize Your Riding Experience
Personalize your riding experience with adjustable pedal-assist levels and ergonomic design features. Tailor your bike's handlebar height, seat position, and accessory attachments to suit your comfort preferences and riding style. Enjoy a customized and comfortable commute every time.
9. Support a Reliable Brand
Invest in Kingbull Bikes, a trusted name in electric bike innovation and quality. Backed by years of expertise and customer satisfaction, our ebikes deliver superior performance and durability in urban environments. Join the Kingbull community and experience the future of urban mobility.
By maximizing the use of Kingbull electric bikes in urban settings, you embrace a sustainable, efficient, and enjoyable mode of transportation. Enhance your daily commute, explore cityscapes, and promote environmental stewardship with our innovative ebike solutions. Discover the freedom and convenience of urban cycling with Kingbull Bikes today!
Read more
MaintenanceTips & Cycling Knowledge
How to Inflate Your Electric Bike Tires: A Step-by-Step Guide
All electric bikes, like regular bikes, need to inflate their tires when they are low on air pressure.Keeping your electric bike tires properly inflated is crucial for a smooth and safe ride. Whether you're a seasoned e-biker or new to the scene, this guide will walk you through the process of inflating your electric bike tires. Let’s dive in!
Why Proper Tire Inflation Matters
Before we get into the steps, it's important to understand why tire inflation is so crucial:
Safety: Properly inflated tires provide better grip and control.
Performance: Correct tire pressure ensures a smoother ride and better efficiency.
Longevity: Well-maintained tires last longer and are less prone to damage.
Step-by-Step Guide to Inflating Your Electric Bike Tires
Step 1: Gather Your Tools
You'll need:
A quality bike pump
A pressure gauge (if your pump doesn’t have one)
Your electric bike’s tire pressure recommendations (found in the manual or on the tire sidewall)
Step 2: Check the Recommended Tire Pressure
Look on the sidewall of your tires for the recommended PSI (pounds per square inch). This information is also usually found in your bike’s user manual. Ensuring you know the correct PSI is essential for avoiding over or under-inflation.
Step 3: Remove the Valve Cap
Locate the valve on your tire. There are two common types of valves:
Schrader Valve: The same type found on car tires.
Presta Valve: A narrower, often found on road bikes. If your bike has Presta valves, you’ll need to unscrew the small knurled nut at the top before you can pump air in.
Step 4: Attach the Pump
For a Schrader valve, simply press the pump head onto the valve and secure it.
For a Presta valve, after unscrewing the knurled nut, press the pump head onto the valve and secure it, usually by flipping a lever.
Step 5: Inflate the Tire
Begin pumping. Keep an eye on the gauge to ensure you’re adding the correct amount of air.
If your pump has a gauge, you’ll see the pressure rising as you pump. If not, periodically check the pressure with a separate gauge.
Step 6: Check the Pressure
Stop pumping occasionally to check the pressure. Ensure it matches the recommended PSI.
For Schrader valves, use the pressure gauge directly.
For Presta valves, close the knurled nut first, then check the pressure if using a separate gauge.
Step 7: Secure the Valve and Replace the Cap
Once your tire is inflated to the correct pressure:
Remove the pump head.
For Presta valves, screw the knurled nut back down.
Replace the valve cap on either type.
Step 8: Repeat for the Other Tire
Don’t forget to repeat the process for your rear tire!
Tips for Maintaining Tire Pressure
Regular Checks: Check your tire pressure at least once a month, or before long rides.
Weather Considerations: Tire pressure can fluctuate with temperature changes, so check more frequently in extreme weather.
Carry a Portable Pump: A compact, portable pump can be a lifesaver if you need to adjust pressure on the go.
Conclusion
Keeping your electric bike tires properly inflated is a simple yet essential task that enhances your riding experience and safety. By following these steps, you'll ensure your tires are always in top condition, ready for any adventure. Happy riding!
Read more
MaintenanceTips & Cycling Knowledge
The Complete Guide to E-Bike Seat Adjustment: Key Tips for Comfort and Fit
When it comes to the comfort of electric bicycles, seat adjustment is of paramount importance. A properly adjusted seat not only enhances the riding experience but also helps reduce the discomfort that may arise from prolonged use.
Adjusting Seat Height
The adjustment of seat height directly affects the rider's comfort and riding efficiency. An appropriate seat height should allow the rider's knees to be slightly bent while pedaling, avoiding discomfort caused by fully extended or overly bent knees. Seat height adjustment can be accomplished by modifying the length of the seat post, ensuring optimal power output and stability during the ride.
Common Issues and Solutions
Some customers have reported that the seat cannot be secured even after tightening the seat post clamp. This issue often arises because the seat is not adjusted to the correct position relative to the marking on the seat post. The seat should be adjusted within the marked range—neither below nor above the marking.
If the seat still cannot be fixed even after adjusting according to the marking, the issue might lie with the seat post clamp itself. In this case, you should:
Open the seat post clamp.
Tighten the screw of the seat post clamp.
Secure the seat post clamp again.
Following these steps should ensure that the seat remains securely in place after adjustment.
Seat Material and Design
When considering the material and design of bicycle seats, aside from adjustment functionalities, several factors contribute to comfort. A comfortable seat should offer adequate support and softness to reduce friction and pressure during long rides. It should also be breathable to wick away moisture, keeping riders dry and comfortable.
When purchasing a seat, it is crucial to consider its size and compatibility with your bike's seat post. The seat is usually secured with a seat clamp, which attaches to the seat post. The size of the clamp that secures the seat is approximately 4.8 cm, while the width of the seat post on the bike is 2.8 cm, ensuring a stable installation. If you are only adding a comfortable seat cover to the seat, you can choose based on personal preference without affecting compatibility with the seat post.
When carrying passengers, ensuring safety is paramount. Installing a rear seat armrest on the seat post can significantly enhance safety by providing passengers with a stable support to hold onto. This can help prevent injuries and maintain balance during sudden braking, sharp turns, or other unexpected movements. Additionally, a rear seat armrest can offer added comfort for passengers, making the ride more enjoyable. Ensuring the armrest is securely installed and made from durable materials is crucial to maximize its effectiveness in enhancing passenger safety.
Conclusion
A well-adjusted electric bicycle seat not only enhances riding comfort but also mitigates potential health issues and fatigue. This allows riders to fully enjoy the benefits and pleasure of cycling.
Read more
MaintenanceTips & Cycling Knowledge
Why My Electric Bike Won't Start After Delivery: Common Issues and Solutions
Upon receiving their electric bike, many customers report that despite charging the battery, their bike fails to start or the throttle doesn't respond, much like a traditional bike. This issue can be frustrating, especially after eagerly anticipating the arrival of a new mode of transportation. Understanding the common problems and their solutions can help resolve these issues quickly and get you back on the road.
Reasons Why Your Electric Bike Won't Start
Battery is Depleted
The first thing you should do after receiving your electric bike is to check the battery level. Long press the button in the middle of the battery. If the indicator light does not turn on, it means the battery is depleted.
Light Status
Battery Status
3 Green Lights & Red Light
80% -100% Power
2 Green Lights & Red Lights
60% - 80% Power
1 Green Lights & Red Lights
40% - 60% Power
Only Red Light
20% - 40% Power
No Light
0% Power
Battery is Still Charging
During the first charge after receiving their electric bike, After charging, they forget to unplug the charging cable before turning on the power, which prevents the bike from starting.
Power Switch on the Right Side of the Battery is Not Turned On
There is a power switch on the right side of the battery that needs to be switched to the "I" position to turn on the power.
Instrument Panel Power Button on the Left Handlebar is Not Pressed
Typically, electric bikes require a long press of the power button to activate the electric assist, similar to how a car needs to be started before it can run. The same applies to your bike; you need to long press the power button on the left handlebar to activate the display.
How to Start an Electric Bike
Activate the Battery:
Turn the red switch on the right side of the battery to the "l" position to power it on.
Check Battery Level:
Press and hold the button in the middle of the battery to check the current battery level.
Power On the E-Bike:
Press and hold the power button located next to the left handlebar to activate the e-bike.
Adjust Pedal Assist:
Briefly press the "+" or "-" buttons to adjust the pedal assist level according to your preference, ranging from levels 1 to 5.If the pedal assist level is set to 0, the electric bike will not operate.
Conclusion
If you have followed all the troubleshooting steps and your electric bike still won't start, don't hesitate to reach out to our customer service team at email customers@kingbullbike.com for further assistance. We are committed to ensuring that your riding experience is smooth and enjoyable. Remember, proper maintenance and understanding your e-bike's functions can prevent many common issues. Thank you for choosing Kingbull Bike, and happy riding.
Read more