


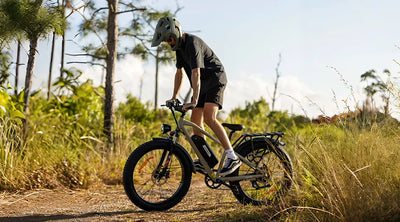


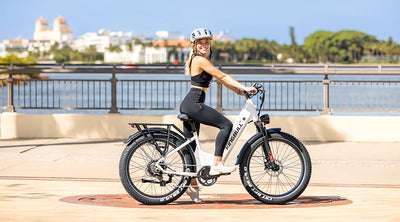
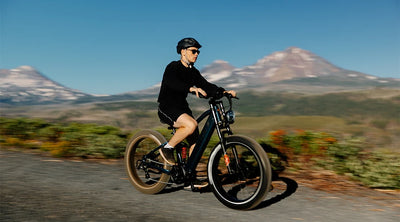


Explore News

MaintenanceTips & Cycling Knowledge
How to Replace Brake Pads
Brake pads on all electric bicycles are consumable parts that gradually wear down with long-term use. When worn to a certain extent, they can affect braking performance and even pose a safety hazard.Inspecting and replacing brake pads is crucial for every rider, as it directly impacts riding safety. This article will provide detailed guidance on the specific procedures for brake pad inspection and replacement.
Preparation for Inspection and Replacement
Brake pad replacement
Allen wrench
Needle-nose pliers
Disc brake pads wear down over time due to normal use. This can cause a slower brake response time and require more effort to press the brakes.
A squeaking noise from disc brakes is usually caused by contaminated brake pads. Even the slightest amount of oil, including from your skin, can damage disc brake pads. Minimize contact between the brake surface and bare skin whenever handling brake pads. If you do touch the pads, clean them with rubbing alcohol or a specialized product for disc brake pads. Then lightly sand the pads.
Brake Pad Inspection
Check your brake pads for shininess or visible wear. Inspect the pads by removing the wheel and examining the space where the rotor spins.
When inspecting brake pads, pay attention to the following key points:
Integrity: Ensure there are no chunks, dents, or missing parts. If there are, replace the damaged pads before your next ride.
Thickness: The pad material should be at least 1.5 mm thick. If you don't have a ruler, note that a grain of rice is about 1.5 mm thick (width, not length). If the pad is thinner than this, it’s time to replace it.
Cleanliness: The pads should be free of oil and other contaminants. If the pads are dirty, especially if they are oily (a significant safety hazard!), they need to be replaced.
Replace brake pads
Please refer to the Youtube video to install!
Read more

MaintenanceTips & Cycling Knowledge
Ultimate Guide to Silencing Your Electric Bike's Noises
Many times, we find ourselves puzzled by squeaks or unexpected noises coming from our newly assembled or regularly used electric bicycles. These noises often stem from improper assembly or wear and tear of components over time, indicating potential issues. Addressing these problems early can prevent them from worsening in the future. If your electric bike starts making noises, it’s crucial to stop and check it before continuing your ride.
Why is my electric bike making strange noises?
Identifying the source of the squeaking is crucial. Here’s how you can diagnose and fix it, as there are many parts on a bike that can produce noise. Once you pinpoint the source, refer to the relevant component below.
Brakes
The contact between the wheel and the brake pads often causes squeaks. First, check if your wheels are properly secured in the dropouts, where the wheel axles attach to the bike frame. Misalignment can cause the wheel to rub against the brake pads. Remove the wheel, tighten the quick-release skewer, and securely fix it in the dropouts.
Chain
A squeaky chain is likely dry and in need of thorough cleaning and lubrication.
Crankset
If the crankset is the source of the noise, loose bolts might be the culprit. Grab the crank arms (the parts connecting the pedals to the bike) and twist them to see if they move side to side. If they do, tighten them using the appropriately sized hex wrench.
Derailleur
Dry pulleys can often cause the derailleur to squeak. Clean them thoroughly with a dry cloth, then apply a drop of lubricant to each pulley’s axle. Also, lubricate the derailleur’s pivots by turning the pedals.
Pedals
A common question is why the bike makes noise when pedaling. The pedals themselves might be the issue. Check if they are tightened securely or if the pedal threads are damaged. If the threads are damaged and you can’t tighten the pedals, replace them promptly.
Saddle
The rails connecting the saddle to the seat post can also be a source of squeaks. Tighten the bolts securing the saddle using an appropriately sized hex wrench. If the saddle tilts and squeaks, consider taking it to a nearby bike shop.
How to Fix Squeaky Bike Brakes?
Fixing noisy brakes on an electric bike is straightforward. Follow these steps to silence your brakes
Check the Brakes
It’s easy to determine if the front or rear brakes are at fault. During a ride, test the brakes individually. If the front brake is noisy, the sound will come from the left side. If the rear brake is noisy, the sound will come from the right side. If both brakes make noise, adjust both front and rear brakes.
Clean the Rotors
If possible, use rubbing alcohol to clean the disc brake rotors and wipe them with a clean cloth or towel. Clean the brake pads with a degreaser if they are still thick; if they are thin, replace them. After cleaning the brake pads, wait for them to dry completely before reassembling.
Replace Brake Pads
Replacing the brake pads follows the same steps for both the front and rear wheels. If your bike’s brakes are squealing when applied, the brake pads are likely worn out. Worn brake pads can’t grip properly and cause squealing, reducing braking efficiency.
Summary
These solutions will help you fix the squeaking noises on your electric bike, ensuring a smoother and more enjoyable ride. Regular maintenance and timely addressing of any noises can extend the life of your bike and make your rides more pleasant. With summer around the corner, hop on your perfect KINGBULL electric bike and explore the secrets of the summer forest!
Read more

Tips & Cycling Knowledge
Recommendation of 3 Leisure Cycling Routes in Atlanta
In cities like Atlanta, there are plenty of cycling routes perfect for leisurely weekend rides. Here are 3 recommended routes, 2 of which are away from the city, suitable for nature-loving cyclists. The last one is the classic BeltLine loop route, allowing you to fully enjoy the city's scenery and community ambiance.
Regardless of which route you choose, remember to check the weather and ensure you have your safety gear in place, ensuring you can enjoy your weekend cycling trip safely and happily.
Brookhaven Route:
Although not within the city limits of Atlanta, it is one of the most popular short cycling routes in the Atlanta area. Brookhaven is a city located in the northeast suburbs of Atlanta. You can start from Country Club Lake, heading north through various neighborhoods and Oglethorpe University, or head west passing Chastain Park and golf courses. The entire route is 21 miles long, passing through beautiful suburban scenery and rural landscapes, perfect for those seeking a peaceful ride.
Route Data:
Surfaces: 99% Paved · 1% Unpaved (Paved surfaces include asphalt, concrete, and chip seal.)
Length: 21.3 miles
Elevation Gain: 1448ft
Max & Min Grade: 5.7% / -7%
Fish Fry Route:
Located just 17 miles from downtown Atlanta, it is one of the best fish fry routes around Atlanta. The route passes through Wilkerson Mill-Farris Park, Hutcheson's Ferry Park, and Chattahoochee Hills.
Route Data:
Surfaces: 100% Paved (Paved surfaces include asphalt, concrete, and chip seal.)
Length: 30 miles
Elevation Gain: 1391ft
Max & Min Grade: 4.9% / -5.4%
BeltLine Route:
Atlanta's BeltLine is a leisure path encircling the city, offering approximately 18.7 miles of cycling route. This route extends through various communities in the city, with beautiful landscapes, art installations, and dining spots along the way. You can spend a whole day cycling on the BeltLine, enjoying the city's scenery and community atmosphere.
Route Data:
Surfaces: 68% Paved · 32% Unpaved (Paved surfaces include asphalt, concrete, and chip seal.)
Length: 18.7 miles
Elevation Gain: 856ft
Max & Min Grade: 6.1% / -8%
Preparing for a Cycling Route: Tips for a Safe and Enjoyable Ride
Before embarking on your cycling adventure, it's essential to take some preparatory steps to ensure a smooth and enjoyable ride, especially if you're riding an electric bike (e-bike). Here are some helpful tips to consider:1. **Prepare Your Kingbull:**
Before hitting the road, it's crucial to check the functionality of all parts of your electric bike. Regular maintenance helps reduce the risk of mechanical problems while riding. Ensure your brakes and moving parts are clean and in good condition. This routine check ensures your e-bike is ready for the journey ahead.2. **Choose the Right Gear:**The gear you wear depends on the riding conditions you'll encounter. For early morning or evening rides, reflective gear and lighting are essential for visibility. If you're tackling rough terrain, wearing a helmet and safety pads can provide added protection. Check the weather forecast to dress appropriately and stay comfortable throughout your ride.3. **Plan Your Route:**Whether you're exploring rural trails or urban bike lanes, knowing your route beforehand is beneficial. Fat tire e-bikes offer extra power for rough terrains, but understanding potential challenges helps you ride safely. Familiarize yourself with bike lanes and traffic patterns. Test your route on different days to gauge traffic flow and potential hazards.4. **Know E-Bike Laws:**Familiarize yourself with local e-bike laws to avoid legal issues. E-bikes are often classified differently from traditional bicycles, with specific regulations regarding where they can be ridden and required equipment. Research regulations regarding speed limits, power restrictions, and licensing requirements to ensure compliance.
Tips to Keep You Going:
- **Maintain Battery Life:**Avoid draining your battery completely to prevent damage. Recharge your battery after each ride to ensure it's ready for your next adventure. Starting with a fully charged battery maximizes your enjoyment and safety on the road.
- **Check Tire Pressure:**Regularly check tire pressure to avoid flat tires during your ride. Establish a routine for air pressure checks to ensure optimal performance.- **Utilize Pedal Assist:**Take advantage of pedal assist features on your e-bike for a smoother ride. Conveniently located controls on the handlebars allow you to adjust speed levels effortlessly while cycling.
In Conclusion:
Before setting off on your cycling journey, thoroughly inspect your e-bike and familiarize yourself with your route and local regulations. With proper preparation and adherence to safety guidelines, along with the reliable performance of a Kingbull Rover Fat Tire Electric Bike, you'll cover distances effortlessly and enjoy memorable experiences in stunning destinations across the country.
Read more

Tips & Cycling Knowledge
Pre-Ride Safety Checklist for All Electric bike Users
Everyone who receives a new electric bike is eager to assemble it and hit the road for an exhilarating ride. However, just like how drivers should make it a habit to check their rearview mirrors and fasten their seat belts before hitting the road, inspecting your electric bike before riding is crucial for every rider. While there is significant overlap between safety checks for electric bikes and regular bicycles, there are some additional considerations specific to electric bikes. So, buckle up and review our checklist! While you can't predict everything that might happen while riding, a quick check of your electric bike before departure can better ensure you don't encounter any unexpected issues.
Check Basic Equipment of the Electric Bike
1.Check the Frame and Screws. The frame is a vital component of an electric bike, and a sturdy frame ensures safe riding. Before riding, it's recommended to inspect the entire frame for any deformities, and ensure that screws on the rear frame and pedal are tightened to prevent any parts from falling off during the ride.
2.Check Wiring. Ensure that all wiring is correctly connected and functioning properly.
3.Check Front Suspension. Ensure that the front suspension is in the open position.
4.Check the Chain. Inspect the chain and gears for any damage or breakage, and ensure that your chain is properly placed on the derailleur. If you ride frequently, especially in harsh weather conditions or on dusty roads, it's advisable to clean the chain about once every 1-2 weeks. Cleaning the chain helps extend the life of both the chain and gears, ensuring smooth and safe riding.
5.Check the Tires. Properly inflated tires are crucial for smooth riding. They not only make your journey more comfortable but also reduce the risk of tire punctures due to under-inflation. You can check the sidewall of the tires to find the recommended tire pressure and inflate them to that level. Additionally, inspect the tire surface for any cracks or signs of wear. If there are any cracks, do not ride the bike until the tires are replaced. Over time, natural vibrations from riding on the road can loosen quick-release bolts, so we strongly recommend checking this component before each ride.
6.Check the Handlebars and Seatpost. The position of the handlebars and seatpost determines your comfort while riding. Ensure that the handlebars are adjusted to a comfortable angle and securely tightened to the stem. Additionally, if you find the seatpost slipping, fully tighten the quick-release lever onto the seatpost.
7.Check the Headlight & Taillight. Lights are essential indicators of your riding status for pedestrians and other vehicles on the road. Before riding, ensure that the lights are functioning properly.Depending on the model of Kingbull electric bike, there may be slight differences in how the lights are operated:
Voyager: Long press "+", the headlight turns on or off, and taillight are operated by the red button for left/right indication.
Rover: Long press "+", the headlight/taillight turns on or off.
Literider: The light button at the handlebar turns the headlight on or off and the tail light comes on automatically when the brakes are applied.
Discover / Discover ST:Long press the "+" button to turn on or off headlights and tail lights.
Hunter:The light button at the handlebar turns the headlight on or off and the tail light comes on automatically when the brakes are applied.
8.Ensure You Have a Helmet. We don't want to sound like your mom, but you can't ride a bike without wearing a helmet. Helmets aren't "cool," but you know what's even less cool? Head injuries. Before riding any bike, be sure to wear your helmet properly and check the helmet straps to ensure they are securely fastened to your head.
Check Electric Bike System Equipment
1.Check the Battery. The most crucial part of an electric bike is its power source. Open the right rubber cover and adjust the red button to "I", "I" indicates that the battery is supplying power normally. Press and hold the button on the front of the battery to check the battery level. The fun of an electric bike comes from the motor, so before rolling it out of the garage, ensure that the battery is fully charged.
2.Check Pedal Assist. After turning on the power, adjust the pedal assist through "+/-". The pedal assist has 0-5 levels, with 0 indicating no pedal assist. If you can't adjust it to 0, long-press "+" and "-", and short-press the power button to adjust the display to P19, then adjust the corresponding value to 000 through "+" or "-".
3.Check the Derailleur. All Kingbull electric bikes come equipped with Shimano 7-speed derailleurs. Before riding, it's recommended to check if shifting gears is smooth, as this will be a significant factor affecting your riding experience.
4.Check the Brakes. Before riding, it's advisable to check the brakes by squeezing the control levers of the front and rear brakes to ensure that the brakes engage as expected. Check if the rubber pads on the brake discs and the screws on the brake discs are tightened to ensure that your brakes operate at maximum efficiency.
5.Check the Throttle. Before checking the throttle, ensure that the rear wheel is lifted off the ground and not in direct contact with the ground. Depending on the throttle method of different models, twist or lightly press the throttle to see if the tire rotates normally, and if the speed value on the display is normal, to ensure normal operation during the ride. If you need to adjust or view the PAS speed on the display, start by long-pressing the '+' and '-' buttons to access the display. Then, navigate to P21 by pressing the power button, and adjust the parameters using the '+' or '-' buttons. Once adjusted, press the power button to move to P22, and continue in the same manner.The smaller the value, the slower the speed, and riders can adjust according to their riding habits.
Conclusion
Taking the time to perform a pre-ride safety check on your electric bike significantly enhances the likelihood of a smooth and enjoyable ride. By consistently conducting these checks and keeping up with regular maintenance year-round, you'll minimize the chances of unexpected maintenance issues cropping up. So, here's to safe and pleasant rides ahead!
Read more

Tips & Cycling Knowledge
Mastering Google Maps: A Guide to Finding the Perfect Bike Routes
Riding a ebike in the city is a delightful way to get around, but ebike lanes often have different layouts and road conditions compared to car lanes. To ensure a smoother and safer riding experience, using specially designed bicycle maps is essential. Google Maps is a powerful tool that can help you find the most suitable routes for cycling. In this article, we will explore how to use Google Maps to pull up bicycle-specific riding maps, making your cycling journey more enjoyable and worry-free.
Planning Your Cycling Adventure
Before embarking on any cycling adventure, it's essential to first confirm your location and plan your destination. Whether exploring new city streets or leisurely riding through your local community, understanding your starting point and destination is key to ensuring a smooth journey. Identifying the starting and ending points will help you plan the most efficient and safe route while also allowing you to anticipate any potential traffic conditions and road conditions. Therefore, before beginning your cycling journey, take a moment to confirm your location, set your destination, and adequately prepare for your adventure.
Navigating Your Cycling Journey with Google Maps
Using Google Maps is an excellent way to plan your cycling routes. Google Maps offers a wealth of features that can help cyclists find the best routes. It's worth noting that the content on the mobile and PC versions of the website may vary slightly, but the basic operations remain consistent.
Firstly, enter the destination of your desired location into the search box at the top of the Google Maps page. You can input a specific address, the name of a landmark, or simply use keywords to describe your destination. Google Maps will then automatically provide you with possible matching results, from which you can select one as your destination. Ensuring accurate input of destination information can help Google Maps plan the best cycling route for you, making your cycling journey more enjoyable and worry-free.
After setting your destination, click on the directions button displayed on the page, usually located below the search results.
After clicking on the directions button, the next step is to input your starting point. Simply enter your current location into the provided input box.
Following that, Google Maps will calculate the optimal cycling route for you and display it on the map. You can click on the starting point and destination on the route map to view detailed information and make adjustments as needed. Remember to select the bicycle icon at the top of the page to ensure that the route is tailored for cycling.
Since I'm using Google Maps on a PC, my page looks like the following. If you're also using Google Maps on a PC, you'll find an icon below the map that resembles a phone. Clicking on it will allow you to send the cycling route to your mobile device. Once done, you can follow the directions on your phone to start your ride. If you're directly searching on your mobile phone, you can skip this step and view the route directly.
Conclusion
Cycling through urban landscapes can be a rewarding experience, offering a unique perspective on city exploration while promoting health and happiness. Whether you're an experienced cyclist or a novice venturing into urban riding for the first time, let Google Maps be your guide as you explore the world, navigating city streets on two wheels and soaking in the urban scenery.
Read more

Tips & Cycling Knowledge
Discovering California: Recommended Electric Bicycle Routes for Leisurely Adventures
Riding an electric bicycle in the sunshine of California is a marvelous experience, allowing you to effortlessly glide between the azure coastlines, lush forests, and breathtaking mountains. Whether you seek adventure or crave relaxation, California's electric bicycle routes promise unparalleled fun and excitement. From the charming vistas of Monterey Bay to the iconic architecture of the Golden Gate Bridge, California offers a diverse array of options to immerse yourself in the beauty of nature, experiencing both physical and mental rejuvenation. Let's embark on this enchanting journey of electric biking together, exploring California's magnificent landscapes and unforgettable riding experiences!
Monterey Bay Coastal Recreation Trail
The Monterey Bay Coastal Recreation Trail is located along the enchanting coastline of Monterey Bay in California, offering a picturesque and bike-friendly pathway. Below, we will provide a detailed introduction to this route, including route description, major attractions, facilities, and difficulty level.
Route Description: The Monterey Bay Coastal Recreation Trail stretches approximately 18 miles, extending from Castroville in the north to Pacific Grove in the south. Following the coastline, the trail passes through beautiful beaches, bay vistas, and charming coastal towns, allowing you to immerse yourself in the beauty of nature.
Major Attractions: Along the way, there are many attractions worth visiting, including the famous Fisherman's Wharf, Cannery Row, and the historic Monterey Harbor. You can also enjoy magnificent views of the Pacific Ocean, fascinating marine life, and stunning beachscapes.
Facilities: The Monterey Bay Coastal Recreation Trail features numerous parking lots, restrooms, and water fountains for the convenience of cyclists. Rest areas and viewpoints are also available along the route, allowing you to take a break and admire the surrounding scenery.
Difficulty Level: Most of the trail is flat and suitable for cyclists of all ages and skill levels. With its wide and well-maintained path, the trail offers low difficulty, making it perfect for family outings and leisurely rides.
If you want to learn more about this biking route, you can click on the following link: Monterey Bay Coastal Recreation Trail Official Website.
Los Gatos Creek Trail
The Los Gatos Creek Trail offers cyclists a scenic and serene route through the heart of Silicon Valley in Northern California. This picturesque pathway extends approximately 11 miles, following the course of Los Gatos Creek from Lexington Reservoir in Los Gatos to Meridian Avenue in San Jose.
Route Description: The trail winds its way through a diverse array of landscapes, including lush woodlands, tranquil creekside settings, and urban areas. It provides a mix of paved and unpaved surfaces, offering cyclists a variety of riding experiences. The trail is relatively flat, making it accessible to riders of all skill levels.
Major Attractions: Along the Los Gatos Creek Trail, cyclists can enjoy a range of attractions, including scenic viewpoints, wildlife habitats, and recreational facilities. The trail passes through several parks, including Vasona Lake County Park and Oak Meadow Park, where riders can take a break and explore the natural surroundings.
Facilities: The trail is equipped with amenities such as restrooms, water fountains, picnic areas, and parking facilities at various points along the route. Additionally, there are bike repair stations and bike rental options available, making it convenient for cyclists to enjoy their ride without worry.
Difficulty Level: The Los Gatos Creek Trail offers a relatively easy riding experience, with gentle inclines and well-maintained paths. It is suitable for cyclists of all ages and abilities, making it a popular choice for families, recreational riders, and commuters alike.
Whether you're seeking a leisurely ride through scenic landscapes or a convenient route for commuting, the Los Gatos Creek Trail provides a tranquil escape amidst the bustling urban environment of Silicon Valley.
For more information about the Los Gatos Creek Trail, you can visit their official website: Los Gatos Creek Trail - Town of Los Gatos.
Jedediah Smith Memorial Trail
The Jedediah Smith Memorial Trail, also known as the American River Bike Trail, is a popular cycling route that spans approximately 32 miles along the American River in Sacramento, California.
Route Description: The trail offers cyclists a scenic and well-maintained pathway that meanders alongside the river, providing stunning views of the surrounding natural landscapes. The trail surface is primarily paved, ensuring a smooth and enjoyable riding experience for cyclists of all levels.
Major Attractions: Along the Jedediah Smith Memorial Trail, cyclists can explore a variety of attractions, including lush riparian forests, tranquil riverbanks, and wildlife habitats. The trail passes by several parks and recreational areas, such as Discovery Park and Ancil Hoffman Park, where riders can take a break and enjoy picnics or nature walks.
Facilities: The trail is equipped with amenities such as restrooms, water fountains, and designated picnic areas at various points along the route. Additionally, there are bike repair stations and rental options available for cyclists looking to explore the trail.
Difficulty Level: The Jedediah Smith Memorial Trail offers a relatively easy riding experience, with gentle inclines and a flat terrain. It is suitable for cyclists of all ages and abilities, making it a popular choice for leisurely rides, family outings, and recreational cycling.
Whether you're seeking a peaceful ride along the river or a scenic journey through natural landscapes, the Jedediah Smith Memorial Trail provides a tranquil escape amidst the bustling city of Sacramento.
For more information about the Jedediah Smith Memorial Trail, you can visit their official website: Jedediah Smith Memorial Trail
San Francisco Bay Trail
The San Francisco Bay Trail is a picturesque multi-use pathway that encircles the San Francisco Bay, offering breathtaking views of the bay, bridges, and city skyline. Stretching for approximately 500 miles, the pathway traverses through various landscapes including waterfronts, wetlands, urban areas, and parks.
Route Description: The Bay Trail follows a combination of dedicated bike paths, pedestrian walkways, and shared roadways, providing cyclists with a safe and enjoyable riding experience. The pathway is divided into different segments, each with its own unique characteristics and attractions.
Major Attractions: Along the Bay Trail, cyclists can explore numerous points of interest including iconic landmarks such as the Golden Gate Bridge, Bay Bridge, and Alcatraz Island. The pathway also passes through scenic waterfront parks, historic sites, and bustling urban districts, allowing riders to immerse themselves in the rich culture and natural beauty of the Bay Area.
Facilities: Facilities along the Bay Trail include restrooms, water fountains, picnic areas, and interpretive signage providing information about the surrounding environment and history. Additionally, the pathway is accessible via public transportation at various points, making it convenient for cyclists to access and explore different sections of the route.
Difficulty Level: The Bay Trail offers a range of difficulty levels, with some sections featuring flat, easy terrain suitable for riders of all ages and abilities, while others may include more challenging hills or off-road segments. Overall, the pathway caters to a diverse range of cyclists, from leisure riders to experienced enthusiasts seeking a more adventurous experience.
If you want to learn more about this biking route, you can click on the following link: San Francisco Bay Trail Official Website.
Conclusion
As you explore the diverse landscapes and picturesque pathways of California on your electric bicycle, you're not just discovering the natural beauty of this state, but immersing yourself in a journey filled with infinite possibilities. From the coastal trails of Monterey Bay to the serene paths along the San Francisco Bay Trail, each route presents a unique adventure, carrying with it unforgettable experiences and cherished memories.
Therefore, whether you're seeking to traverse scenic countryside trails or embark on thrilling explorations through urban landscapes, California's electric bicycle routes are sure to inspire and delight you. As you pedal away, may you continue to uncover the charm and wonders that the Golden State holds.
With every turn of the wheel, may you discover new sights, forge new friendships, and open up new horizons through the adventures on two wheels. Embrace the liberating feeling of riding freely and let the spirit of exploration guide you through the heartland of California.
So, charge up your electric bicycle, map out your next route, and prepare for another exhilarating adventure. In the diverse landscapes and endless possibilities of California, the only limit is your imagination.
Here's to the joy of discovery and the thrill of the ride – happy cycling!
Read more